
V50 L5-2.4L VIN 38 B5244S4 (2006)
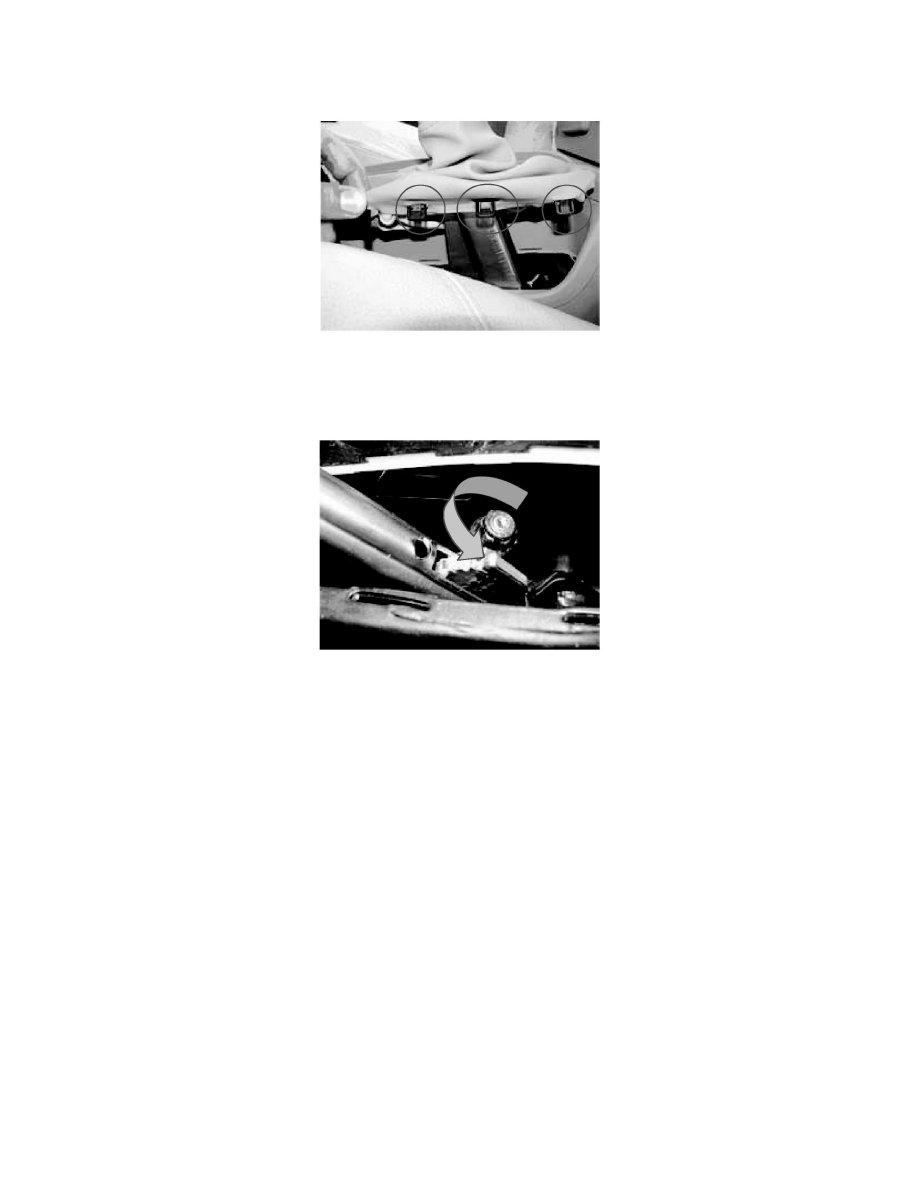
Release the lever boot to make the adjuster nut accessible.
To release the lever boot, carefully use a plastic bone tool, 9814071, to push and release the plastic tabs (push in and lift up).
There are three plastic tabs on the driver's side that you must release before you can lift the boot.
Note!
Be careful. The tabs and the plastic frame are fragile and easy to break.
Slacken the adjuster nut counter-clockwise until the nut is even with the end of the adjuster rod, and pull hard on the parking brake lever five times.
Make sure that the parking brake lever is in its released position (fully down).
3.
Adjust the brake caliper
The brakes must not be so hot that you cannot touch them.
Raise the car so that the rear wheels can rotate freely.
Check that the parking brake lever is in its released position (fully down).
With the engine at idle, depress the brake pedal five times so that the automatic adjustment of the brake caliper is activated. Turn engine off.
4.
Check friction
Rotate the rear wheels to check that there is no abnormal friction. There should be no sensation that the brakes are dragging.
Note!
For all-wheel drive vehicles, there is some friction in the powertrain, which is completely normal.
It is therefore vital that this AWD friction is taken into consideration during adjustment.
Note!
The friction may vary slightly between the left and right sides.