
V50 L5-2.4L VIN 39 B5244S7 (2005)
-
Take the power supply cable (A in the kit illustration) from the kit. Connect the power supply cable to the suppression cable (B) as illustrated.
Note! The smaller grey connector (female) on cable A, must be plugged into the larger connector (male) on the suppression cable B.
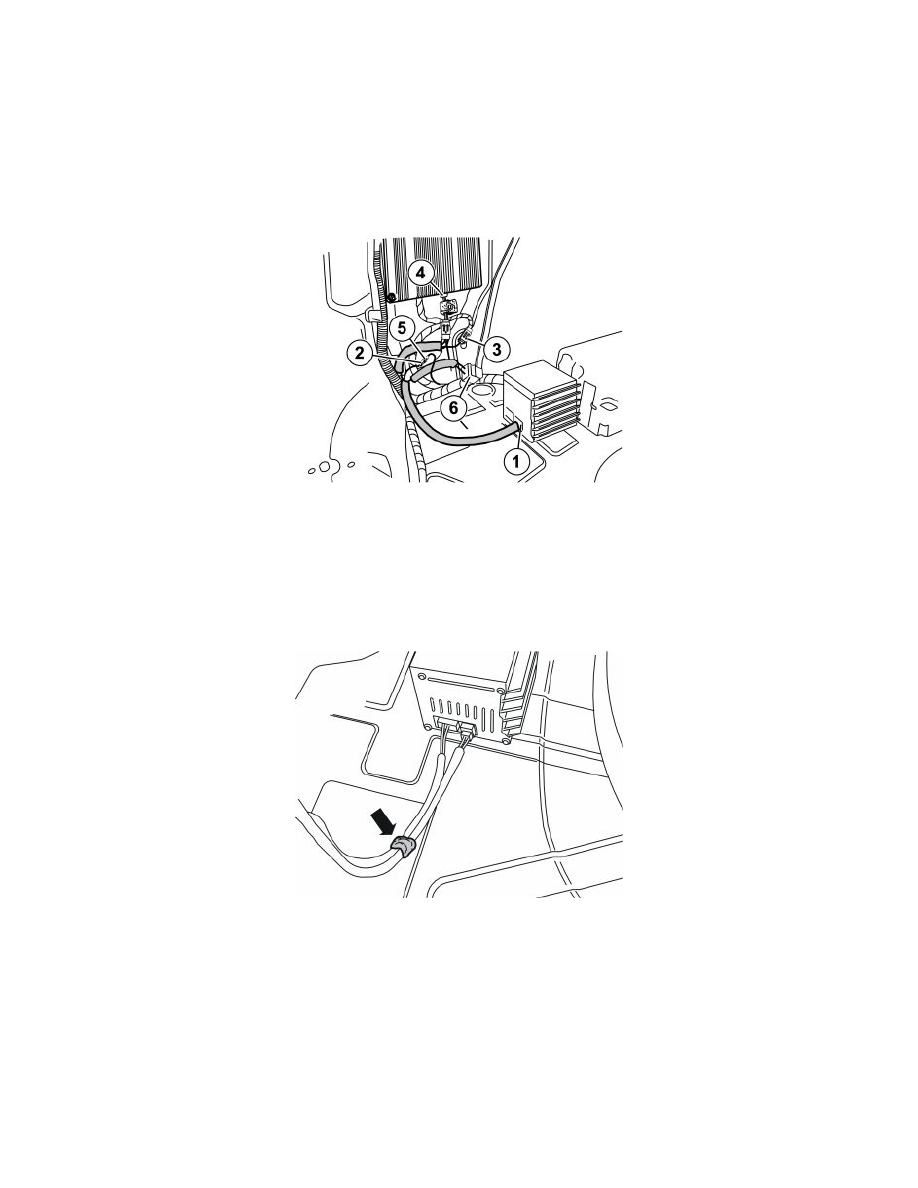
Connectors:
-
to the subwoofer (1)
-
to the pre-routed single pole connector (2)
-
to the connector detached from the amplifier (3)
-
to the amplifier (4)
Illustration B
Note! The previously installed fibre optic cable is not illustrated.
-
Plug connector (1) into the rear end face of the subwoofer.
-
Plug the connector (2) into the pre-routed black connector (5) which is taped on the cable harness at the rear edge of the left-hand rear wheel arch.
-
Detach the existing connector in the amplifier and plug it into connector (3) in the T-cable
-
Plug the remaining connector (4) in the suppression cable to the amplifier.
-
Tape and clamp the relay (6) and all loose connectors in at the car's existing cable harness to prevent rattling.
-
Applies to cars with RTI: Temporarily detach the fibre optic cable to the GPS antenna to improve access.
-
Using butyl tape, tape the cables for the subwoofer to the floor and straight back approximately 200 mm (7 7/8"). The cables must be positioned in
the cut-out on the underside of the floor support when this is installed.
Illustration A