
V50 L5-2.4L VIN 39 B5244S7 (2005)
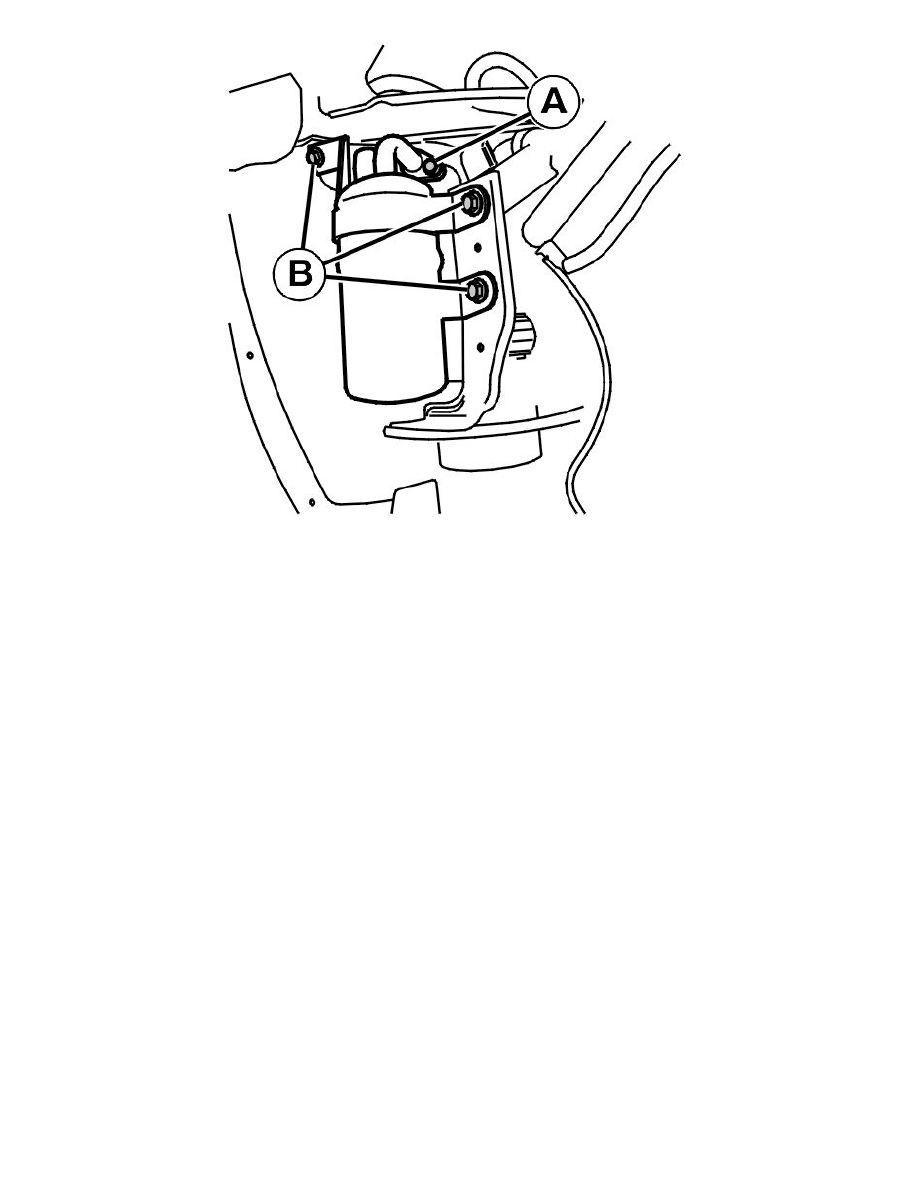
Remove:
-
the screw (A) for the pipe coupling
-
the 3 screws (B) for mounting the receiver.
Remove the receiver.
Installation
Note! For tightening torques, see Specifications. See: Body and Frame/Specifications
Installing receiver
Fill the recommended volume of compressor oil. See: AC-system, oil, refilling See: Service and Repair/AC-System, Oil, Refilling.
Note! Install the receiver within 5-10 minutes of the plugs having been removed. This prevents the absorbent material absorbing moisture from
the air.
Install:
-
the receiver together with 3 M8 screws. Tighten
-
the pipe couplings, 2 x M8. Make sure the O-rings are securely located. Tighten the screws
-
the M8 nut below the fender liner. Tighten
-
the fender liner together with the plastic nut and the retaining clip.
Finishing
Checking the function and leak tracing
Vacuum pump the air conditioning (A/C) system. See: Vacuum pumping See: Service and Repair/Vacuum Pumping.
Fill the air conditioning (A/C) system with refrigerant. See: Refrigerant, filling See: Service and Repair/Refrigerant, Filling.
Leak trace the air conditioning (A/C) system. See: Leak detection, tracer agent See: Testing and Inspection/Component Tests and General
Diagnostics/Leak Detection, Tracer Agent or Leak tracing, electronic leak tracer See: Testing and Inspection/Component Tests and General
Diagnostics/Leak Tracing, Electronic Leak Tracer.
Installing components and checking performance
Install:
-
the bumper cover. See: Body and Frame/Bumper/Front Bumper/Front Bumper Cover / Fascia/Service and Repair