V50 T5 AWD L5-2.5L Turbo VIN 67 B5254T7 (2008)

-
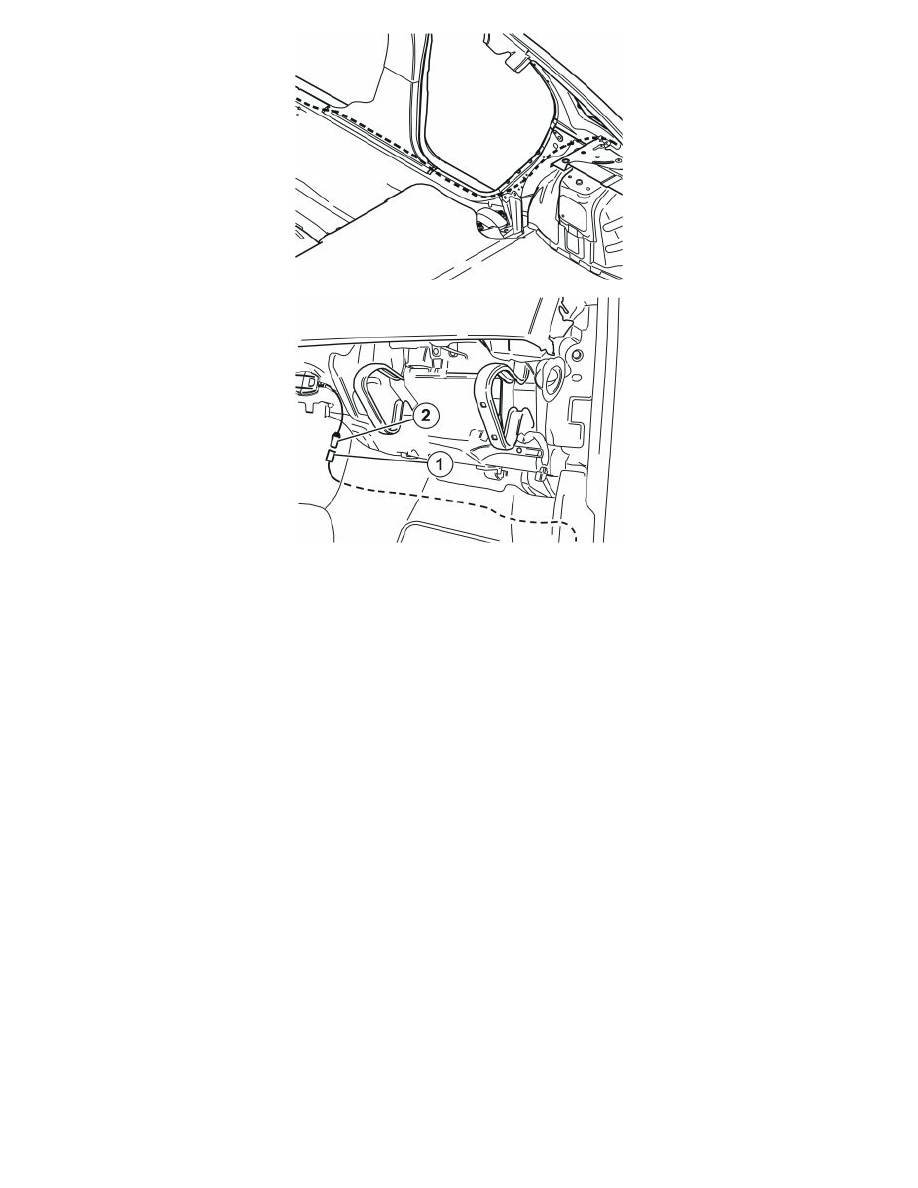
Route the antenna cable (1) under the carpet on the right hand side of the front seat and forward to the short cable (2) in the large connector
screwed to the centre console. If another antenna cable is already connected there disconnect that antenna cable and tie it up so that it will not
rattle.
Note! On left hand drive cars when the phone is attached to the roof antenna it may be necessary to remove the sound insulation on the
left hand side to access the antenna connector. It is located by a screw and two clips in the upper side and two screws in the underside of
the dashboard. The connector for the courtesy lighting and air quality sensor must be removed.
-
Connect both the connectors to each other.
Finishing work
-
Fold the front seat carpet back into place
-
Reinstall the passenger compartment connector socket if applicable
-
Reinstall the lower B-post panel
-
Reinstall the rubber trim strips at the lower B-post panel
-
Reinstall the sill trim panel in the front door
-
Connect the connectors to the glovebox / sound insulation. Reinstall the glovebox / sound insulation
-
Reinstall the clip in the air vent
-
Reinstall the end panel on the dashboard
-
Reinstall the panel in front of the centre console
-
Reinstall the C-post panels and the sill trim panel in the rear door
-
Reinstall the rubber trim strip in the rear door
-
Reinstall the side cushion
-
Reinstall the backrest and seat cushions
-
Reconnect the battery negative lead.
Caution! Leave the car indoors for two hours after carrying out the work. To ensure optimum adhesion do not wash the car for 48 hours.
