
V50 T5 AWD L5-2.5L Turbo VIN 67 B5254T7 (2008)
-
Remove the two screws in the lower edge of the existing media player. Save the screws, they shall be re-used.
-
Pull out the media player and detach the connectors on the rear side.
Note! Make a mental note of how the cables are routed on the rear side.
-
Put the media player to one side. It shall not be re-used.
Illustration B
-
Take the new media player from the kit, and the two existing screws.
Note! Make sure that the fibre optic cable is routed so that it is bent to a radius of no less than 25 mm (1").
Plug in the connectors to the media player.
-
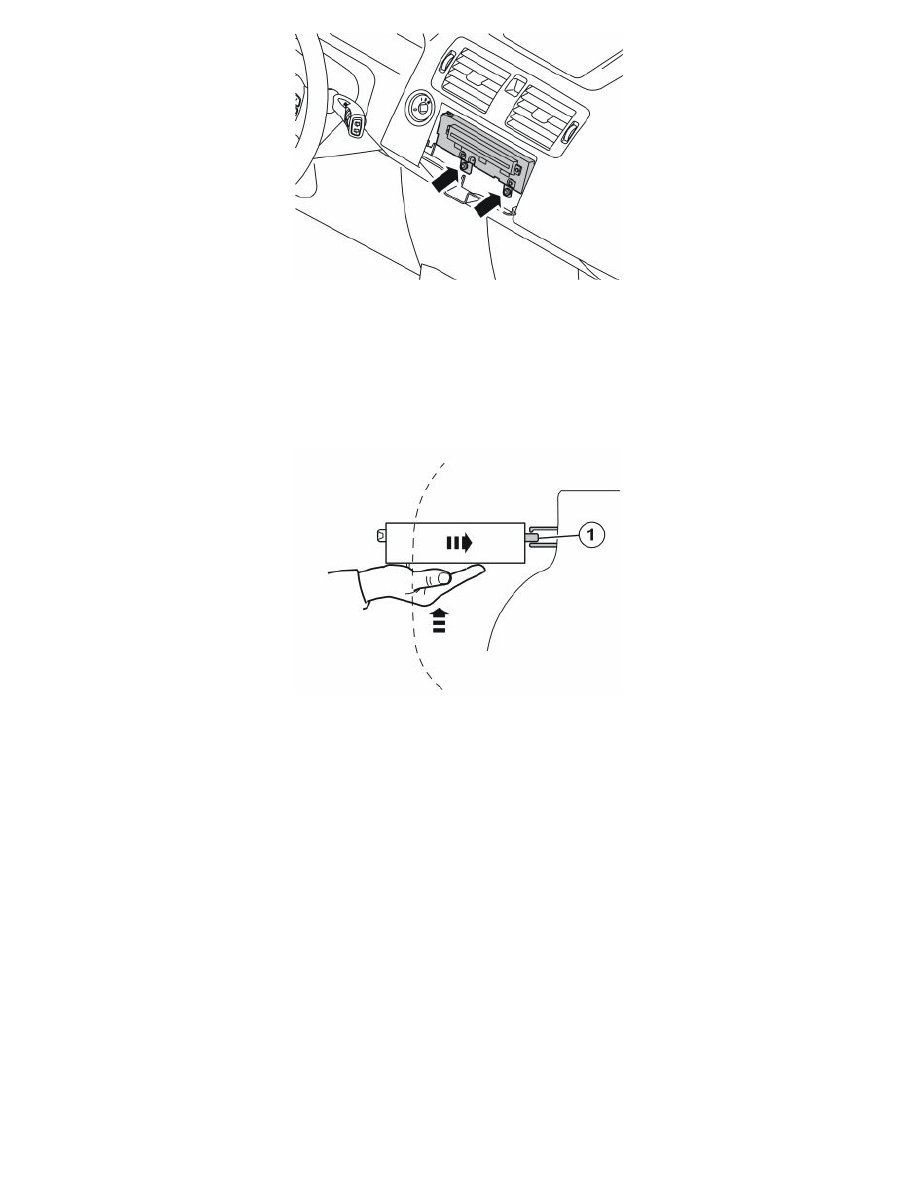
Position the media player in the dashboard. Guide in the lug (1) at the rear edge of the media player using one hand. The lug must be in the
corresponding hole on the reverse of the heater.
-
Tighten the media player using the two screws.
-
Reinstall the clips with the cables on the underside of the media player.
Reinstall:
-
the connector for the dashboard environment panel
-
the centre console for the dashboard and tunnel console
-
the connectors for the display
-
the display
-
Applies to CD player/changer:
Reinstall the display surround and the media player.
-
Applies to MD/CD player:
Install the new surround for the display and media player.
-
Reinstall the panel on the reverse of the centre console.
-
Reinstall the panel on the rear edge of the centre console.
-
Program the function using VCT 2000.