
V50 T5 AWD L5-2.5L Turbo VIN 67 B5254T7 (2008)
Caution! The bearing covers are not interchangeable. Also note the position of the bearing caps for the rotation of the crankshaft.
Remove the screws for the big-end cap.
Lift away the cap. Make sure that the bearing half also comes out.
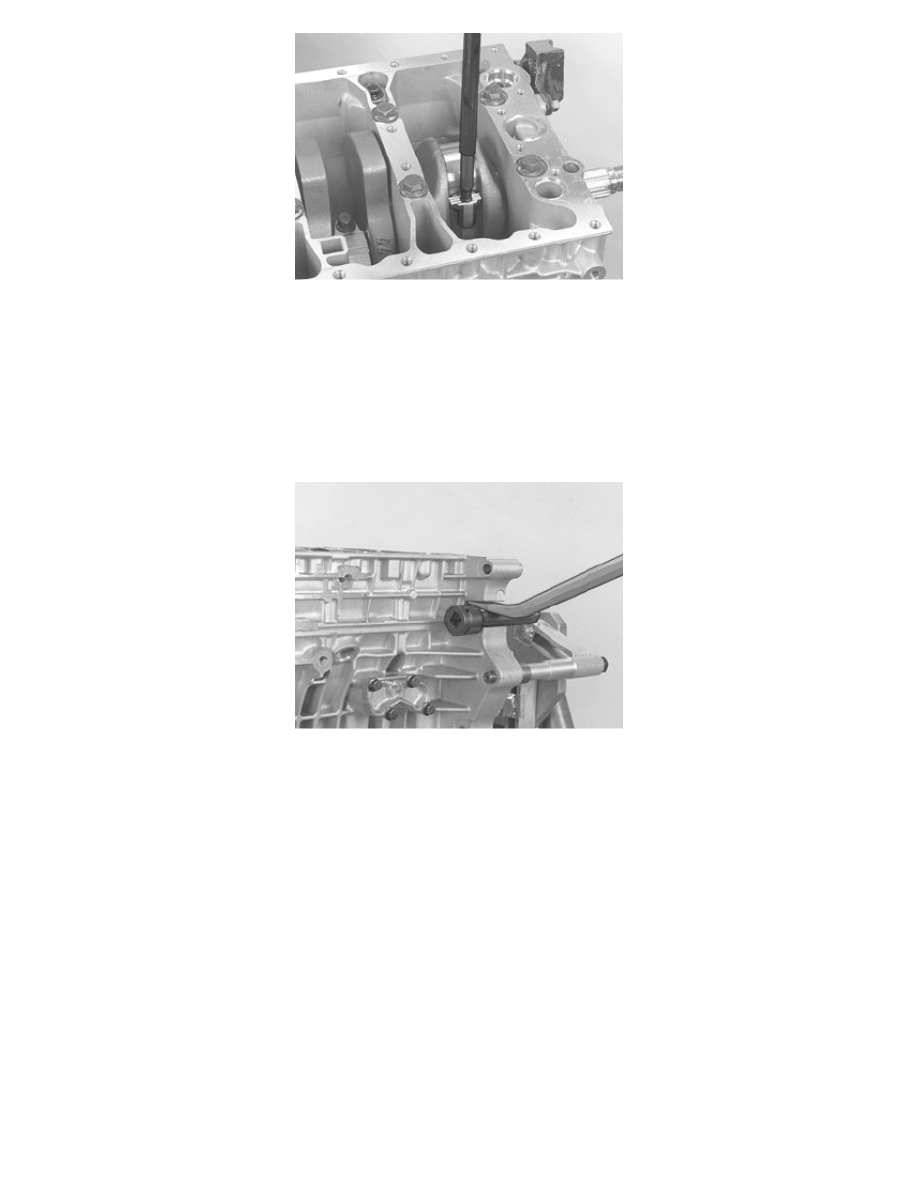
Install: 999 5746 Holder See: Tools and Equipment/999 5746 Holder in the connecting rod and press out the connecting rod/piston.
Hold your hand under the piston so that it does not fall to the floor, and make sure that the bearing half also comes out.
Lay the piston with connecting rod so that they can be reinstalled in the right cylinder.
Continue with cylinder 2, 3, 4 and 5 as above.
Removing the intermediate part's bolted joint
Carefully pry apart the intermediate part and engine block so that a clearance of approx. 6-8 mm is obtained.
Then carefully tap (at the exhaust side) loose the intermediate part with a plastic mallet.
Lift away the intermediate part. Make sure that the intermediate part's bearing halves also come out.
Caution! Make sure that the bearing halves are not mixed up. Also note the position of the thrust bearing's upper half with regards to the
crankshaft's rotational direction.
The crankshaft must not rotate.
Make sure that the flywheel and drive flange screws, that were installed earlier, are installed securely. Lift by these screws and in the crankshaft's leading
edge.
Carefully lift the crankshaft straight up.
Remove the remaining bearing halves.
Note! The bearing covers for the different bearing recesses are not interchangeable.
Removing piston cooling valve and nozzles