
V50 T5 AWD L5-2.5L Turbo VIN 67 B5254T7 (2008)
Use piston ring pliers.
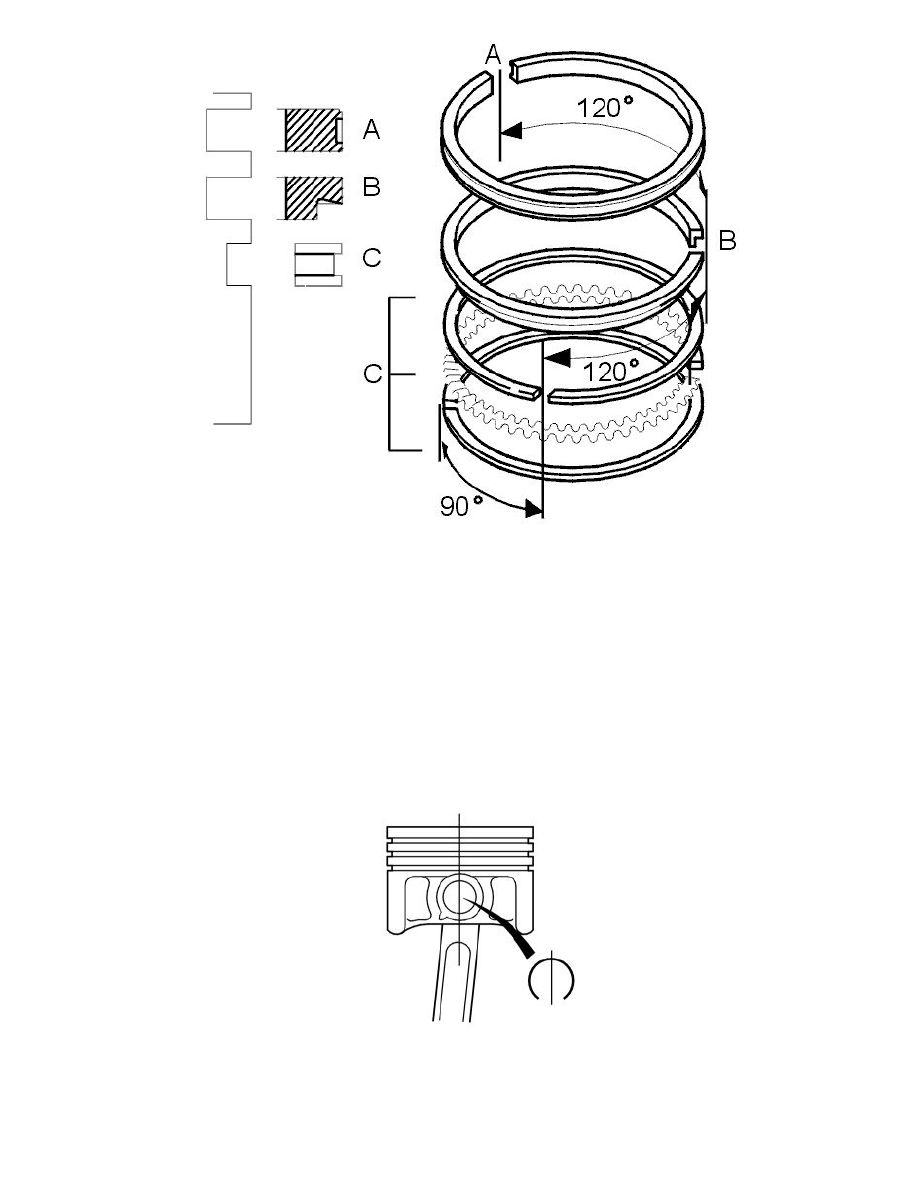
Turn the piston rings so that the piston ring openings are displaced as shown in the figure.
A=Compression ring. The text on the piston ring shall face up.
B=Scraper ring. The bevel shall face down.
C=Oil ring. Three parts equilateral.
First install the expander ring (C), then the two upper rings over the expander ring.
Caution! Ensure that the piston rings can be turned easily.
Note! Incorrect installation gives increased oil consumption.
Assembly
Assembling pistons and connecting rods
There is an arrow marking on top of the piston. This shall be turned to face forward in the engine block.
The connecting rods are symmetrical and can be turned arbitrarily. However, marked connecting rods shall be turned to face the same way.
Assemble connecting rod and piston with the piston pin.
Check that the classification of each cylinder and piston diameter as well as any numbering of the connecting rod correspond.
Install the piston pin's two lock rings. Check that the lock rings are positioned correctly in the piston. The opening shall be positioned in the vertical line.