
V70 2.5T L5-2.5L Turbo VIN 59 B5254T2 (2006)
-
Reinstall the rubber mounting (13) for the silencer. Use soap to facilitate installation.
Illustration D
-
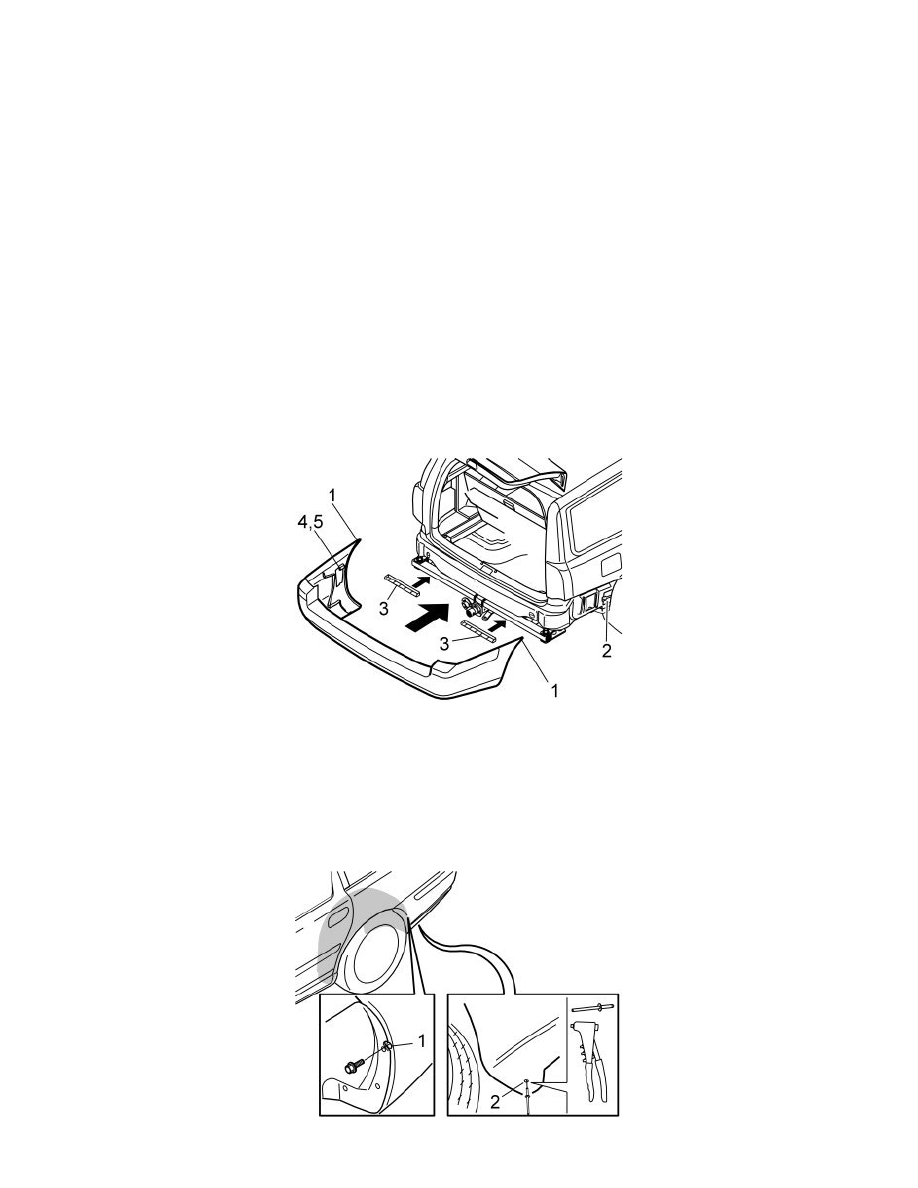
Insert the member (1) between the brackets (4, 5). Centre it around the holes
-
Install the screws (2) and the washers (16) from the underneath of the bracket (5). Install the nuts (3) from above the bracket. Do not tighten.
Illustration A
-
Check that the distance between the member (1) and the spare wheel well is 10 mm. Centre the tow hitch to the car.
Illustration B applies to both sides. The right-hand side is shown (the holes are then on the left-hand side)
-
Tighten the screws (7). Tighten to 79 Nm (59 lbf.ft)
-
Tighten the screws (8). Tighten to 120 Nm (90 lbf.ft).
Illustration D
-
Tighten the screws (2) Tighten the nut (3). Tighten to 136 Nm (102 lbf.ft).
-
Wait at least five minutes, so that the joint has time to set. Then tighten the screws (8) on both sides, a quarter turn (90°). See illustration A.
Note! Torque tightened screws that have been removed may not be reused.
-
Underseal the car.
Applies only to Sweden
-
Carry out this operation only after state road worthiness inspection.
Only applies if the car is equipped with mouldings
-
Reinstall the mouldings (3) on the expander clips. Press the mouldings into place.
Applies to all cars
-
Reinstall the guide lugs (4) and the clips (5) if they have been removed
-
Reinstall the bumper by pressing it forwards. Ensure that the four screws that are protruding from the bumper align in the holes in the car
-
Before the bumper is completely installed: Slide the top edge (1) into the grooves. Then slide in the bumper fully
-
Check that the guide lug (4) and clip (5) are centred with the hole (2) in the fender liner.