
V70 GL L5-2.4L VIN 55 B5254S (1998)
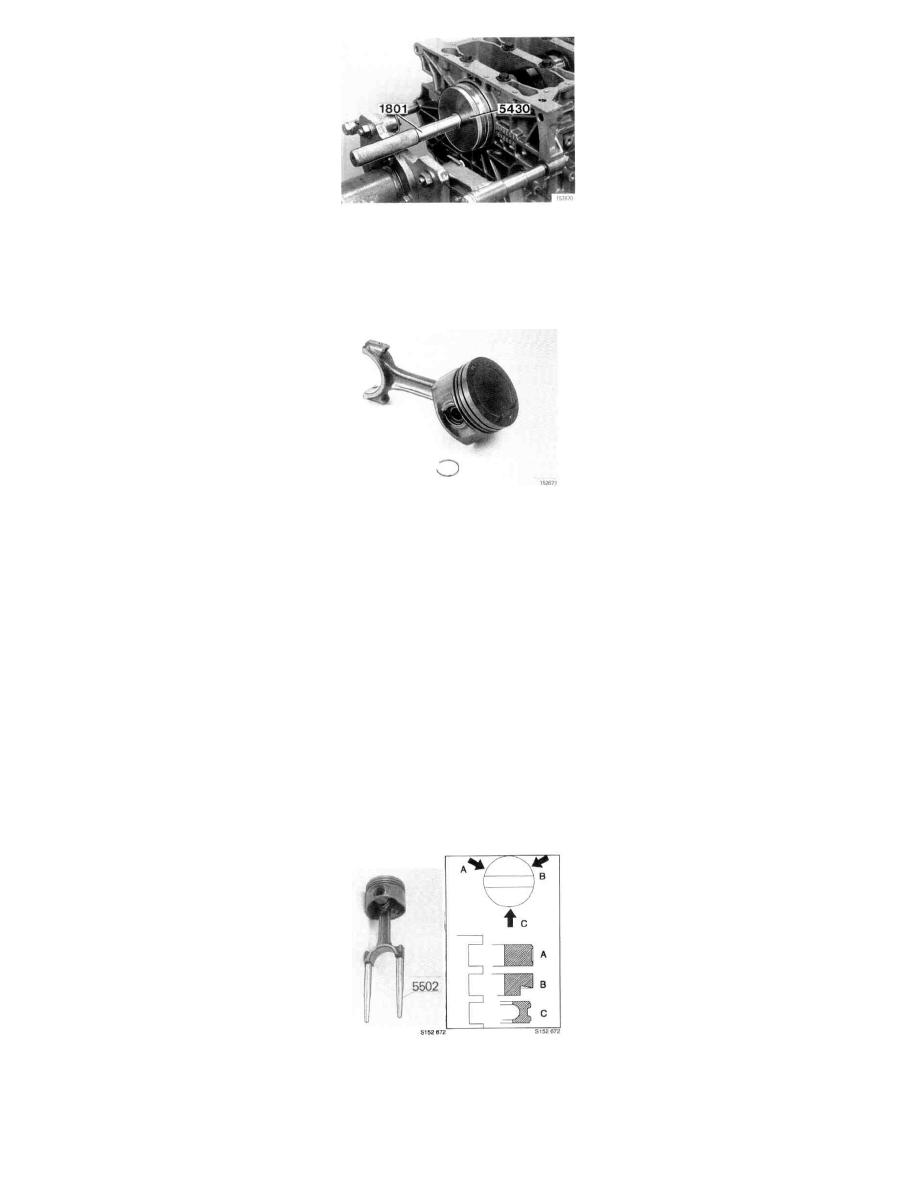
6. Install crankshaft rear seal:
-
Use standard handle tool No. 999 1801 and assembly tool No. 999 5430, or equivalents.
-
Oil mating surfaces between seating flange and seal, and between seal lips. Place seal on drift.
-
If there are any wear marks on the crankshaft, push seal further into the flange than before by removing a spacer ring from the tool.
-
Tap seal in until drift meets crankshaft.
7. Assemble pistons and connecting rods:
-
Arrow on piston crown must point towards front, i.e. timing belt, end of engine.
Numerical markings on connecting rod must face towards intake side of block (starter motor side).
NOTE:
-
Install wrist pin circlip and check that the circlip springs apart and locks in the groove.
-
The circlip opening should point downwards.
CAUTION:
-
Pistons, replacement:
Later Volvo 850s have two different types of piston, which differ in terms of the upper compression ring.
Version number 1 can be replaced by version number 2 without having to replace all the pistons; but version number 2 can not be replaced
by version number 1.
-
Connecting Rods, replacement:
Connecting Rods are symmetrical and can face either way round.
-
Markings:
Assemble connecting rod (tighten bolts to 20 Nm) and check that bearing end cap is pointing the right way.
Put the big end in a vice with copper spacers or similar.
Mark both halves with the cylinder number using a number punch or die.
8. Install piston rings as follows:
-
Use piston ring pliers tool No. 998 5424, or equivalent.
-
Turn rings so gaps are approx. 120° apart.
-
A. Compression ring: Text upwards