
V70 GL L5-2.4L VIN 55 B5254S (1998)
Axle Nut: Service and Repair
Warning The use of protective equipment such as safety goggles is recommended.
If a drive shaft nut that requires staking needs to be re-tightened or removed, a new nut must be installed. Tighten the new nut to the correct torque and
lock as described below.
Procedure for locking hub:
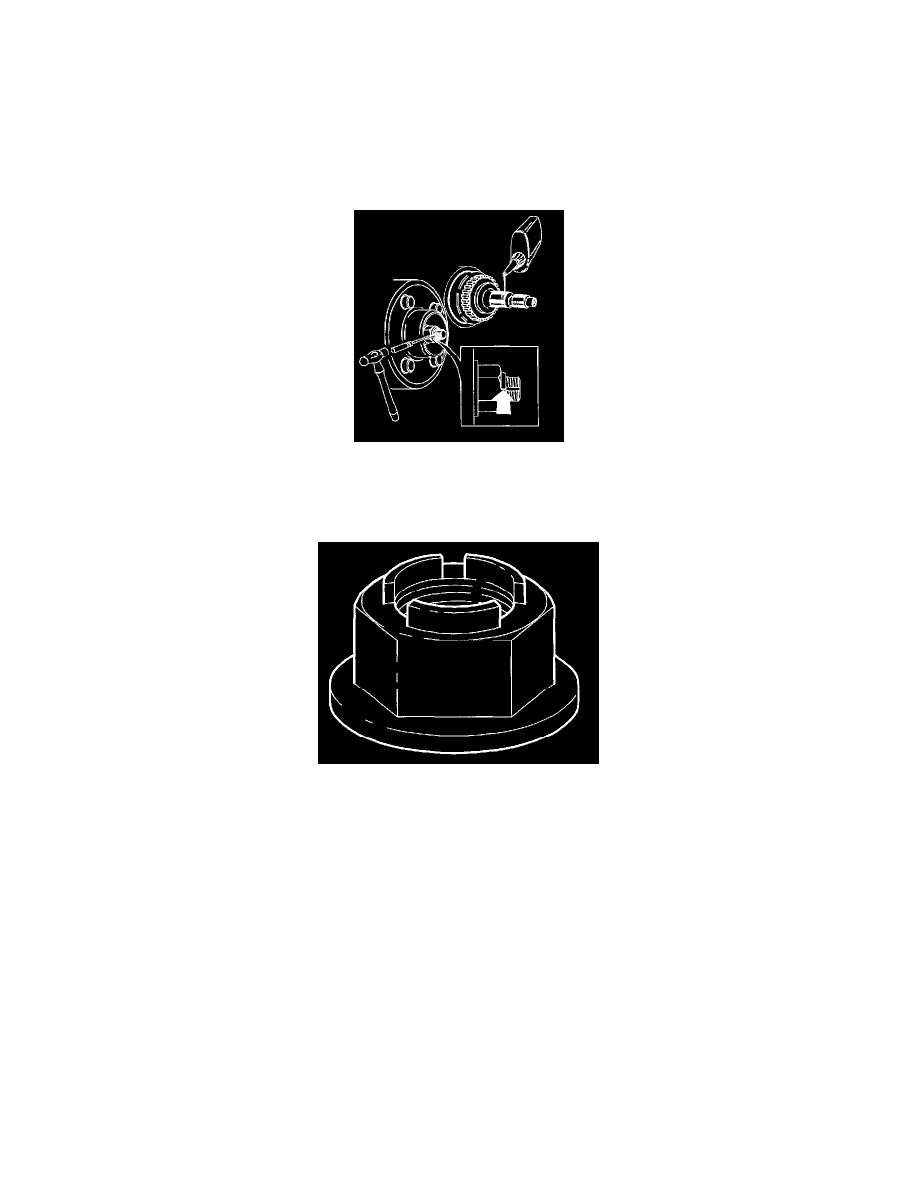
Clean splines and groove in shaft thoroughly. Remove all oil, anti-rust agent and dirt.
Apply 3 - 4 mm (3/16" - 1/4") wide bead of metal adhesive, P/N 1161370-0 Apply bead around shaft covering approximately 1/3 of splined length
(as illustrated).
Note! Apply adhesive around complete shaft just before installing hub.
Install hub and new nut.
Tighten nut to 120 Nm (89 ft. lbs) + 60° as specified in service manual.
Lock the nut (stake the nut) by tapping outer flange into drive shaft groove, using suitable tool (as illustrated).
Note! From chassis no:s. 854: 219646,855: 121429 a new drive shaft nut has been introduced on all versions of the 850, which means the following
changes should be noted:
-
The nut is reusable
-
There is no locking groove in the drive shaft.
-
The threads on the shaft end have increased from M20 to M22.
-
New self-locking nut with M22 thread.
Note! The nut must be oiled before use.
The new nut must be tightened to the same torque and protractor angle as previously. 120 Nm (89 ft. lbs) + 60°.