
V70 XC AWD L5-2.4L Turbo VIN 56 B5254T (1998)
-
Pull out cable and place to one side.
14. Removal:
-
Remove control system cover screws (Torx TX40)
-
Clean sealing compound residue from threads (8 x 1.25 mm).
-
Remove cover.
-
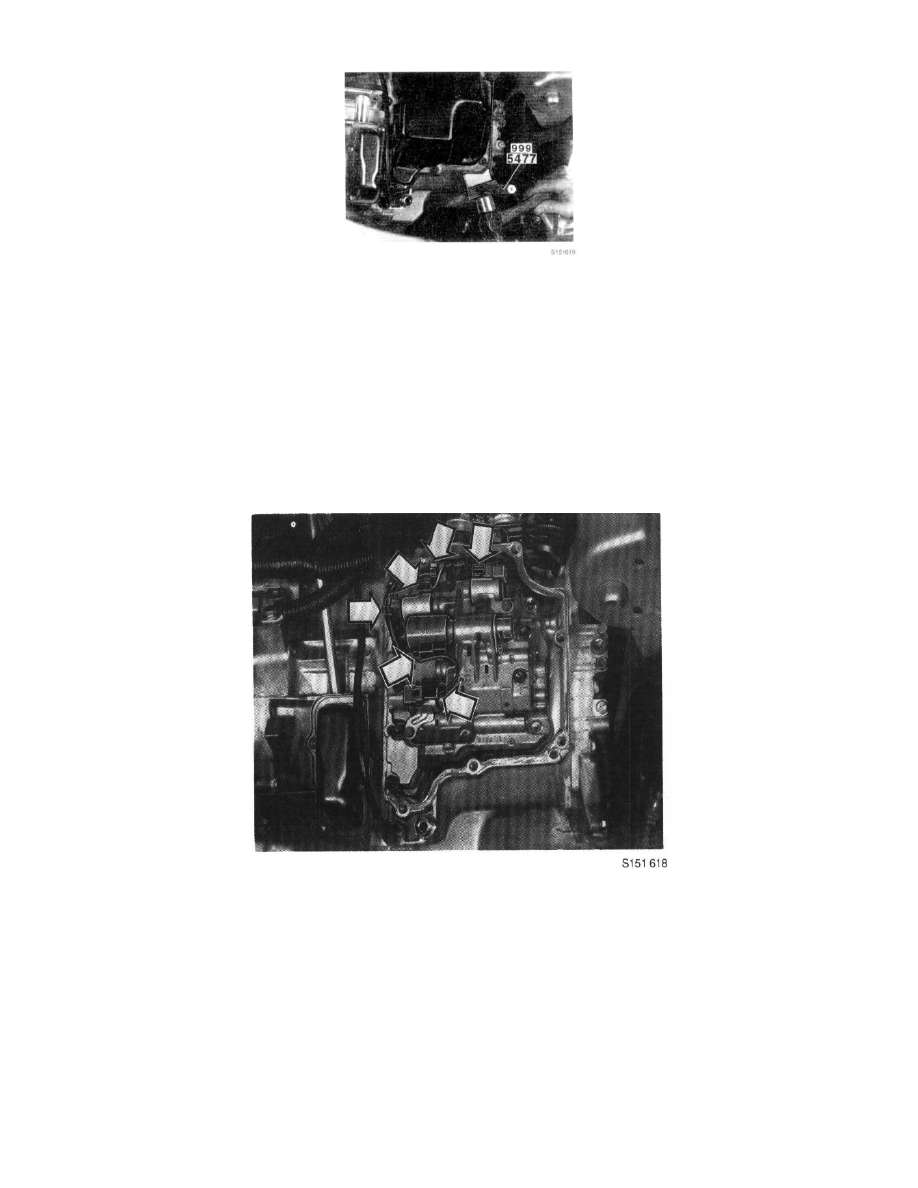
Use separator tool No. 999 5477, or equivalent.
Tap tool carefully into joint between cover and transmission to ensure that cover sealing flange is not distorted.
Take care to ensure that oil temperature sensor cables are not damaged.
-
Remove remains of gasket from cover and transmission joint faces
Use scraper.
NOTE:
-
Ensure that no debris enter transmission.
-
Wash cover thoroughly.
15. Preparation
-
Remove:
Solenoid valve connectors.
Unclip wiring harness from clips on control system.
NOTE:
-
Solenoid S1 and solenoid S2 have two types of cable harness
-
See the following operations.
16. Information, performance and combinations