
V70R AWD L5-2.3L Turbo VIN 52 B5234T6 (1998)
3. Intermediate section:
-
Apply liquid gasket compound, part No. 1 161 059-9, or equivalent to intermediate section.
Cover surface completely but do not allow to overflow, as this may block channels and bolt holes.
-
Use a short-haired roller tool No. 951 1205, or equivalent.
-
Put bearing shells in intermediate section.
Bearing seats must be dry.
-
Oil bearing shells and flanged shells (at back) liberally.
4. Install crankshaft:
-
Install crankshaft.
Do not rotate it until intermediate section is tightly in place.
-
Install intermediate section.
-
Tighten intermediate section and crankshaft bolts in 5 stages in sequence from the center towards ends.
Complete each stage before starting the next.
Skip 8 mm and 7 mm bolts until stages 3 and 4.
1st Stage: Tighten all 10 mm bolts to 20 Nm (15 ft lb)
2nd Stage: Tighten 10 mm bolts to 45 Nm (33 ft lb)
3rd Stage: Tighten 8 mm bolts to 24 Nm (18 ft lb)
4th Stage: Tighten 7 mm bolts to 17 Nm (13 ft lb)
5th Stage: Finally, tighten 10 mm bolts through 90°
NOTE: Max. Length of 10 mm bolts 118 mm.
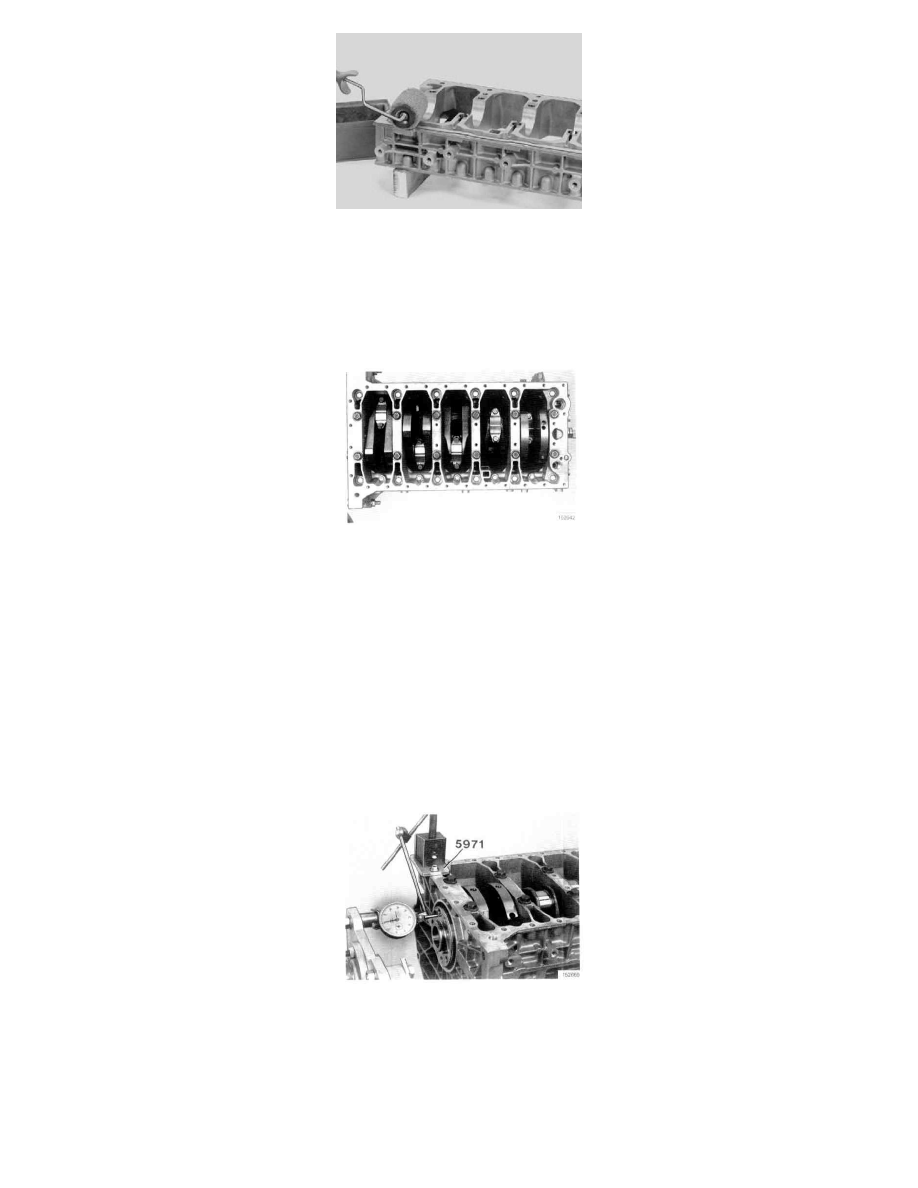
5. Measure axial clearance:
-
Check that crankshaft rotates smoothly.
-
Measure crankshaft axial clearance.
-
Use dial gauge, magnetic plate tool No. 999 5971 and magnetic frame tool No. 999 9696, or equivalents.
-
Axial clearance: 0.08-0.19 mm