
V70R AWD L5-2.3L Turbo VIN 52 B5234T6 (1998)
Modify a 30 mm (1-1/4") wide spatula by rounding of the corners as per illustration. Sand all edge till smooth. The edge MUST be smooth without any
nicks or cuts.
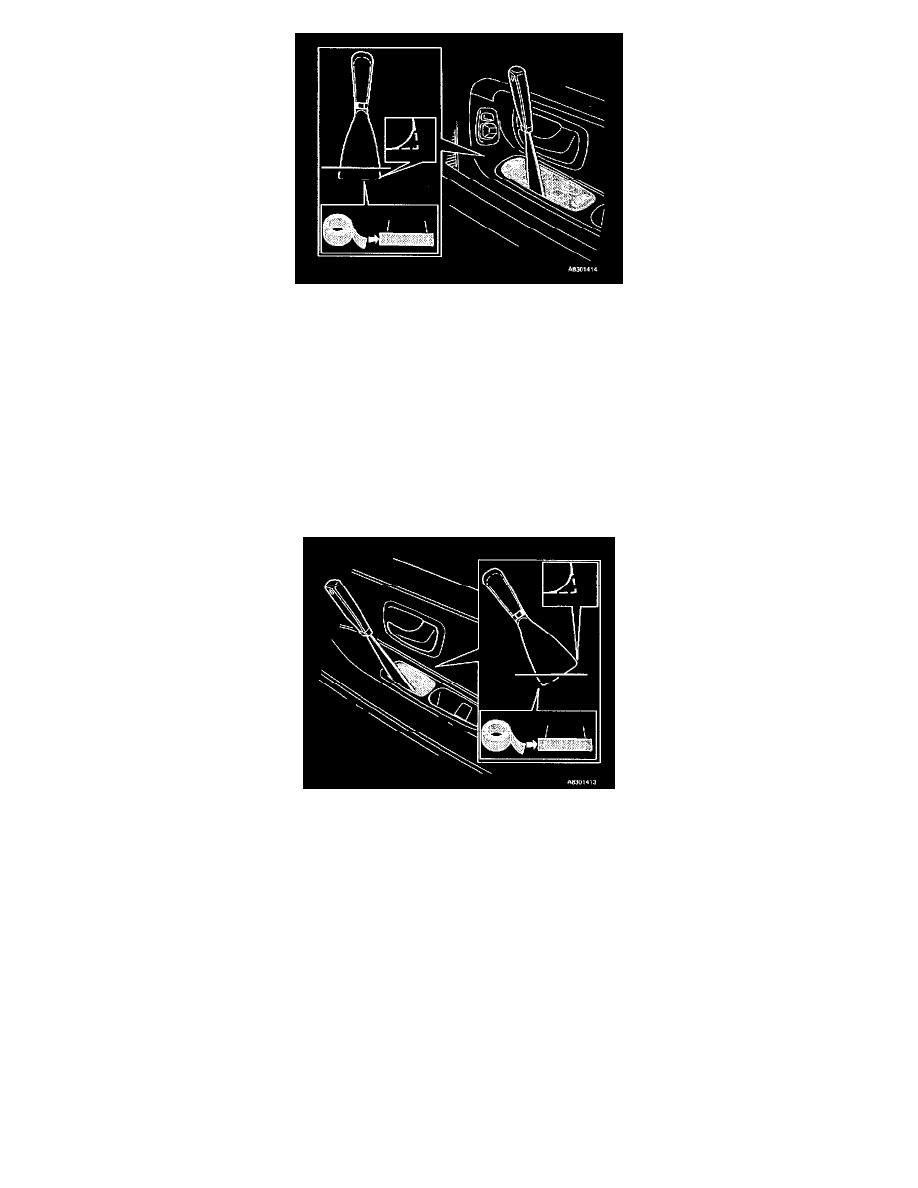
Affix a 75 mm (3.0") piece of electrical tape covering the edge of the spatula (see illustration).
Carefully insert the spatula about 15 mm (9/16") down so that the tape gets pushed down together with the blade, and slowly pry up the switch.
Note!
The spatula must be inserted as per illustration. Failing to do so may damage the base when replace the switch assembly.
2
Removing switch, passenger and rear doors
Affix a 75 mm (3.0") piece of electrical tape covering the edge of the spatula. (see illustration) Carefully insert the spatula as per illustration about 15
mm (9/16") down so that the tape gets pushed down together with the blade, and slowly pry up the switch.
Note!
The spatula must be inserted as per illustration. Failing to do so may damage the base when replace the switch assembly.
WARRANTY STATEMENT: Claims may be submitted under the New Car Warranty when there is a documented customer complaint, using claim type
01.
Operation No.
Labor description
Time allowance
36478-2
Replacing power window switch(s) per unit
0.1 hr