
V70R AWD L5-2.3L Turbo VIN 60 B5244T2 (2000)
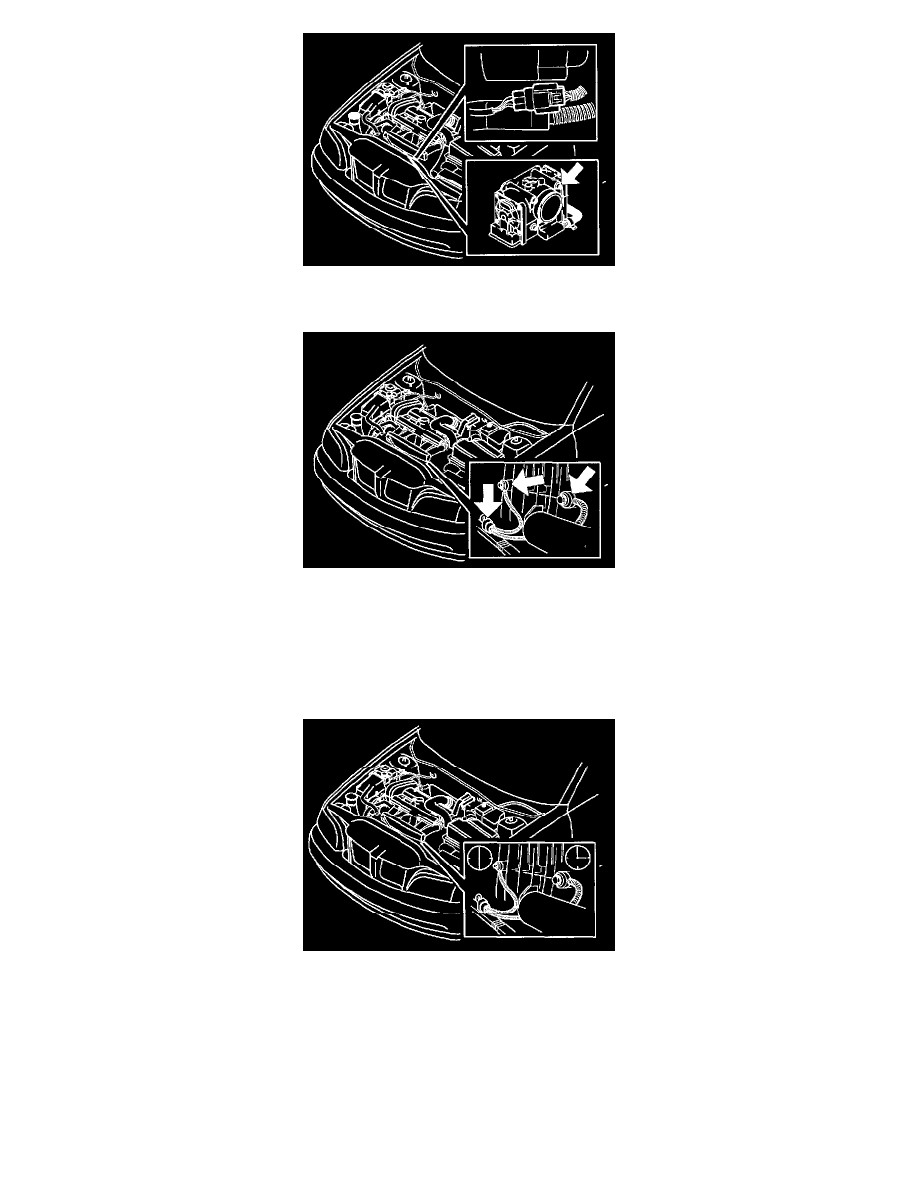
Undo the clamp on the charge air pipe at the throttle housing.
Force the charge air pipe and the cooler aside and, at the same time, pull the fan up.
-
charge air pipe
-
the knock sensors
-
the cable tie on the wire bundle
Disconnect the connectors. Pull out the knock sensors between the engine block and starter motor.
Installation of knock sensor
Install new sensors with screws, tighten finger-tight
Pull the wires on the outside of the starter motor bracket and clamp.
Position the sensors (from the front and rear). Position of wire from sensor in cylinder 2 = 6 o'clock and from sensor in cylinder 4 = 3 o'clock.
Tighten the knock sensors to 20 Nm (14.75 ft. lbs.).
Press the knock sensor connectors together and check that the wires are correctly positioned. Clamp if necessary.
Install the charge air pipe. Ensure that the screw in the hose clamp is located between the block and the pipe, pointing towards the left and parallel
with the engine block. Do not tighten any harder than is necessary to allow the pipe to rotate.
Force the charge air pipe and the cooler aside and, at the same time, push the fan down.
Position the wiring.
Install the rubber part of the charge air pipe between the throttle housing and the cooler. Tighten the clamp on the charge air pipe next to the throttle