
XC60 FWD L6-3.2L VIN 96 B6324S2 (2010)
There is a classification letter stamped in for every cylinder. Engine, B6304T2, B6324S See: Specifications/Mechanical Specifications/Specifications,
Mechanical
The first letter corresponds to the classification of the cylinder diameter in cylinder 1 and is then followed by cyl. 2, 3, 4, 5, 6. Choice of piston is
decided by the cylinder bore's classification. E.g.: Cylinder class D shall have piston marked D, etc.
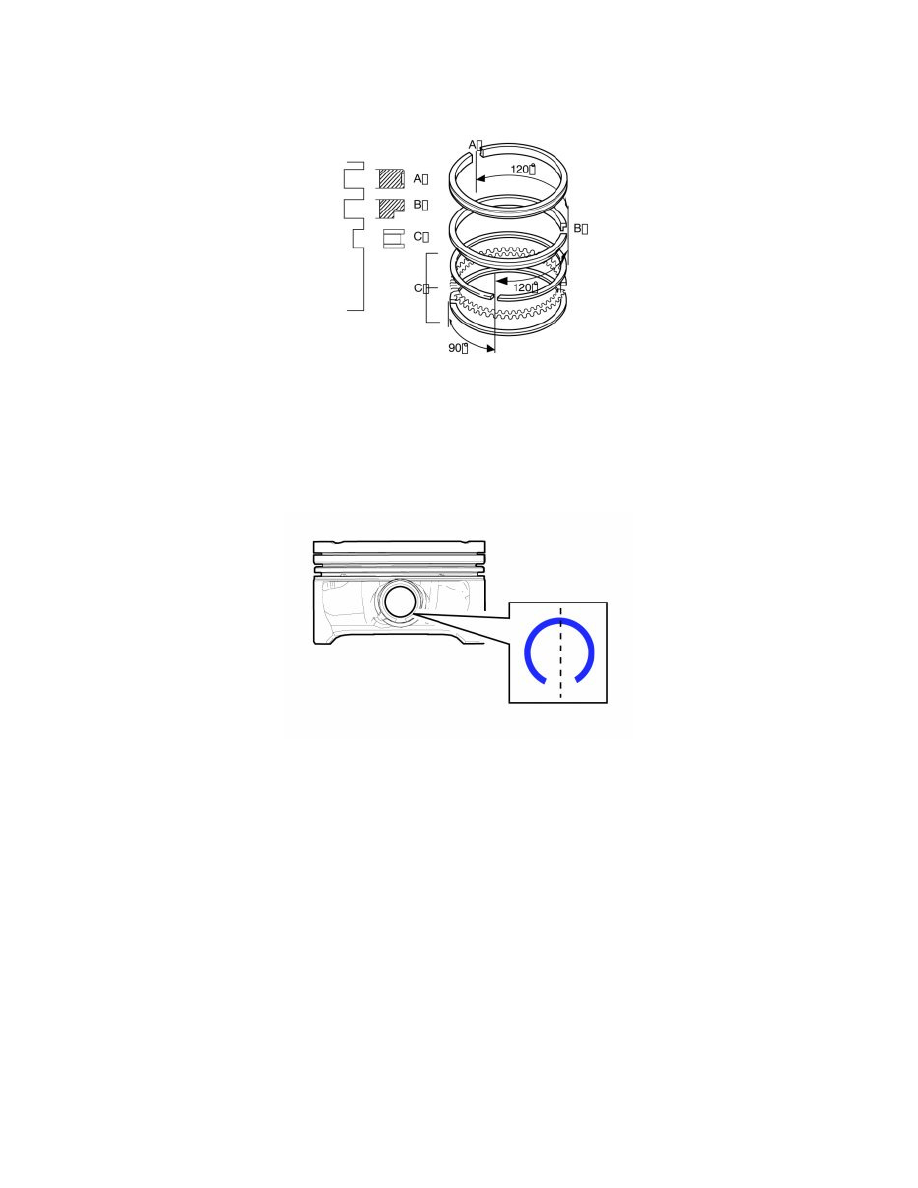
Use piston ring pliers. Turn the piston rings so that the openings are offset as illustrated.
A=Compression ring. The text on the piston ring shall face up.
B=Scraper ring. The bevel shall face down.
C=Oil ring. Three parts equilateral.
First install the expander ring (C), then the two upper rings over the expander ring.
Make sure that the piston rings are not stuck and turn easily.
Incorrect positioning increases oil consumption.
Warning! Use protective goggles.
The lock ring shoots away easily.
There is a marking on top of the piston. It shall face forward in the engine block. The connecting rods are symmetrical and can face either way. However,
marked connecting rods shall face the same way.
Assemble connecting rod and piston with the piston pin. Check that the classification of each cylinder/piston diameter and any numbering of connecting
rod match. Install both lock rings for the piston pin. Check that the lock rings are positioned correctly in the piston. The opening shall be in a vertical
line.
Wipe clean at the bearing position in the connecting rod and cap, and blow with compressed air on the connecting rod's/cap's fracture surface.