
XC70 L5-2.5L Turbo VIN 59 B5254T2 (2003)
Remove:
-
the connectors
-
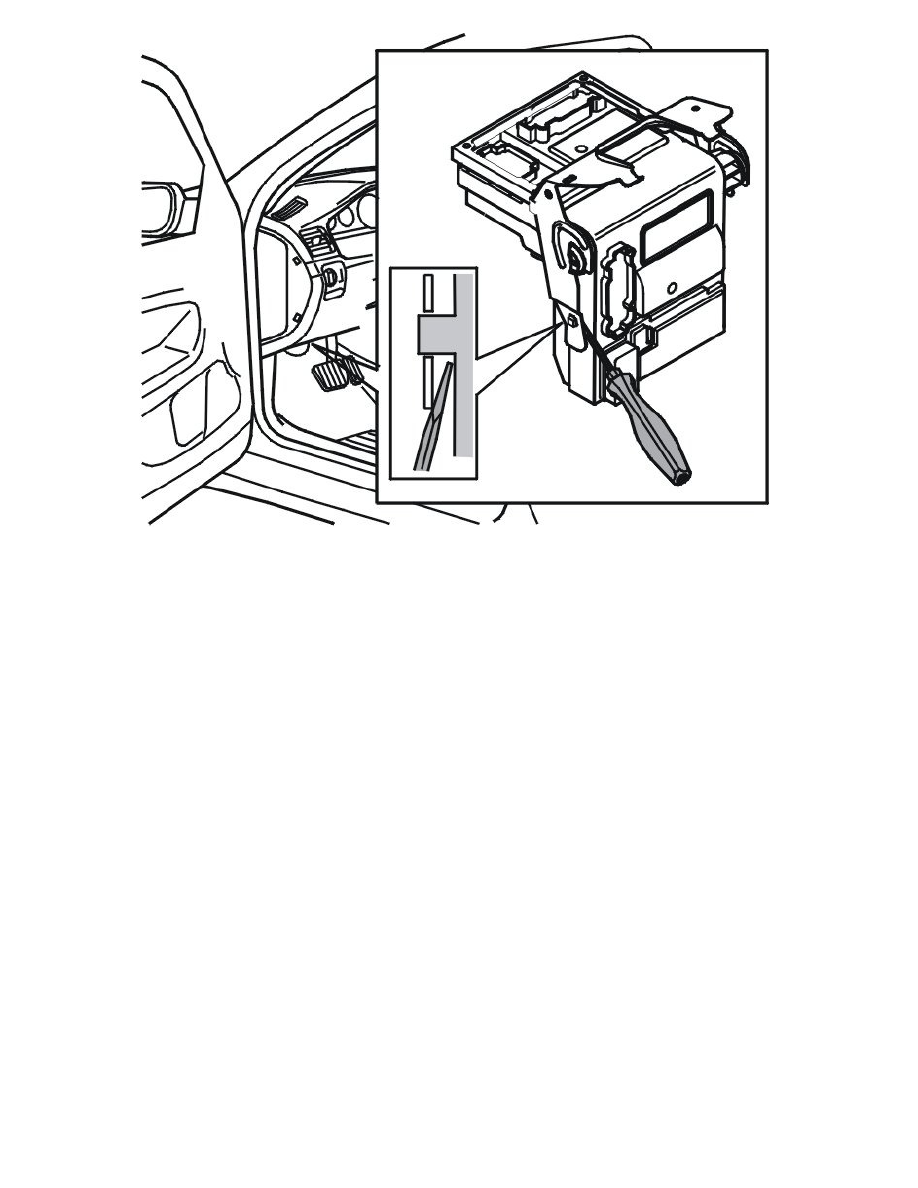
the control module by inserting a screwdriver up between the bracket and the relay box. Turn the screwdriver so that the bracket opens out. At the
same time, pull the relay box out of the bracket towards the underside of the dashboard
-
the control module from the bracket and pull downwards under the dashboard.
Remove the fuses from the central electronic module (CEM).
Hint: For the location of the fuses, see:
-
The wiring diagram for the relevant model year
-
The decals by the relevant fuse box in the vehicle
-
The Pocket Data booklet
-
The Owner's manual.
Installation
Installing the central electronic module (CEM)
Caution! The pins are fragile. Check that the connectors go straight down into the control module.
Install:
-
the control module on the bracket. Press the control module forward so that the catches enter the bracket
-
the connectors
-
the soundproofing panel on the driver's side
-
the 2 screws on top of the control module
-
the 2 connectors on top of the control module.
Note! Make sure that the rubber seal is correctly positioned in the groove.
Install:
-
the cover
-
the wiper arm mechanism. See: Wiper mechanism, windshield, replacing See: Wiper and Washer Systems/Wiper Motor Linkage/Service and
Repair/Wiper Mechanism, Windshield, Replacing
-
the battery negative lead. See: Battery, disconnecting See: Starting and Charging/Battery/Service and Repair/Procedures/Battery, Disconnecting.