
XC70 L5-2.5L Turbo VIN 59 B5254T2 (2003)
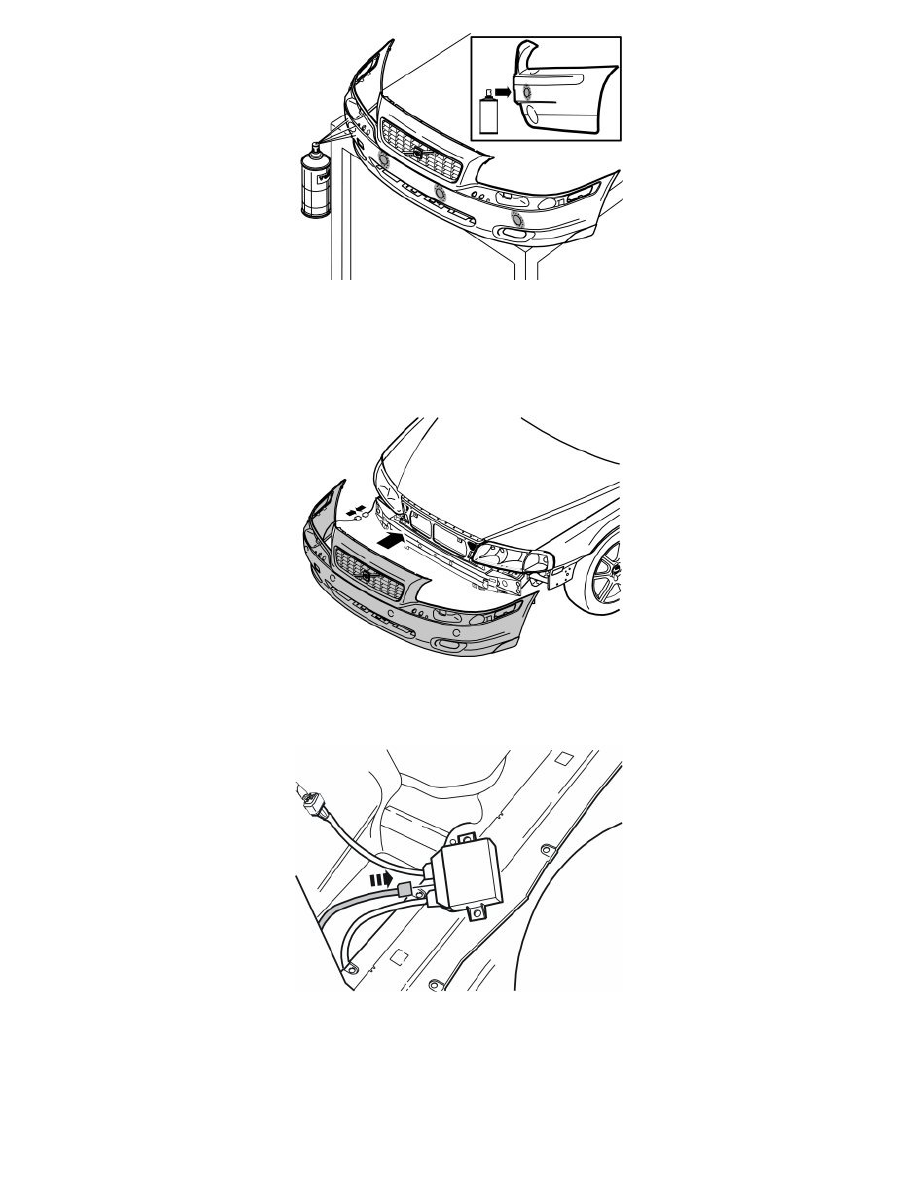
Note! Ensure that the activator has dried for at least 10 minutes before the paint is applied.
-
Spray the sensor holders and the sensors. Use paint with the same colour code as the car. Use a Volvo recommended paint. Apply a maximum of
two layers of paint.
Caution! Too many layers of paint may result in partial or complete malfunction.
-
Hold the bumper up against the car. Connect the connectors for the sensors to the connector secured to the car
-
Reinstall the bumper by repeating the instructions in points in reverse order
-
Install the outer sensors in the holders. Connect the sensors to the cable harness. See illustration.
-
Connect the pre-routed cable to the spare port in the parking assistance module (PAM)
-
It is secured by Velcro strips on the left-hand side in the cargo compartment behind the wheel arch.
Note! Ensure that the connector clicks into place and are properly secured.
Finishing work
-
Clamp the sensor cable so that it does not chafe or rattle.