XC70 AWD L6-3.2L VIN 98 B6324S (2009)

Variable Valve Timing Solenoid: Procedures
VVT solenoid, cleaning
Note! Some variation in the illustrations may occur, but the essential information is always correct.
Removal
Note! Removal steps in this procedure may contain installation details.
Remove the VVT solenoid. Refer to: VVT solenoid, B6304T2 See: Removal and Replacement/VVT Solenoid
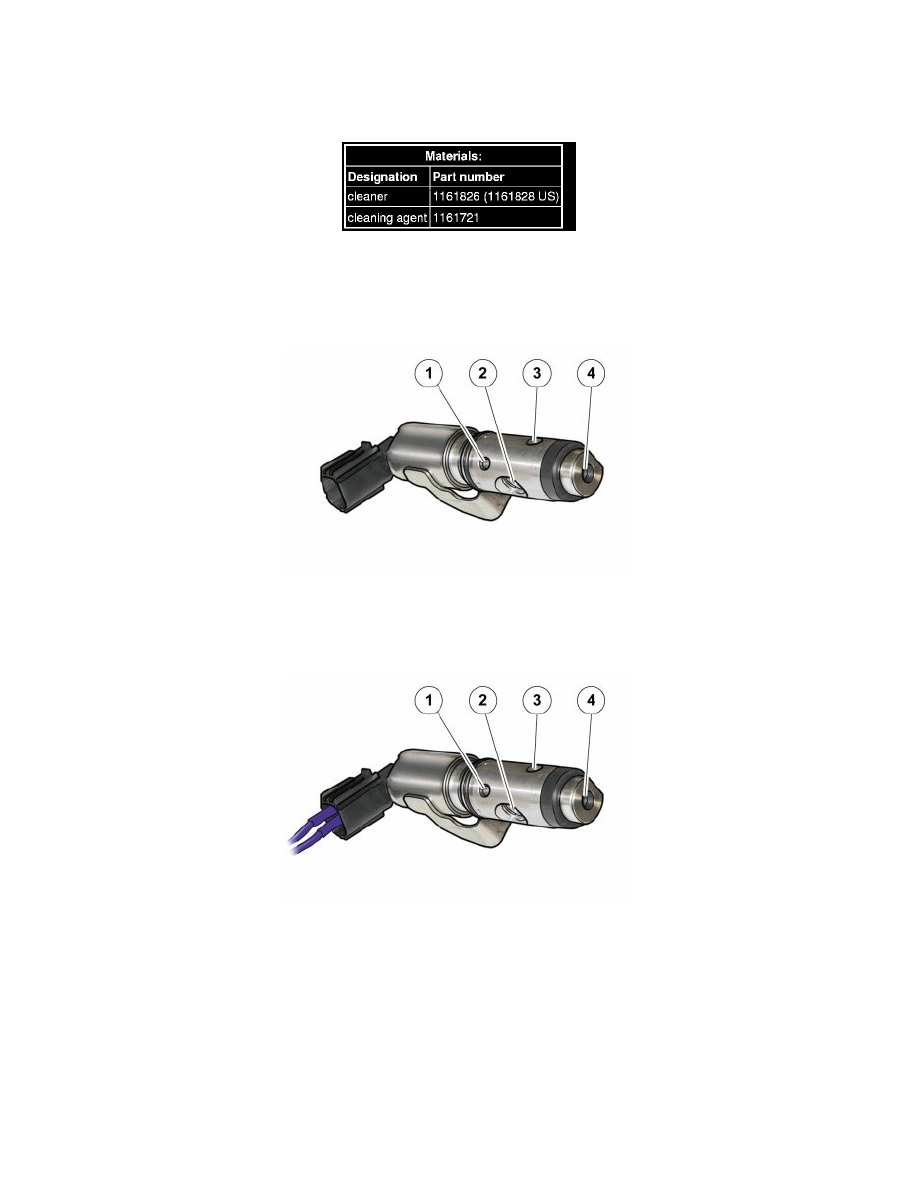
Blow compressed air into the oil feed hole (2). Air should come out through the A port (1).
Blow compressed air into the oil drain hole (4). Air should come out through the B port (3)
For further function checks continue with step "check function".
If the duct seems to be blocked, go to the "cleaning" step.
Connect current to the solenoid. A click should be heard from the solenoid.
It is easier to hear the click when holding the solenoid.
Blow compressed air into the oil feed hole (2). Air should come out through the B port (3)
If the piston is sticking or the solenoid is not working, the direction of flow will not change. If the duct seems to be blocked, go to the "cleaning" step.
Use: cleaner, 1161826 (1161828 US)
Use cleaner. Allow it to act for 5 minutes.
Blow compressed air into all holes from both directions and look for contamination. Carry this out with current on and off to ensure that no dirt remains
in the ducts.
Use: cleaning agent, 1161721
