
XC90 AWD L5-2.5L Turbo VIN 59 B5254T2 (2005)
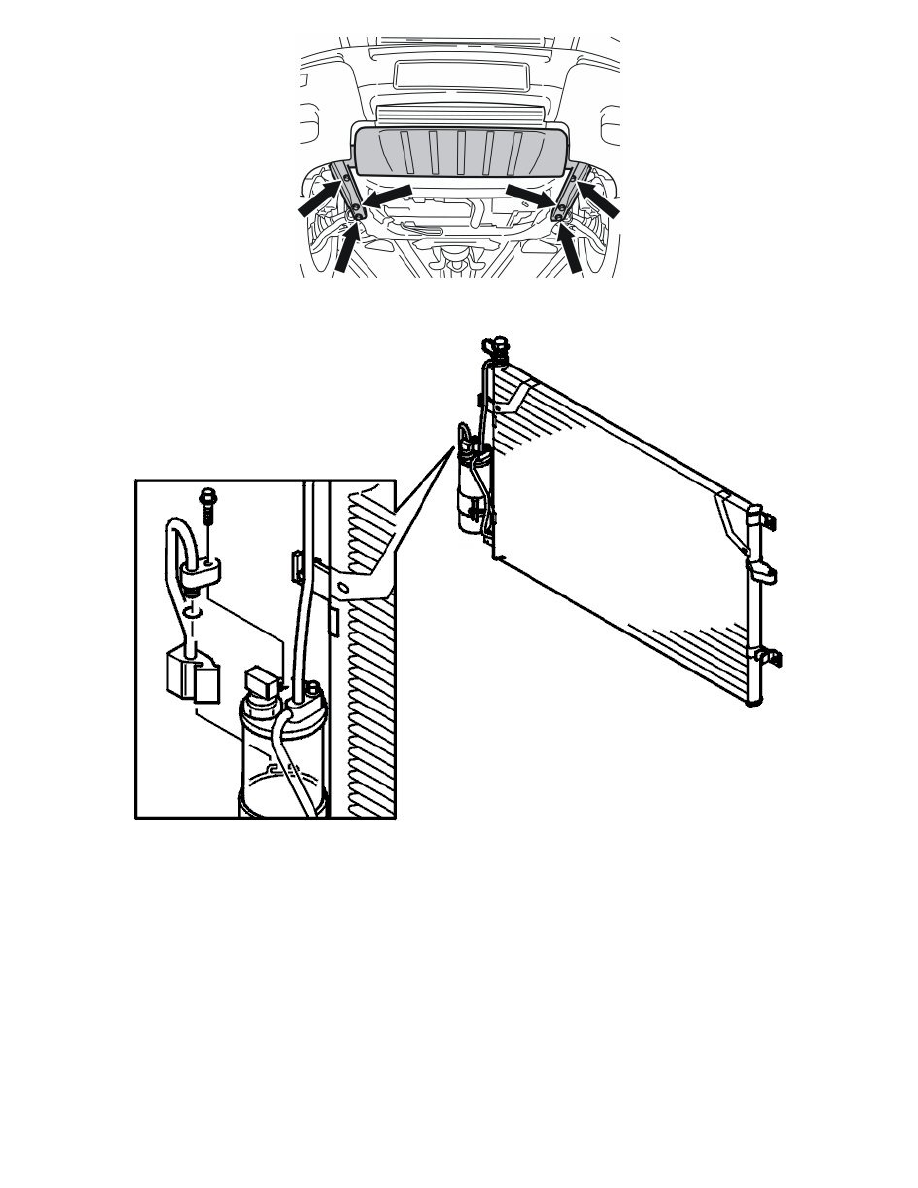
Remove the splash guard under the car.
Detach the pipe coupling from the receiver.
Slacken off the tensioner screw in the mounting for the bracket a few turns.
Remove the right-hand headlamp. See Headlight/bulb, replacing See: Lighting and Horns/Headlamp/Headlamp Bulb/Service and Repair/Headlight/Bulb,
Replacing Headlight/bulb, replacing See: Lighting and Horns/Headlamp/Headlamp Bulb/Service and Repair/Headlight/Bulb, Replacing.
Disconnect the pipe coupling form the top of the receiver. Lift the pipe out of the mounting.
Installing the pipe for the receiver/drier
Note! Use new O-rings lubricated with compressor oil.
Position the pipe on the mounting in the bracket. Position the pipe coupling on the receiver.
Tighten the tensioner screw for the mounting in the bracket a few turns. Tighten to 10 Nm.
Secure the pipe coupling from the condenser to the receiver. Tighten to 10 Nm.
Vacuum pump. See Vacuum pumping See: Heating and Air Conditioning/Service and Repair/Vacuum Pumping.
Fill the system with refrigerant. See Refrigerant, filling See: Heating and Air Conditioning/Service and Repair/Refrigerant, Filling.
Test for leaks. See Leak tracing, fluorescent tracing agent / UV lamp See: Heating and Air Conditioning/Testing and Inspection/Component Tests and
General Diagnostics/Leak Tracing, Fluorescent Tracing Agent/UV Lamp or Leak tracing, electronic leak tracer See: Heating and Air
Conditioning/Testing and Inspection/Component Tests and General Diagnostics/Leak Tracing, Electronic Leak Tracer.