
XC90 AWD L5-2.5L Turbo VIN 59 B5254T2 (2005)
Knock Sensor: Service and Repair
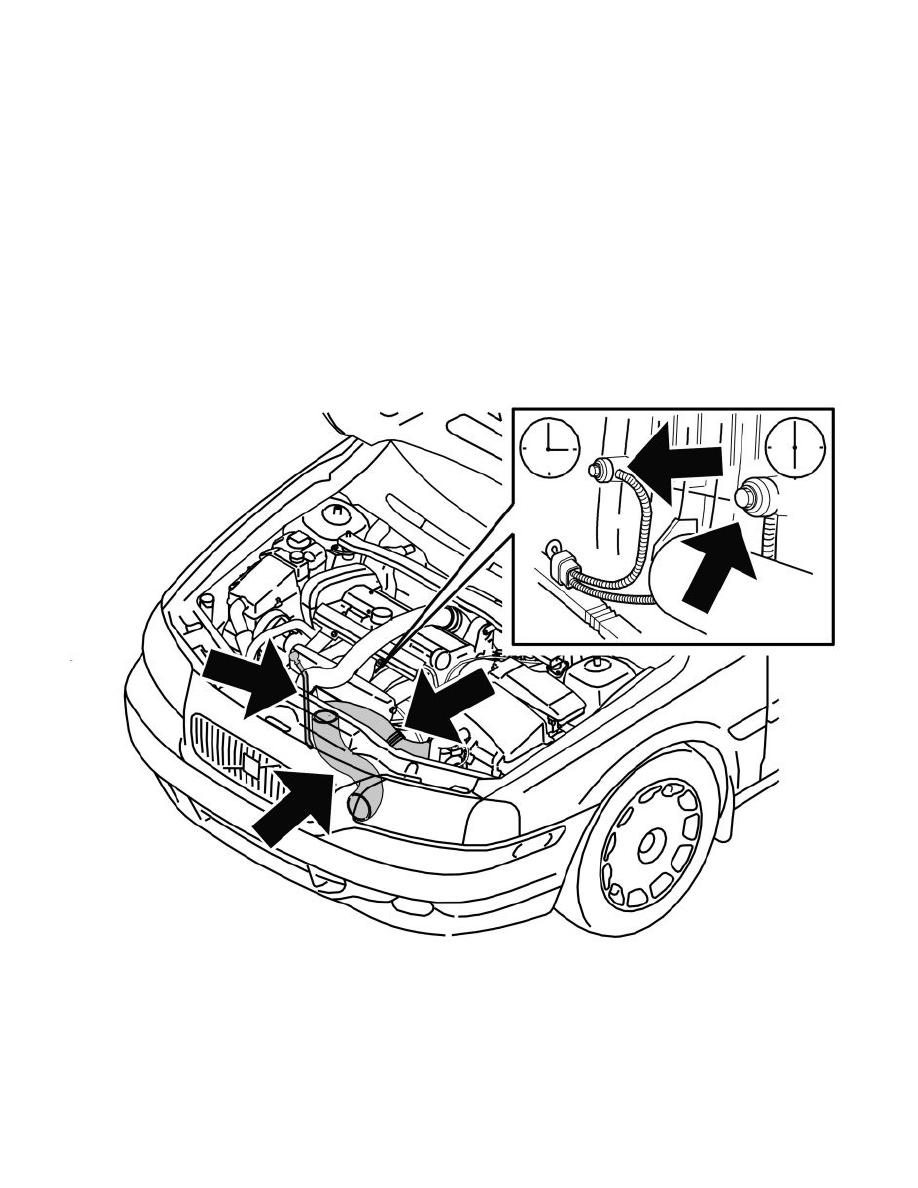
Replacing knock sensors (KS)
Note! As the illustrations in this service information are used for different model years and/or models, some variation may occur. However, the
essential information is always correct.
Removing the knock sensor (KS)
Remove
-
the cable from the battery negative terminal. First read Battery, disconnecting See: Starting and Charging/Battery/Service and
Repair/Procedures/Battery, Disconnecting
-
the intake pipe between the front cover plate and the air cleaner (ACL)
Detach the pipe from the charge air cooler at the throttle housing. Push the pipe to one side
-
the dip stick and its holder
-
the screws for the knock sensors (KS)
-
the tie strap at the connector.
Disconnect the connector. Pull the sensors downwards and past the rear edge of the starter motor bracket.
Installing knock sensors (KS)
Install the new sensor. Tighten by hand.
Route the cables on the outside of the starter motor bracket.
Align the sensors. The cable from the sensor for cylinder 2 = 3 o'clock and from the sensor for cylinder 4 = 6 o'clock.
Tighten the knock sensors (KS) to 20 Nm.
Connect the knock sensor (KS) connectors. Check that the wiring is in the correct position. Secure with a tie strap at the starter motor bracket.
Install
-
the dip stick
-
the pipe between the throttle body (TB) and the charge air cooler (CAC)
-
the intake pipe between the front cover plate and the air cleaner (ACL)
-
the negative battery cable. First read Battery, disconnecting See: Starting and Charging/Battery/Service and Repair/Procedures/Battery,