
XC90 AWD L6-2.9L Turbo VIN 91 B6294T (2004)
Detach the bottom section from its mounting by the spring strut housing by pressing it in towards the engine compartment.
Installation
Note! For tightening torques, see Specifications See: Specifications/Mechanical Specifications/Starting and Charging/System Specifications.
Installing the bottom section
Install:
-
bottom section
-
the screws
-
the air cleaner (ACL) housing.
Installing the relay/fuse holder
Install:
-
the cable terminals for the main terminals
-
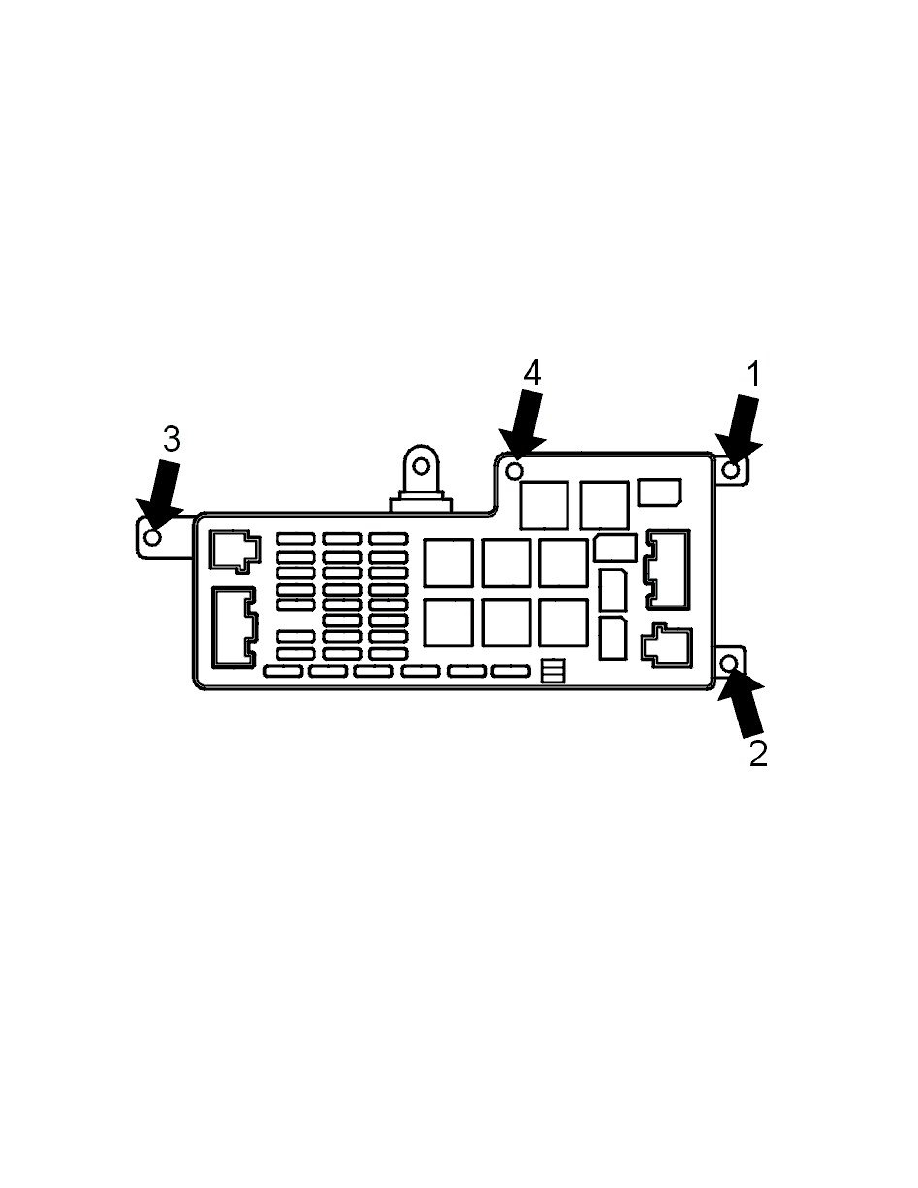
the relay/fuse holder. Check that the rubber seals are correctly positioned
-
the screws as illustrated. Tighten screw 4. Tighten to 2 Nm
-
the battery leads
-
the nut for the battery leads.
Finishing work
Install:
-
the cover for the fusebox
-
the battery negative pole. Tighten according to Tightening torque See: Specifications/Mechanical Specifications/Starting and Charging/System
Specifications. Also see Battery, disconnecting See: Starting and Charging/Battery/Service and Repair/Procedures/Battery, Disconnecting.