
XC90 AWD L6-2.9L Turbo VIN 91 B6294T (2004)
Apply a little petroleum jelly to the inner piston gasket. Use Volvo Genuine parts petroleum jelly (P/N 116 1151-4).
Carefully press the piston up into the cylinder.
Install the catch on the push rod.
Installing the servo cylinder on the transmission
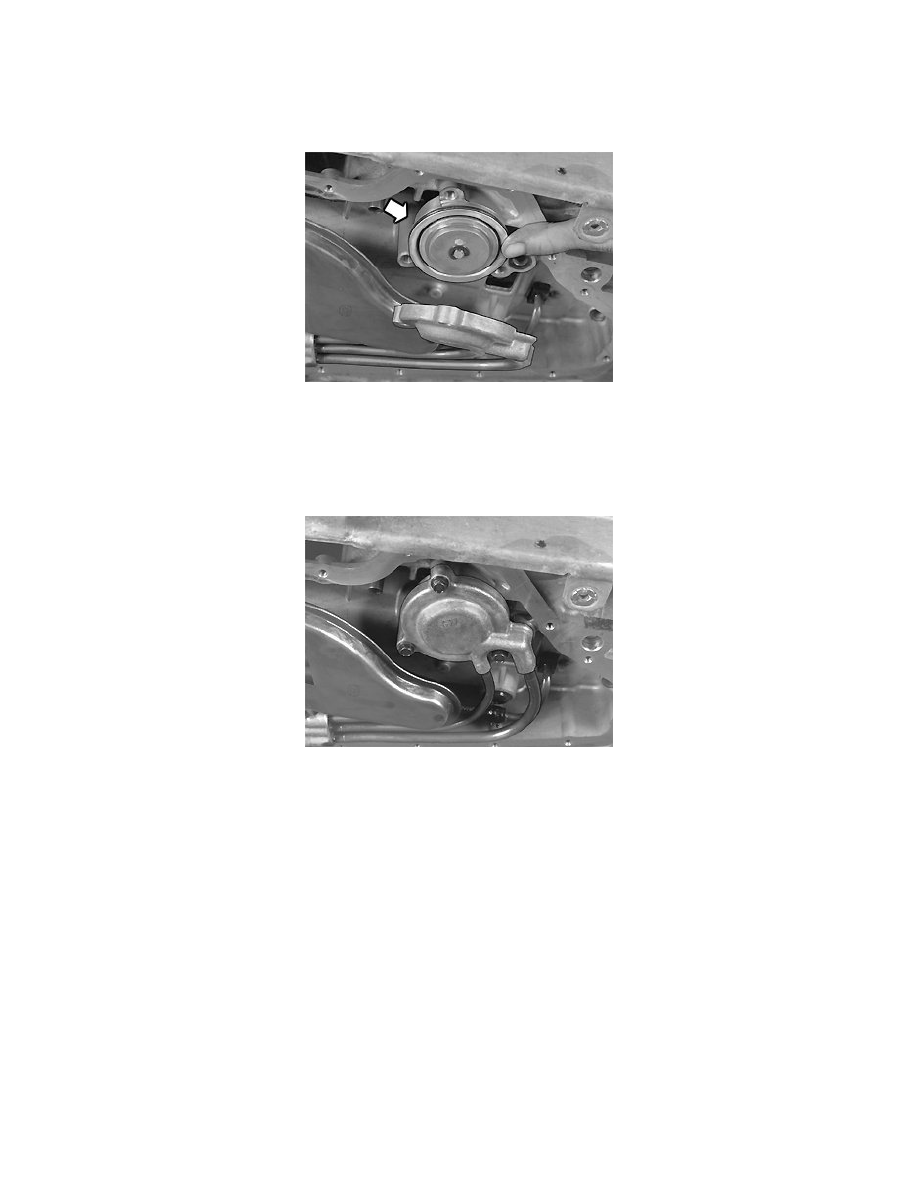
Note! The strainer on the piston must come into the opening on the left in the transmission.
Apply petroleum jelly to the O-ring. Use Volvo Genuine parts petroleum jelly (P/N 116 1151-4).
Install the piston in the housing. Hold the piston in position by hand. Check that the strainer is opposite the opening on the left hand side.
Slide the cover up towards the piston. Lower the piston towards the cover. Press the piston down into the cover using your fingers so that the O-ring
cannot be seen on the piston.
Install the screws and tighten by hand. Secure the cover so that all the screws are aligned.
Tighten the screws. Tighten to 25 Nm.
Finishing
Install the oil trough. See Transmission oil / oil filter, replacing See: Fluid Filter - A/T/Service and Repair.
Top up with oil. Check the oil level. See Transmission oil / oil filter, replacing See: Fluid Filter - A/T/Service and Repair.
Test drive the car.
Gasket/Piston Accumulator, Replacing
Gasket/piston accumulator, replacing
Note! The accumulator housing is located in the transmission.
Caution! Cleanliness is extremely important when working on automatic transmissions. Use lint free paper or rags.
Caution! Read through the instructions before beginning work.
Removal
Preparations