
XC90 AWD V8-4.4L VIN 85 B8444S (2005)
Caution! Ensure that the piston rings can be turned easily.
Note! Incorrect positioning may result in higher oil consumption.
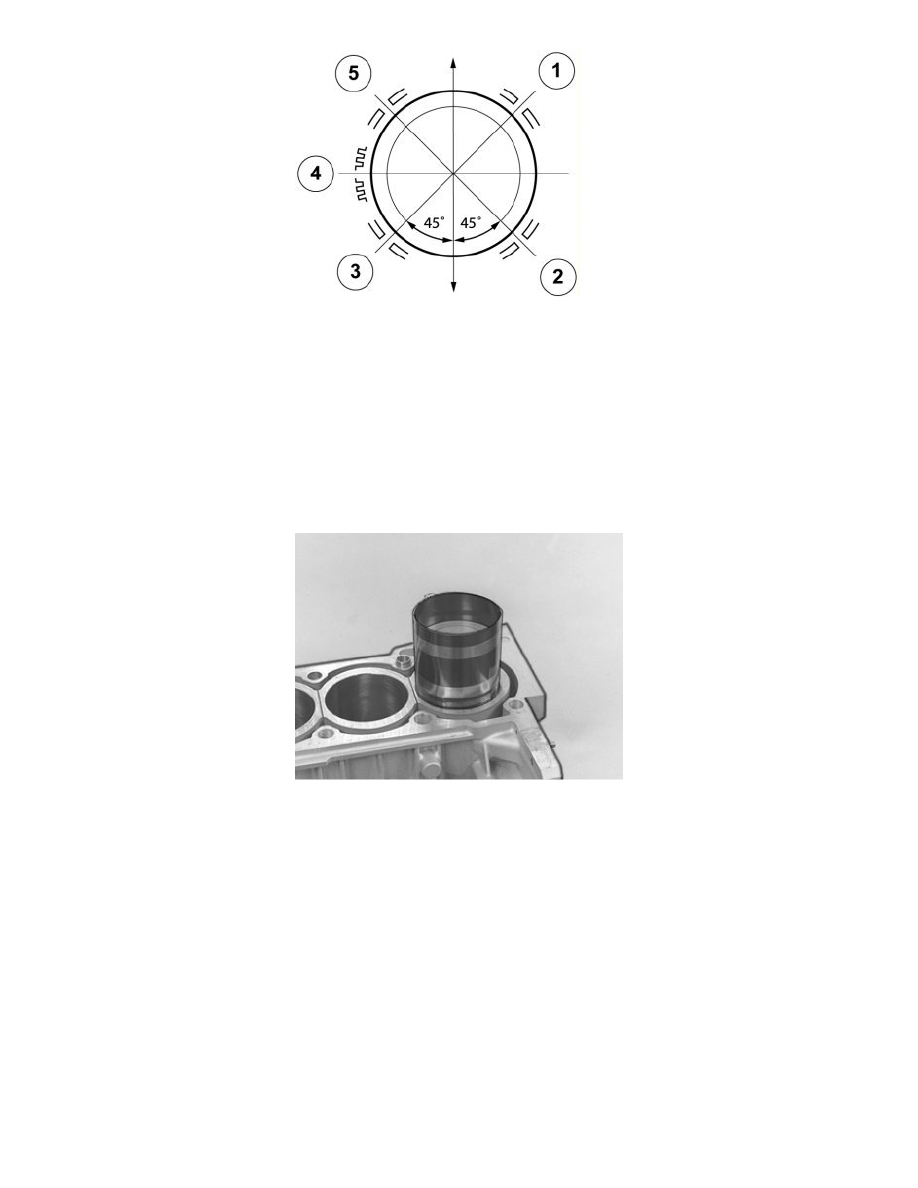
Use piston ring pliers. Turn the piston rings so that the openings are offset as illustrated.
1. Compression ring
2. Lower oil scraper ring
3. Lower oil scraper ring
4. Expander ring
5. Upper oil scraper ring.
Installing the pistons in the cylinder bores
Note! The marking on top of the piston must point forwards. Ensure that the classifications correspond.
Use a cylinder ring compressor.
Lubricate the cylinder bore, the pistons and the bearing shells.
Turn the crankshaft so that the crank pin is in bottom dead center (BDC) for the cylinder that the piston is to be installed in.
Ensure that the engine is in a position where the cylinder bore forms as vertical a line as possible.
Carefully press/tap down the piston (e.g., with the handle of a hammer).
When the piston releases from the piston ring compressor, remove the piston ring compressor and turn the engine 180° in the stand.
Install tool 999 5746 Holder See: Tools and Equipment/999 5746 Holder in the connecting rod. Pull the connecting rod until it secures against the big
end journals.
Tightening the connecting rod cover