
Campaign - Front Camshaft Replacement Campaign - Page 2229
31.
Install the front cylinder head cover with the original gasket. Tighten the bolts in two or three steps, using the sequence shown. In the final step,
torque the bolts to 12 N.m (8.7 lb-ft).
32.
Install the intake manifold with its original gasket. Tighten the nuts and bolts in two or three steps, using the sequence shown. In the final step,
torque the nuts and bolts to 22 N.m (16 lb-ft).
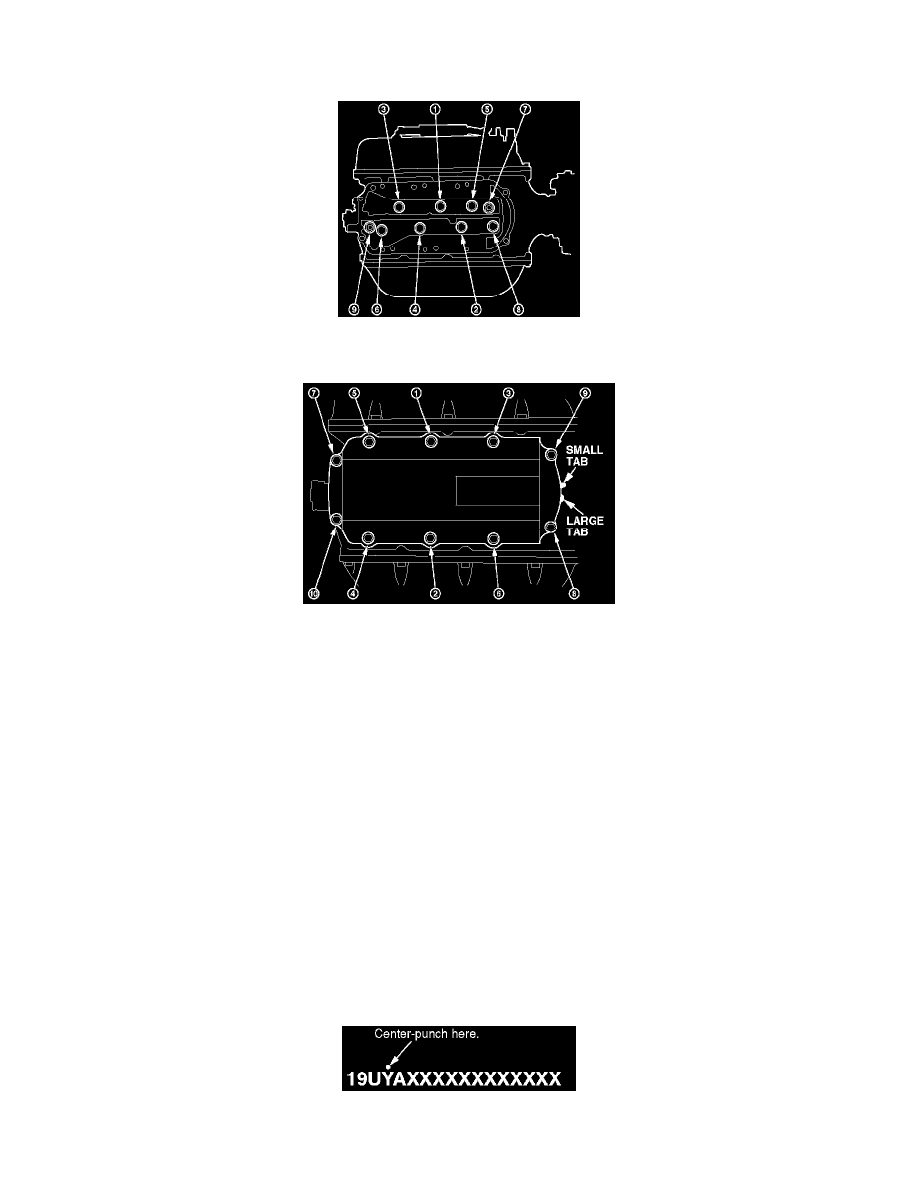
33.
Install the intake manifold upper cover with its original gasket. Make sure the gasket is positioned with its small tab behind the large tab. Tighten
the nuts and bolts in two or three steps, using the sequence shown. In the final step, torque the nuts and bolts to 12 N.m (8.7 lb-ft).
34.
Install the ignition coils, and torque the bolts to 12 N.m (8.7 ft-lb).
35.
Install the intake manifold cover and the ignition coil front cover. Torque the bolts to 12 N.m (8.7 lb-ft).
36.
Install the battery, and reconnect the terminals.
37.
Do the idle learn procedure:
^
With all electrical items off (radio, A/C, lights, etc.) start the engine, and hold it at 3,000 rpm until the radiator fan comes on.
^
Let the engine idle for 5 minutes with the throttle fully closed. If the radiator fan comes on, do not include its running time in the 5 minutes.
35.
Reset the driver's window AUTO function:
^
With the engine running, open the driver's window fully.
^
Close the window fully, and hold the switch for a second or two more.
39.
Enter the audio system anti-theft code and the customer's radio station presets. Enter the navigation system security code (if equipped). Set the
clock.
40.
Center-punch a completion mark above the fourth character of the engine compartment VIN.