3.2TL TYPE S V6-3.2L SOHC (2002)

Rocker Arm Assembly: Testing and Inspection
VTEC Rocker Arm Test
Special Tools Required
^
VTEC Air Adaptor 07VAJ-P8A010A VTEC Air Stopper 07VAJ-P8A020A
1. Remove the cylinder head covers.
2. Remove the front upper cover.
3. Set the No. 1 piston at Top Dead Center (TDC).
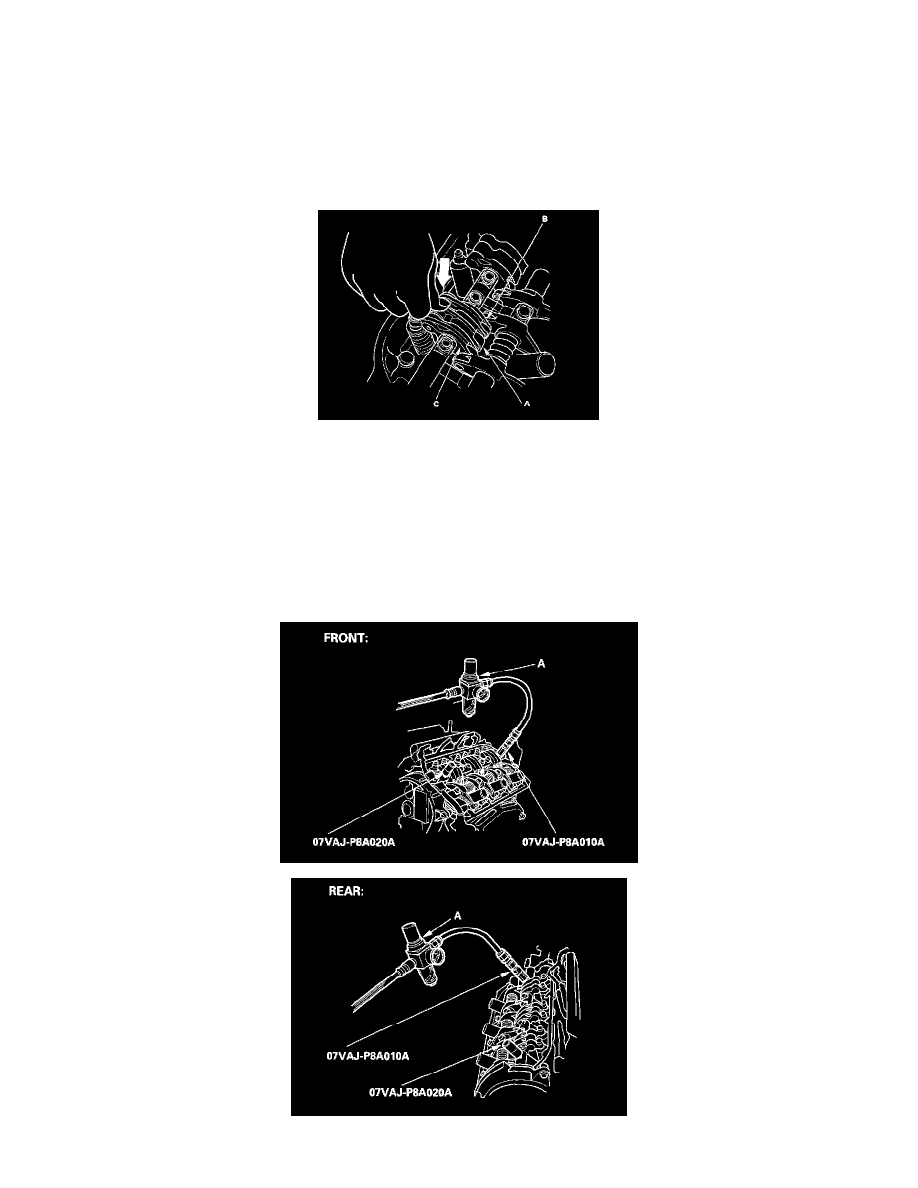
4. Push on the intake mid rocker arm (A) for the No. 1 cylinder. The mid rocker arm should move independently of the primary rocker arm (B) and
secondary rocker arm (C).
^
If the intake mid rocker arm does not move, remove the mid, primary, and secondary intake rocker arms as an assembly, and check that the
pistons in the mid and primary rocker arms move smoothly. If any rocker arm needs replacing, replace the primary, mid and secondary rocker
arms as an assembly, and retest.
^
If the mid rocker arm moves freely, go to step 5.
5. Repeat step 4 on the remaining intake mid rocker arms with each piston at TDC. When all the mid rocker arms pass the test, go to step 6.
6. Check that the air pressure on the shop air compressor gauge indicates over 690 kPa (7.0 kgf/cm2, 100 psi).
7. Inspect the valve clearance.
8. Cover the timing belt with a shop towel to protect the belt.
9. Remove the two end intake rocker shaft mounting bolts, then install and connect the special tools and an air pressure regulator with a 0 - 100 psi
