
3.2TL TYPE S V6-3.2L SOHC (2002)
REPAIR PROCEDURE
NOTE:
^
Do not replace the timing belt because it has oil on it from the auto-tensioner or because you see belt dust after removing the engine upper covers.
Residual oil from the auto-tensioner and dust from minor belt contact with the inner edge of the camshaft pulleys does not affect timing belt
performance.
^
Do not automatically replace a water pump just because it has a 9" casting die number. Vehicles affected by this product update do not require
water pump replacement. For details, refer to Service Bulletin 03-022, Product Update: Timing Belt Auto Tensioner and Safety Recall: V6
Engine Water Pump.
Product Update: Timing Belt Auto Tensioner and Safety Recall: V6 Engine Water Pump.
1.
Follow steps 1 thru 12 of Timing Belt Removal in section 6 of the appropriate service manual.
2.
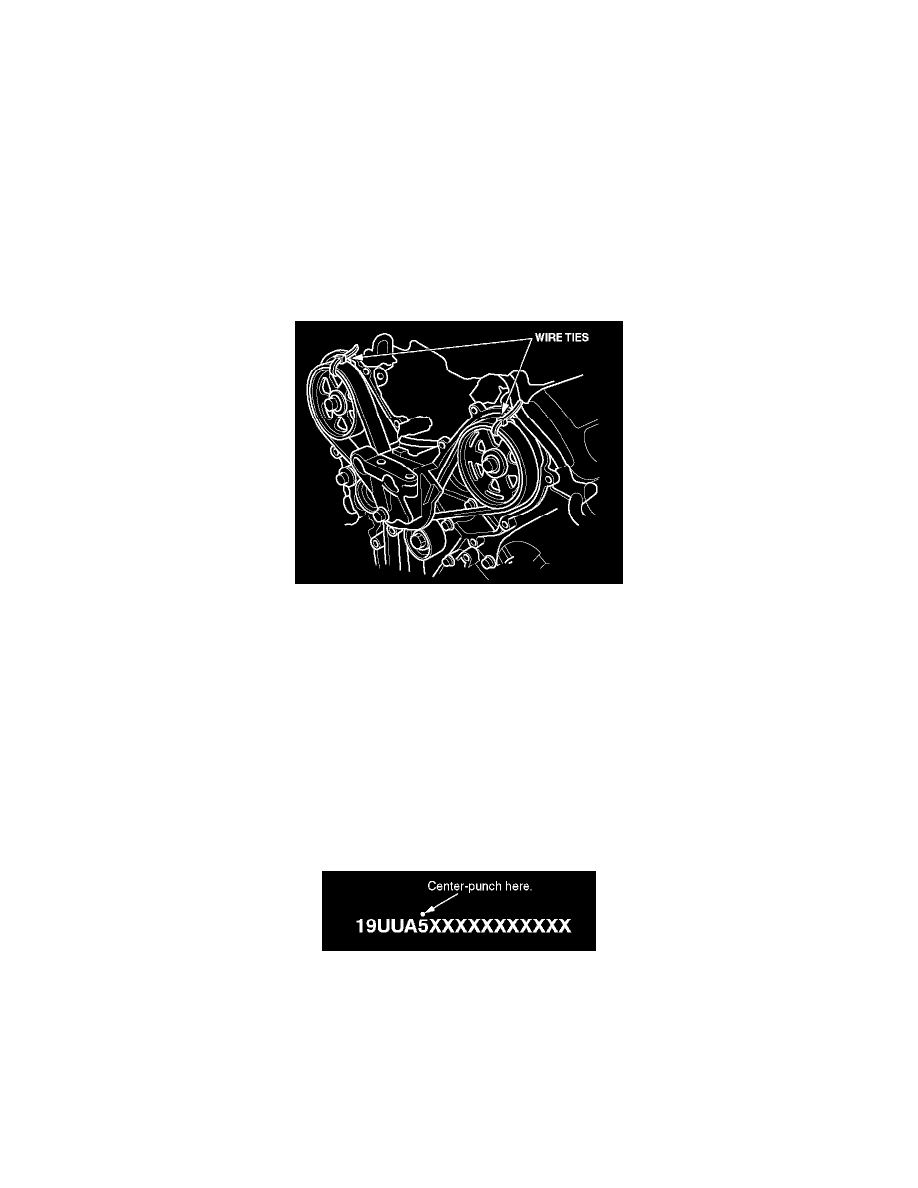
Secure the timing belt to both cam pulleys using plastic wire ties. This helps to keep the timing belt in place while you replace the auto-tensioner.
3.
Remove the timing belt auto-tensioner.
4.
Install the new auto-tensioner. Refer to section 6 of the appropriate service manual.
5.
Remove the pin from the auto-tensioner, and remove the wire ties from the cam pulleys.
6.
Replace the dipstick tube 0-ring.
7.
Install the remaining parts in the reverse order of removal. Tighten all nuts and bolts to the specifications shown in the appropriate service manual.
NOTE:
Overtightening the power steering belt would cause the power steering pulley to fail, so make sure you set the belt tension to the used belt
specification. Refer to section 17 of the appropriate service manual.
8.
Center-punch a completion mark above the sixth character of the engine compartment VIN.