
3.2TL TYPE S V6-3.2L SOHC (2002)
3. Clean the camshaft pulleys. Set the camshaft pulleys to TDC by aligning the TDC marks (A) on the camshaft pulleys with the pointers (B) on the
back covers.
4. Remove the battery clamp bolt from the back cover.
5. Remove the auto-tensioner.
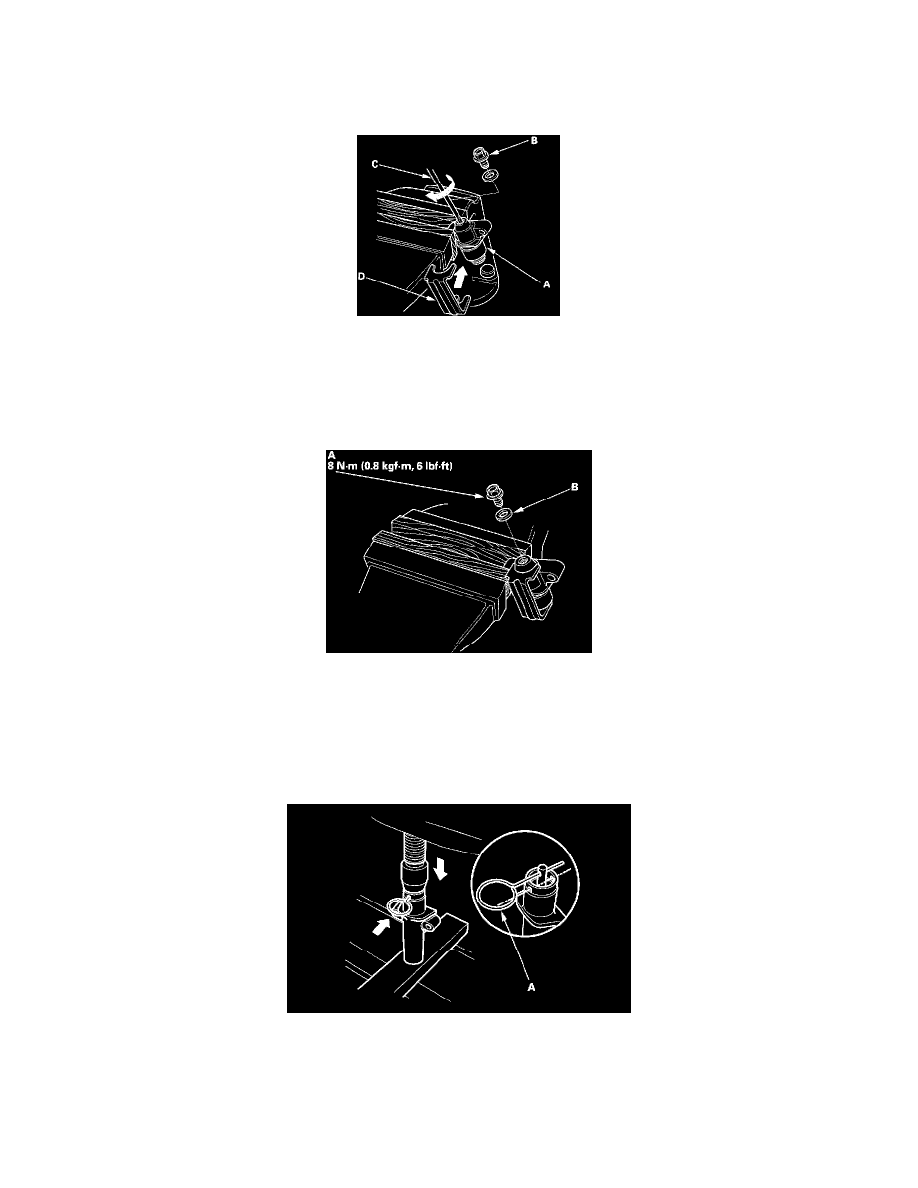
6. Hold the auto-tensioner (A) with the maintenance bolt pointing up. Loosen and remove the maintenance bolt (B) ('99 model).
NOTE: Handle the auto-tensioner carefully so the oil inside does not spill or leak. If any of the oil has spilled or leaked out of the auto-tensioner,
refill it with 5W-30 motor oil. The total capacity is 6.5 ml (0.22 fl oz).
7. Clamp the boss of the auto-tensioner in a soft-jawed vise. Do not grip the housing of the autotensioner ('99 model).
8. Insert a flat blade screwdriver (C) into the maintenance hole. Place the retainer (D) (P/N 14540-P8A-A01) on the auto-tensioner while turning the
screwdriver clockwise to compress the bottom ('99 model).
NOTE: Take care not to damage the threads or the gasket contact surface with the screwdriver.
9. Reinstall the maintenance bolt (A). Always use a new casket (B) ('99 model).
10. Make sure no oil is leaking around the maintenance bolt.
11. Align the holes on the rod and housing of the autotensioner with a pin (A)('00-03 models).
12. Set the auto-tensioner on the hydraulic press, then slowly compress the auto-tensioner. Insert a pin of 2.0 mm (0.08 inch) diameter through the
housing and the rod ('00-03 models).
NOTE: The compression pressure should not exceed 9,800 N (1,000 kgf, 2,200 lbs.).