
3.2TL TYPE S V6-3.2L SOHC (2002)
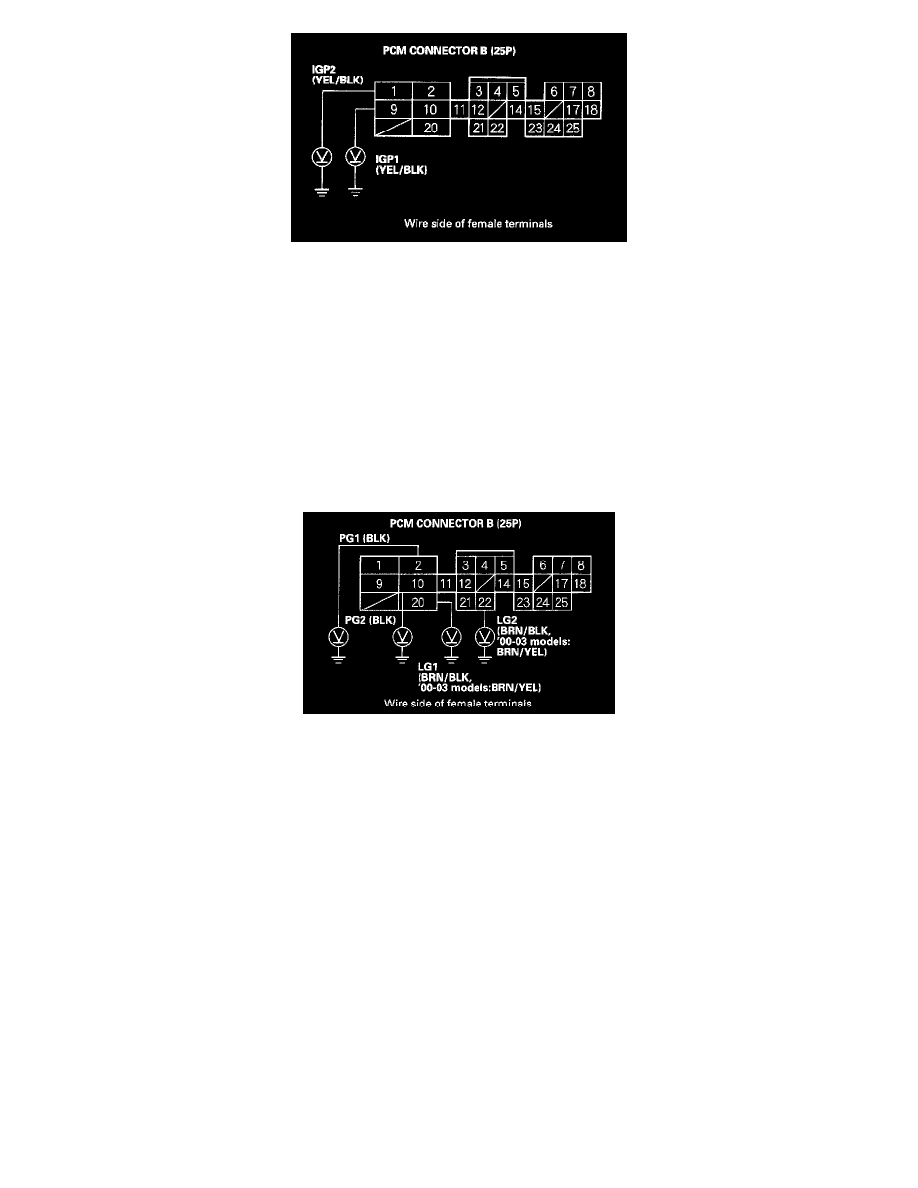
15. Measure voltage between body ground and PCM connector terminals B1 and B9 individually.
Is there battery voltage?
YES - Go to step 16.
NO - Check for these problems.
-
An open in the wire(s) between the PGM-FI main relay and PCM connector terminals B1 and B9.
-
Poor connections at the PGM-FI main relay.
-
A faulty PGM-FI main relay. If necessary, repair or replace the faulty part.
16. Turn the ignition switch OFF.
17. Reconnect the connectors to the sensors, then reconnect PCM connector C (31P).
18. Turn the ignition switch ON (II).
19. Measure voltage between body ground and PCM connector terminals B2, B10, B20, and B22 individually.
Is there less than 1.0 V?
YES - Substitute a known-good PCM and recheck. If the symptom/indication goes away, replace the original PCM.
NO - Repair open in the wire(s) that had more than 1.0 V between G101 and the PCM (B2, B10, B20, B22).
20. Turn the ignition switch OFF.
21. Connect an OBD II scan tool/Honda PGM Tester.
22. Turn the ignition switch ON (II).
23. Read the OBD II scan tool/Honda PGM Tester.
Does the OBD II scan tool/Honda PGM Tester communicate with the PCM?
YES - Go to step 24.
NO - Go to DLC Circuit Troubleshooting.
24. Check the OBD scan tool/Honda PGM Tester for DTCs.
Are any DTCs indicated?
YES - Go to the DTC Troubleshooting Index. See: Testing and Inspection/Diagnostic Trouble Code Descriptions