
3.2TL TYPE S V6-3.2L SOHC (2002)
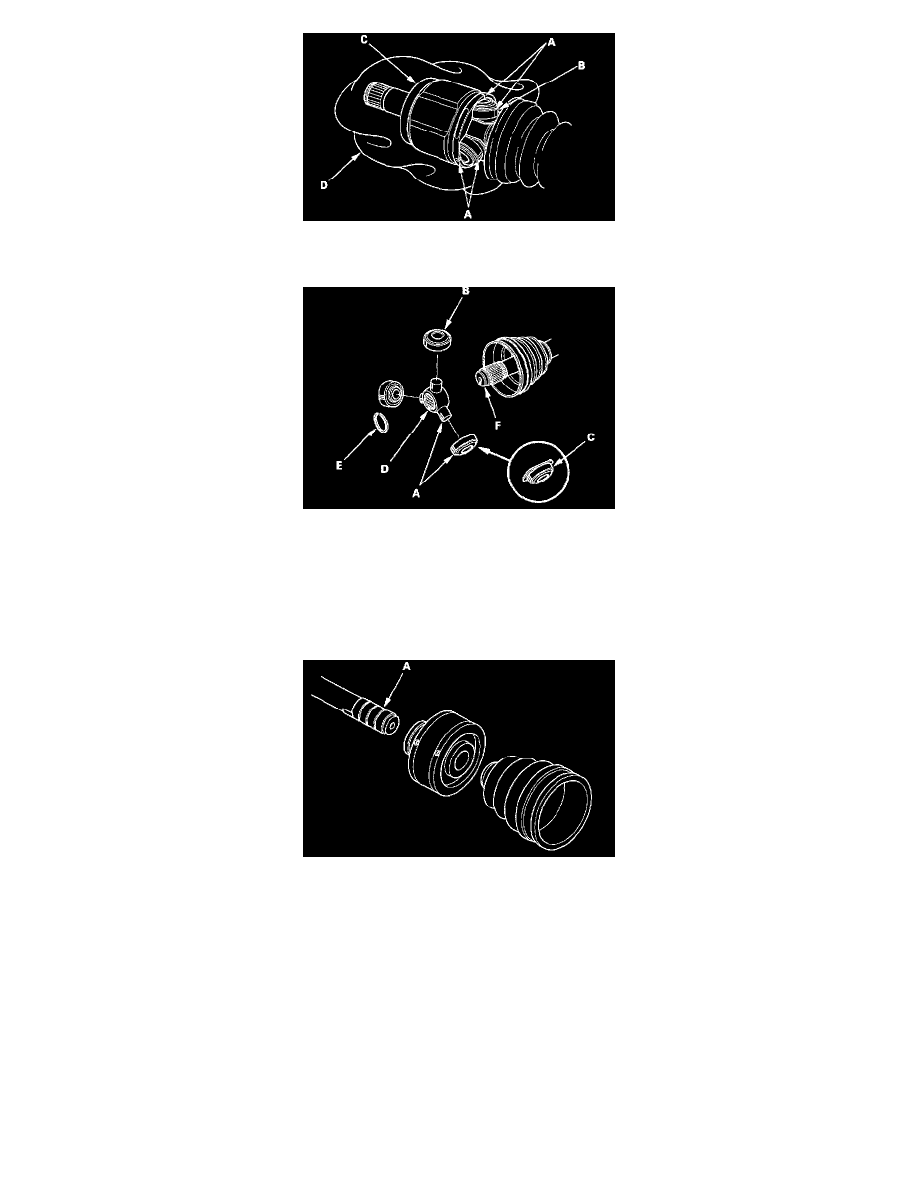
3. Make a mark (A) on each roller (B) and inboard joint (C) to identify the locations of rollers and grooves in the inboard joint. Then remove the
inboard joint on the shop towel (D). Be careful not to drop the rollers when separating them from the inboard joint.
4. Make a mark (A) on the rollers (B or C) and spider (D) to identify the locations of rollers on the spider, then remove the rollers.
NOTE: The roller (B) is '01 model; roller (C) is for' 99-00 models.
5. Remove the circlip (E).
6. Mark the spider (D) and driveshaft (F) to identify the position of the spider on the shaft.
7. Remove the spider.
8. Wrap the splines on the driveshaft with vinyl tape (A) to prevent damage to the inboard boot and dynamic damper.
9. Remove the inboard boot and dynamic damper.
Outboard Joint Side:
1. Remove the boot bands. Take care not to damage the boot and dynamic damper.
-
If the boot band is a double loop type (A), lift up the band bend (B).
-
If the boot band is an ear clamp type (C), lift up the three tabs (D) with a screwdriver.