
3.5RL V6-3474cc 3.5L (2001)
CAUTION:
-
Be sure to install the SRS wiring so that it is not pinched or interfering with other vehicle parts.
-
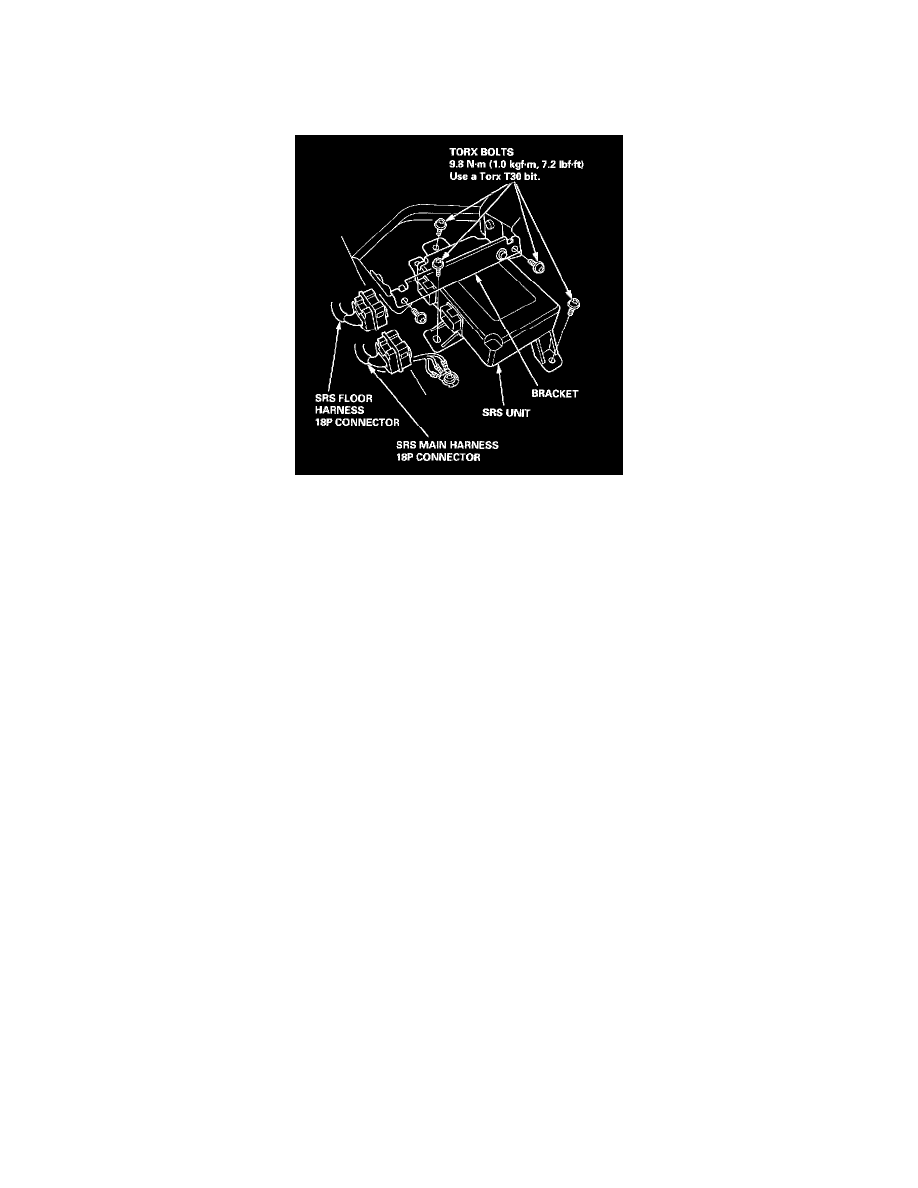
When tightening the Torx bolts to the specified torque after replacement, be careful to turn them in so that their heads rest squarely on the
brackets.
7. Install the new SRS unit.
8. Connect the SRS main harness 18P connector and SRS floor harness 18P connector to the SRS unit, then push it into position until it clicks.
9. Reconnect the driver's airbag 2P connector to the cable reel 2P connector, and reinstall the access panel on the steering wheel.
10. Reconnect the front passenger's airbag 4P connector to the SRS main harness 4P connector, then install the glove box.
11. Reconnect the side airbag 2P connectors to the SRS floor harness 2P connectors.
12. Reconnect the left side wire harness 2P connector to the driver's seat belt tensioner and the right side wire harness 2P connector to the front
passenger's seat belt tensioner. Reinstall the B-pillar trim panels.
13. Reconnect the battery positive cable, then the negative cable.
14. After installing the SRS unit, confirm proper system operation: Turn the ignition switch ON (II); the SRS indicator light should come on for about
6 seconds and then go off.
15. Enter the anti-theft code for the radio, then enter the customer's radio station presets.