
3.5RL V6-3474cc 3.5L (2001)
Seat Belt Tensioner: Service and Repair
Removal and Installation
CAUTION:
-
Always disconnect the seat belt tensioner connector(s) when the harness is disconnected.
-
Carefully inspect the seat belt tensioner before installing it. Do not install a tensioner that shows signs of being dropped or improperly handled,
such as dents, cracks or deformation.
-
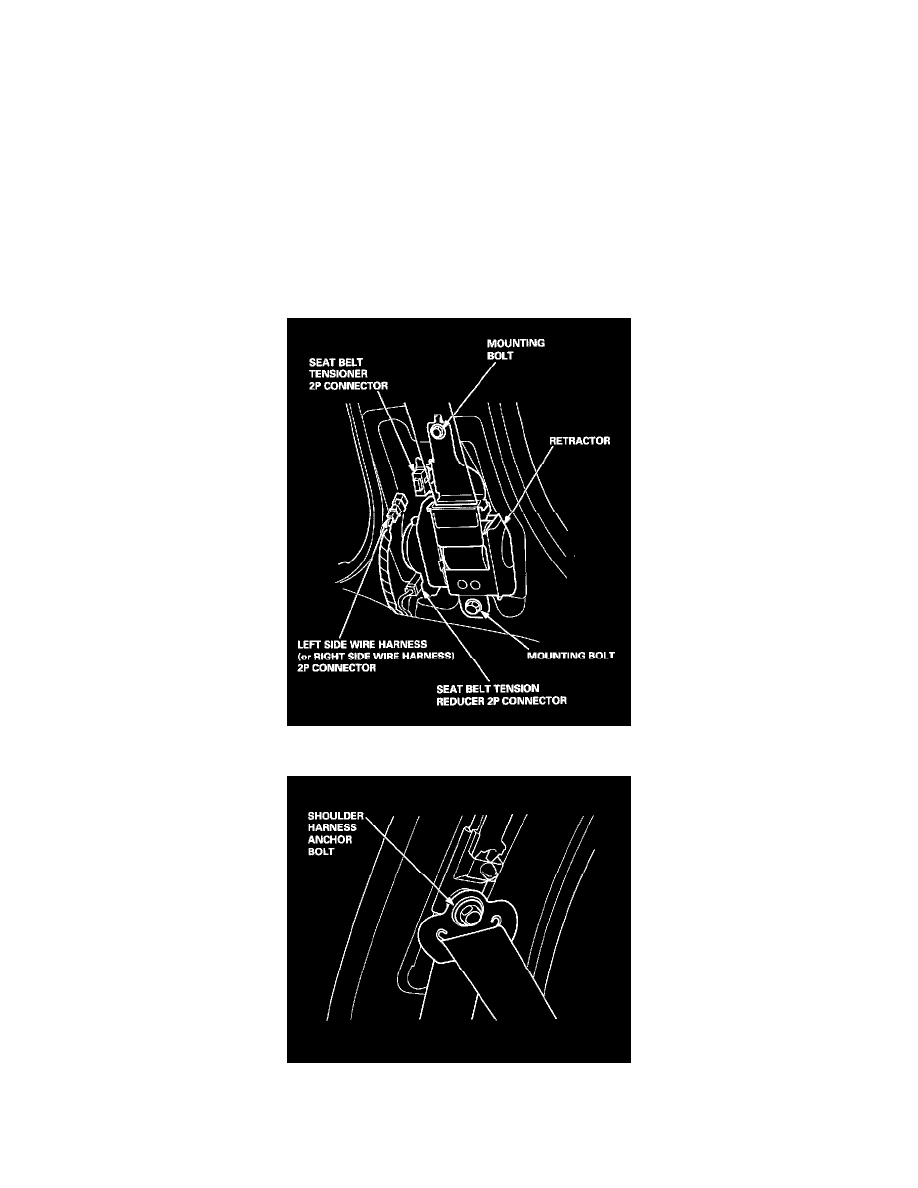
The shoulder harness anchor bolt must be removed before you remove the tensioner.
1. Make sure you have the anti-theft code for the radio, then write down the frequencies for the radio's preset buttons.
2. Disconnect the battery negative cable, then disconnect the positive cable from the battery, and wait at least 3 minutes.
3. Remove the left and (or) right B-pillar trim panels.
4. Disconnect the seat belt tensioner 2P connector(s) from the left side wire harness (driver's side) and (or) the right wire harness (front passenger's
side).
NOTE: When disconnected, the tensioner connector is automatically shorted.
5. Disconnect the 2P connector from the tension reducer connector.
6. Remove the shoulder harness anchor bolt, then remove the two seat belt tensioner mounting bolts and retractor.
CAUTION: Be sure to install the harness wires so that they are not pinched or interfering with other parts.