
3.5RL V6-3474cc 3.5L (2001)
1. Check that there is continuity between each pair of leads.
2. Check that there is no continuity between each lead and the coil core.
3. If the coil fails either continuity check, replace the alternator.
Alternator Belt Inspection and Adjustment
NOTE: When using a new belt, first adjust the deflection or tension to the values for the new belt, then readjust the deflection or tension to the values
for the used belt after running engine for five minutes.
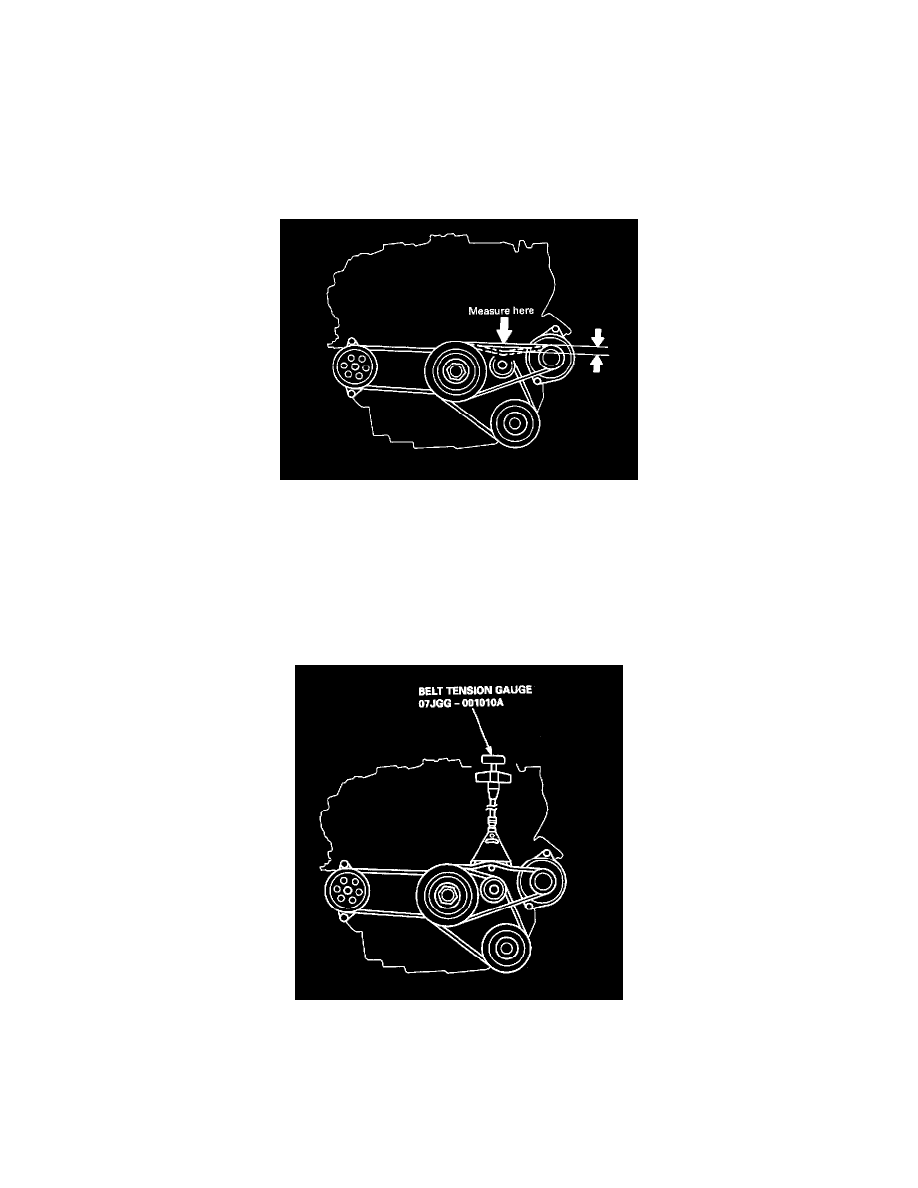
Deflection method:
Apply a force of 98 N (10 kg, 22 lb), and measure the deflection between the alternator and crankshaft pulley.
Deflection:
Used Belt: 9.5 - 11.5 mm (0.37 - 0.45 in)
New Belt: 7.0 - 8.0 mm (0.28 - 0.31 in)
NOTE: If the belt is worn or damaged, replace it.
Belt tension gauge method:
Attach the belt tension gauge to the belt and measure the tension. Follow the gauge manufacturer's instructions.
Tension:
Used Belt: 390 - 590 N (40 - 60 kg, 88 - 130 lb)
New Belt: 780 - 980 N (80 - 100 kg, 180 - 220 lb)
NOTE: If the belt is worn or damaged, replace it.