
3.5RL V6-3474cc 3.5L (2001)
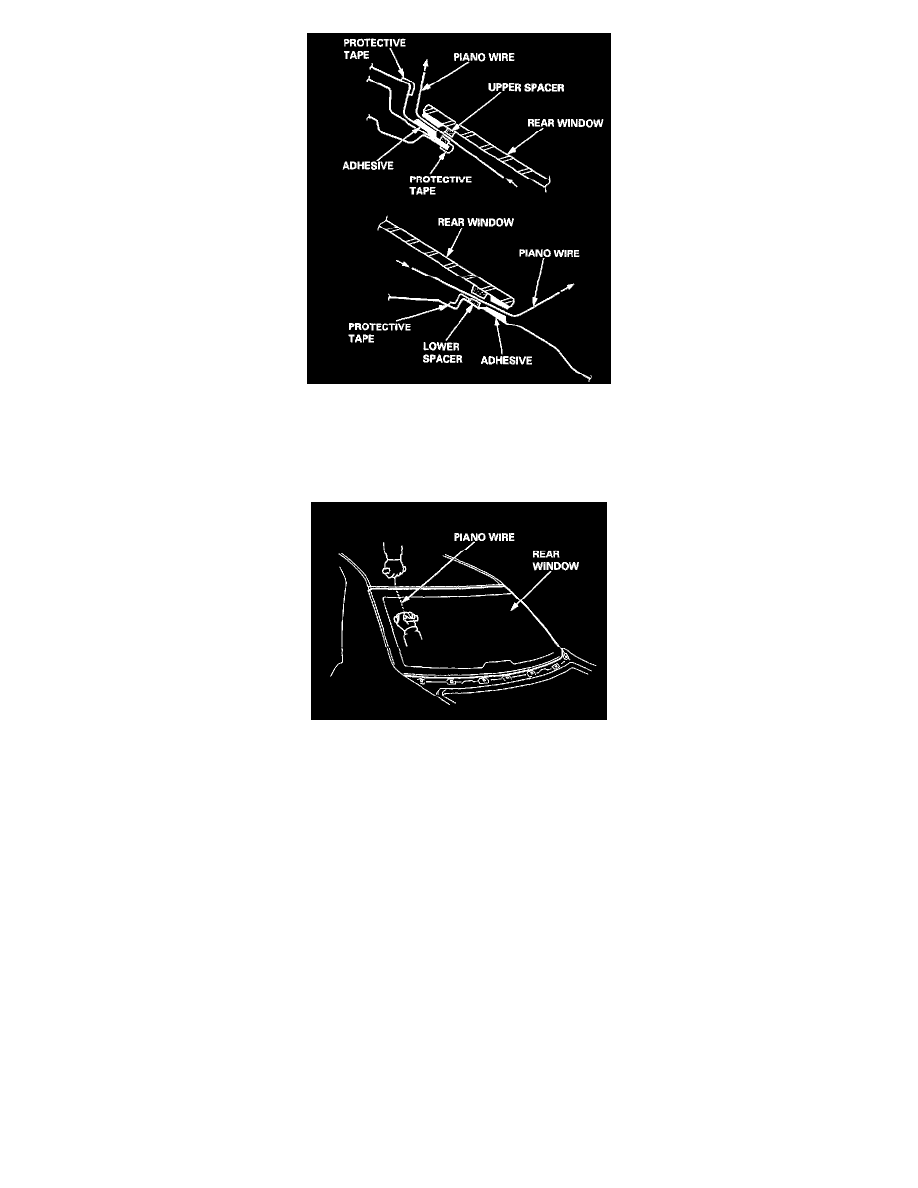
5. Apply protective tape along the edge of the body as shown. Using an awl, make a hole through the adhesive from inside the vehicle. Push the
piano wire through the hole, and wrap each end around a piece of wood.
6. With a helper on the outside, pull the piano wire back and forth in a sawing motion, and carefully cut through the adhesive around the entire rear
window.
CAUTION: Hold the piano wire as close to the rear window as possible to prevent damage to the body.
7. Carefully remove the rear window.
Installation
1. Using a knife, scrape the old adhesive smooth to a thickness of about 2 mm (0.08 in.) on the bonding surface around the entire rear window
opening flange.
NOTE:
-
Do not scrape down to the painted surface of the body; damaged paint will interfere with proper bonding
-
Mask off surrounding surfaces before painting.
-
Remove the rubber dam, fasteners and spacers from the body.
2. Clean the body bonding surface with a sponge dampened in alcohol.
NOTE: After cleaning, keep oil, grease and water from getting on the surface.
3. If the old rear window is to be reinstalled, use a putty knife to scrape off all traces of old adhesive and the rubber dam, then clean the rear window
surface with alcohol where new adhesive is to be applied.
NOTE: Make sure the bonding surface is kept free of water, oil and grease.
CAUTION: Avoid setting the rear window on its edges; small chips may later develop into cracks.