
CL L4-2156cc 2.2L SOHC F22B1 MFI (1997)
Piston: Service and Repair
Installation
INSTALLATION
CAUTION: Before installing the pistons, apply a coat of engine oil to the ring grooves and cylinder bores.
1. If the crankshaft is already installed:
-
Set the crankshaft to BDC for each cylinder.
-
Remove the connecting rod caps, and slip short sections of rubber hose over the threaded ends of the connecting rod bolts.
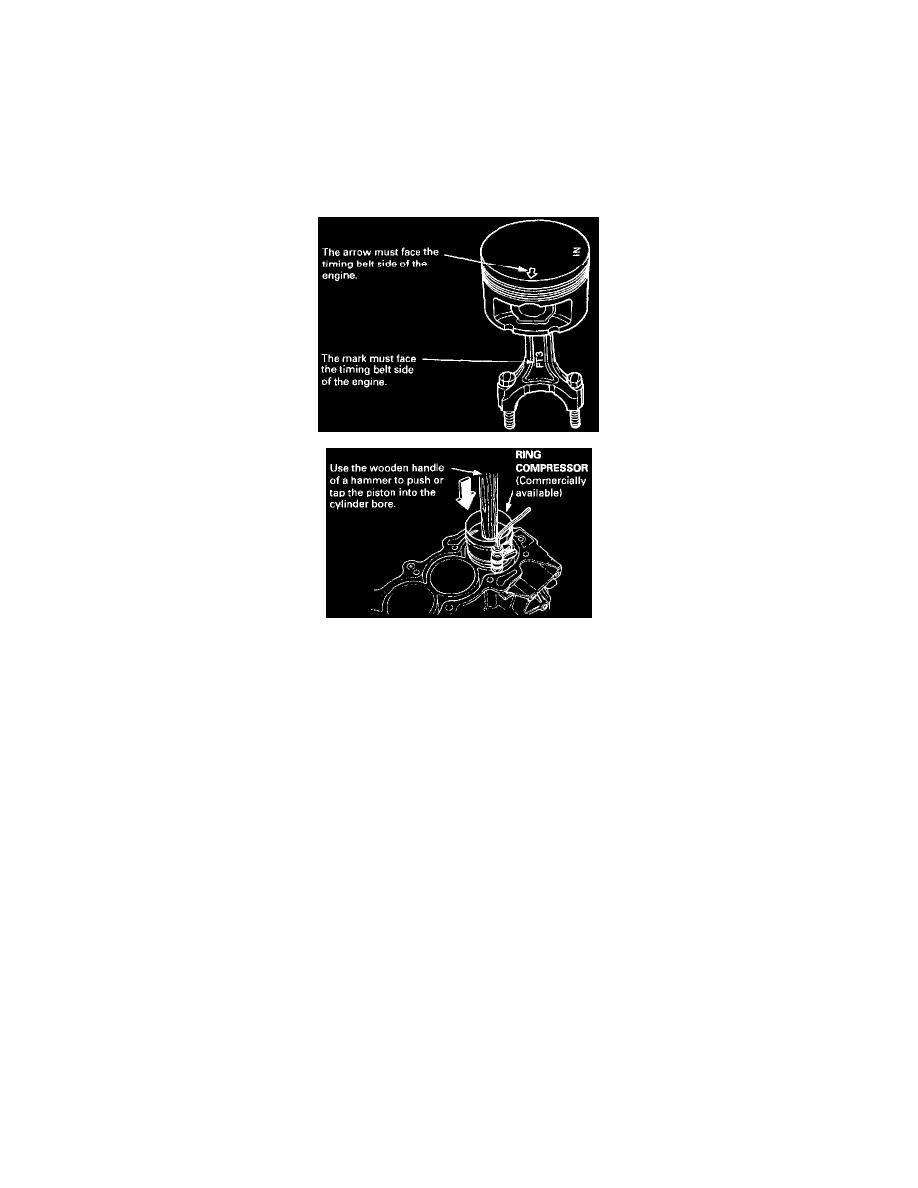
-
Install the ring compressor, check that the bearing is securely in place, then position the piston in the cylinder and tap it in using the wooden
handle of a hammer.
-
Stop after the ring compressor pops free, and check the connecting rod-to-crank journal alignment before pushing the piston into place.
-
Install the rod caps with bearings, and torque the nuts to:
46 Nm (4.7 kgf/m, 34 ft.lbs.)
2. If the crankshaft is not installed:
-
Remove the rod caps and bearings, install the ring compressor, then position the piston in the cylinder and tap it in using the wooden handle of
a hammer.
-
Position all pistons at top dead center.
NOTE: Maintain downward force on the ring compressor to prevent the rings from expanding before entering the cylinder bore.