
CL L4-2156cc 2.2L SOHC F22B1 MFI (1997)
Crankshaft Position Sensor: Service and Repair
REPLACEMENT
1. Make sure you have the anti-theft code for the radio, then write down the frequencies for the radio's preset buttons.
2. Disconnect the battery negative terminal first, then the positive terminal.
3. Remove the left front tire/wheel and the splash shield.
4. Loosen the adjusting bolt, locknut and mounting nut, then remove the P/S pump belt.
5. Loosen the adjusting bolt, mounting bolt and locknut, then remove the alternator belt.
6. Remove the alternator terminal and connector.
7. Remove the dipstick and the pipe.
8. Remove the cylinder head cover.
9. Remove the pulley bolt and crankshaft pulley.
10. Remove the rubber seal from the adjusting nut, then remove the upper and lower covers.
NOTE: Do not use the upper and lower covers for storing removed items.
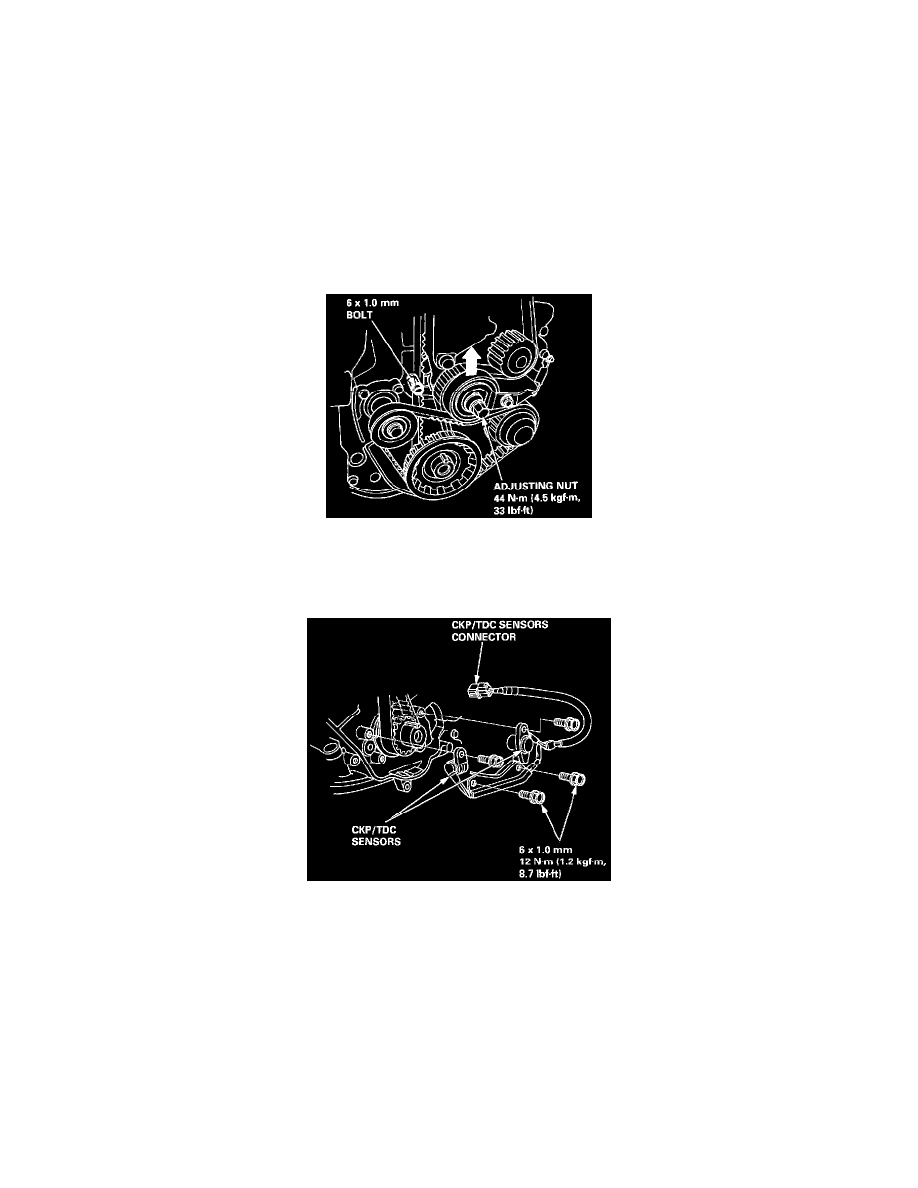
11. Lock the timing belt adjuster arm in place by installing one of the 6 x 1.0 mm bolts.
12. Loosen the adjusting nut 2/3-1 turn.
Push the tensioner to remove tension from the balancer belt, then retighten the adjusting nut.
13. Remove the balancer belt and balancer belt drive pulley.
14. Disconnect the CKP/TDC sensors connector, then remove the CKP/TDC sensor.
15. Install the CKP/TDC sensors in reverse order of removal.
16. Enter the anti-theft code for the radio, then enter the customer's radio station presets.