CL L4-2156cc 2.2L SOHC F22B1 MFI (1997)

Pressure Plate: Testing and Inspection
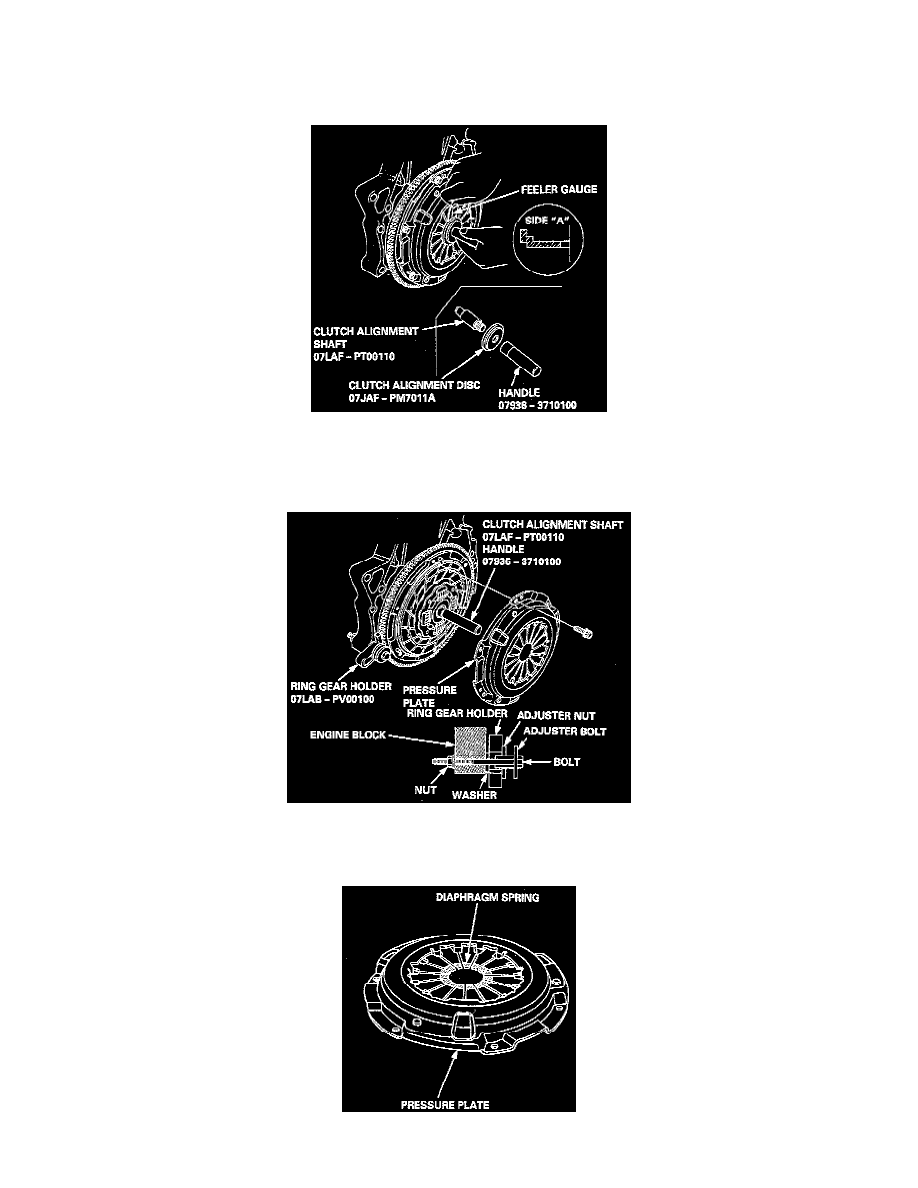
1. Assemble the special tools as shown.
NOTE: Assemble the Clutch Alignment Disc with side "A" facing the diaphragm spring as shown.
2. Check the diaphragm spring fingers for height using the special tools and a feeler gauge.
-
Standard (New): 0.6 mm (0.02 inch) max.
-
Service Limit: 0.8 mm (0.03 inch)
-
If the height is more than the service limit, replace the pressure plate.
3. Install the special tools as shown.
4. To prevent warping, unscrew the pressure plate mounting bolts in a crisscross pattern in several steps. then remove the Pressure orate
5. Inspect the pressure plate surface for wear, cracks, and burning.
6. Inspect the fingers of the diaphragm spring for wear at the release bearing contact area.
