
Windshield: Locations (page 6 of 7)
- Make
- Acura (Honda)
- Model
- CL
- Engine
- V6-3.2L SOHC
- Year
- 2002
- Section
- Windshield
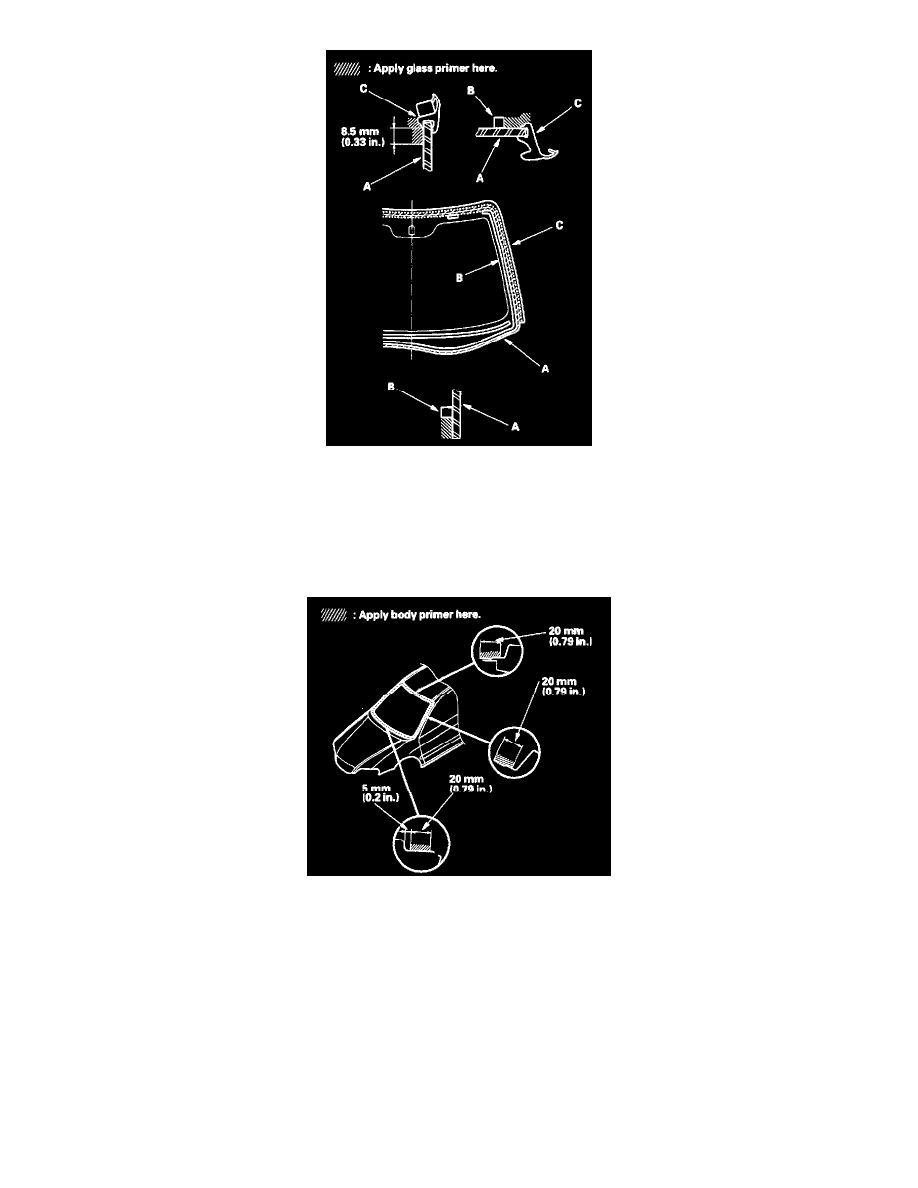
18. With a sponge, apply a light coat of glass primer around the edge of the windshield (A) between the dam (B) and molding (C) as shown, then
lightly wipe it off with gauze or cheesecloth:
-
Apply glass primer to the molding.
-
Do not apply body primer to the windshield, and do not get body and glass primer sponges mixed up.
-
Never touch the primed surfaces with your hands. If you do, the adhesive may not bond to the windshield properly, causing a leak after the
windshield is installed.
-
Keep water, dust, and abrasive materials away from the primed surface.
19. With a sponge, apply a light coat of body primer to the original adhesive remaining around the windshield opening flange. Let the body primer dry
for at least 10 minutes:
-
Do not apply glass primer to the body, and do not get glass and body primer sponges mixed up.
-
Never touch the primed surfaces with your hands.
-
Mask off the dashboard before painting the flange.
Pinch or Ctrl + scroll to zoom. Double-tap to reset.
Parts & tools for this job For 2002 Acura CL 3.2L
- TOOLTrim removal tool kitSearch: trim removal tool kit
- PARTTouch-up paintSearch: Acura touch up paint
- PARTPanel clip assortmentSearch: Acura panel clips assortment
Links open Amazon search results in a new tab. As an Amazon Associate I earn from qualifying purchases.