
CL TYPE S V6-3.2L SOHC (2001)
Front Door Panel: Service and Repair
Door Panel Removal/Installation
Special Tools Required
Trim pad remover. Snap-on A177A or equivalent, commercially available.
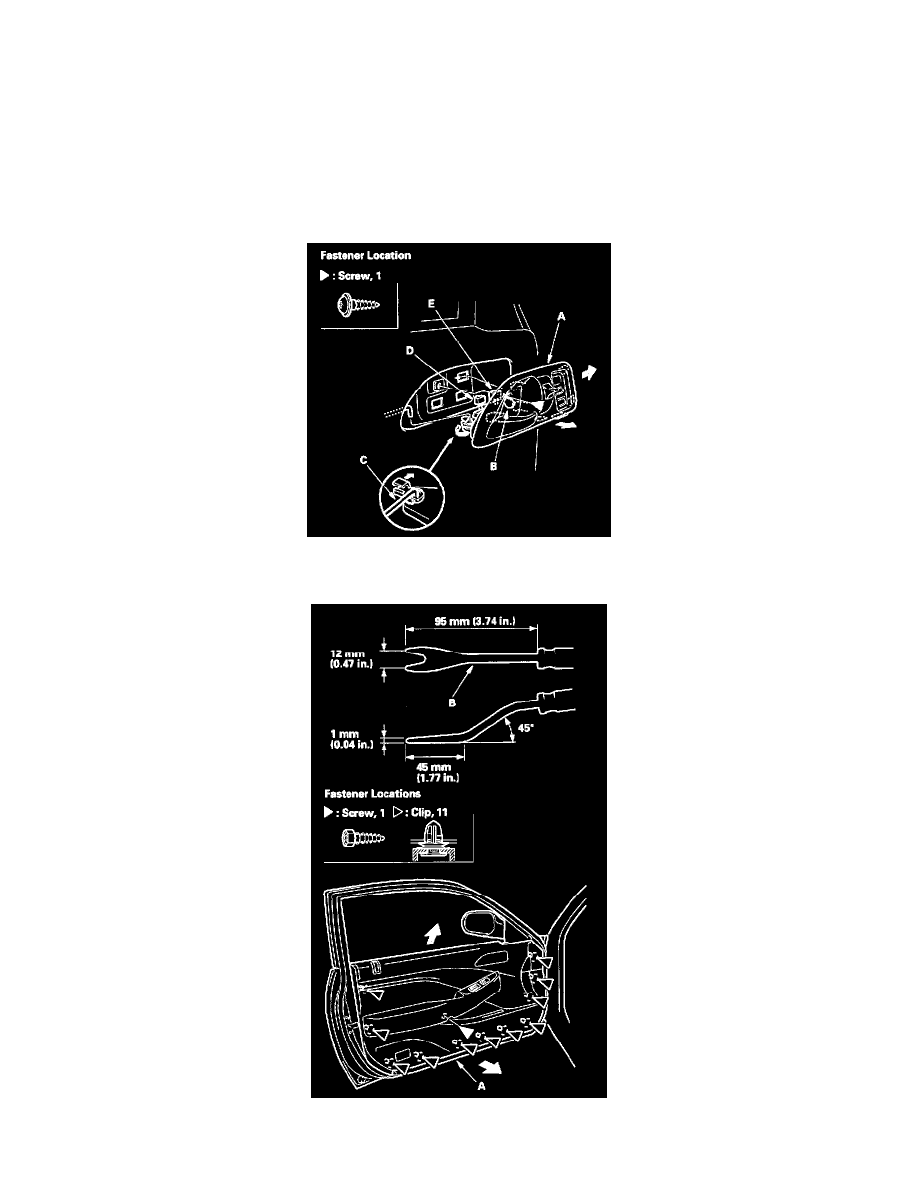
1. Remove the mirror mount cover. Take care not to scratch the door panel.
2. Remove the inner handle (A). Take care not to scratch the door panel.
1. Pry out the cap (B), and remove the screw.
2. Pull the inner handle forward and out half-way.
3. Disconnect the inner handle rod (C) and power door lock switch connector (D). On driver's side, disconnect the driving position memory
switch connector (E).
3. Remove the screw from the armrest portion of the door panel. Release the clips that hold the door panel (A) with a commercially available trim
pad remover (B), then remove the door panel by pulling it upward. Remove the door panel with as little bending as possible to avoid creasing or