
CL TYPE S V6-3.2L SOHC (2001)
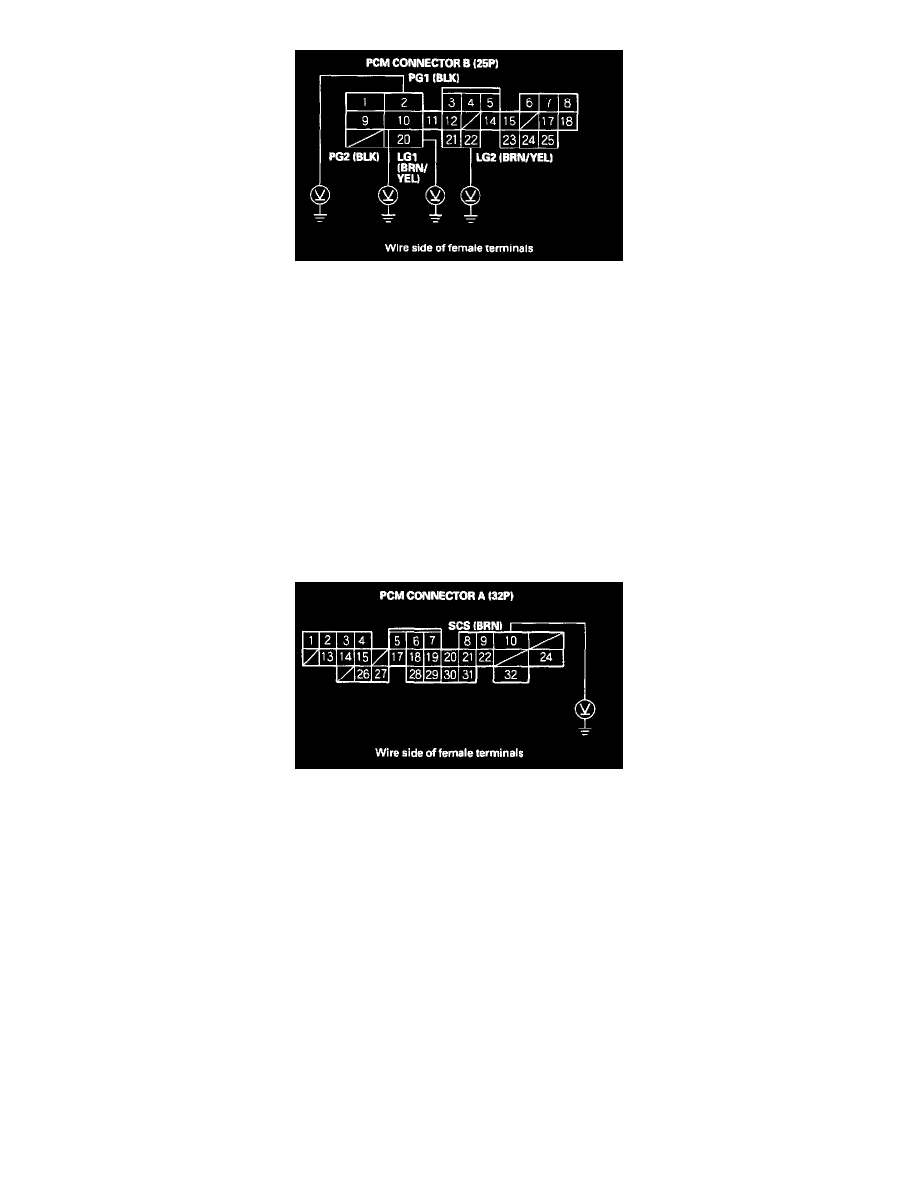
11. Turn the ignition switch ON (II), and measure voltage between body ground and PCM connector terminals B2, B10, B20, and B22 individually.
Is there less than 1.0 V?
YES - Substitute a known-good PCM and recheck. If the symptom/indication goes away, replace the original PCM.
NO - Repair the open in the wire(s) that had more than 1.0 V between G101 and the PCM (B2, B10, 620, or B22).
12. Turn the ignition switch OFF.
13. Connect an OBDII scan tool/Honda PGM Tester.
14. Turn the ignition switch ON (II), and read the OBDII scan tool/Honda PGM Tester.
Are any DTCs indicated?
YES - Go to step 15.
NO - Go to DLC Circuit Troubleshooting.
15. Turn the ignition switch OFF, then turn it back ON (II) and measure voltage between PCM connector terminal A10 and body ground.
Is there approx. 5 V?
YES - Go to step 16.
NO - Repair short in the wire between the DLC and the PCM (A10).
16. Turn the ignition switch OFF, disconnect PCM connector A (32P), and turn the ignition switch ON (II).
Is the MIL on?
YES - Repair short in the wire between the gauge assembly and the PCM (A18).
NO - Substitute a known-good PCM and recheck. If the symptom/indication goes away, replace the original PCM.