
CL TYPE S V6-3.2L SOHC (2001)
17. With a hammer and the special tools, install a new front bearing in the stator housing.
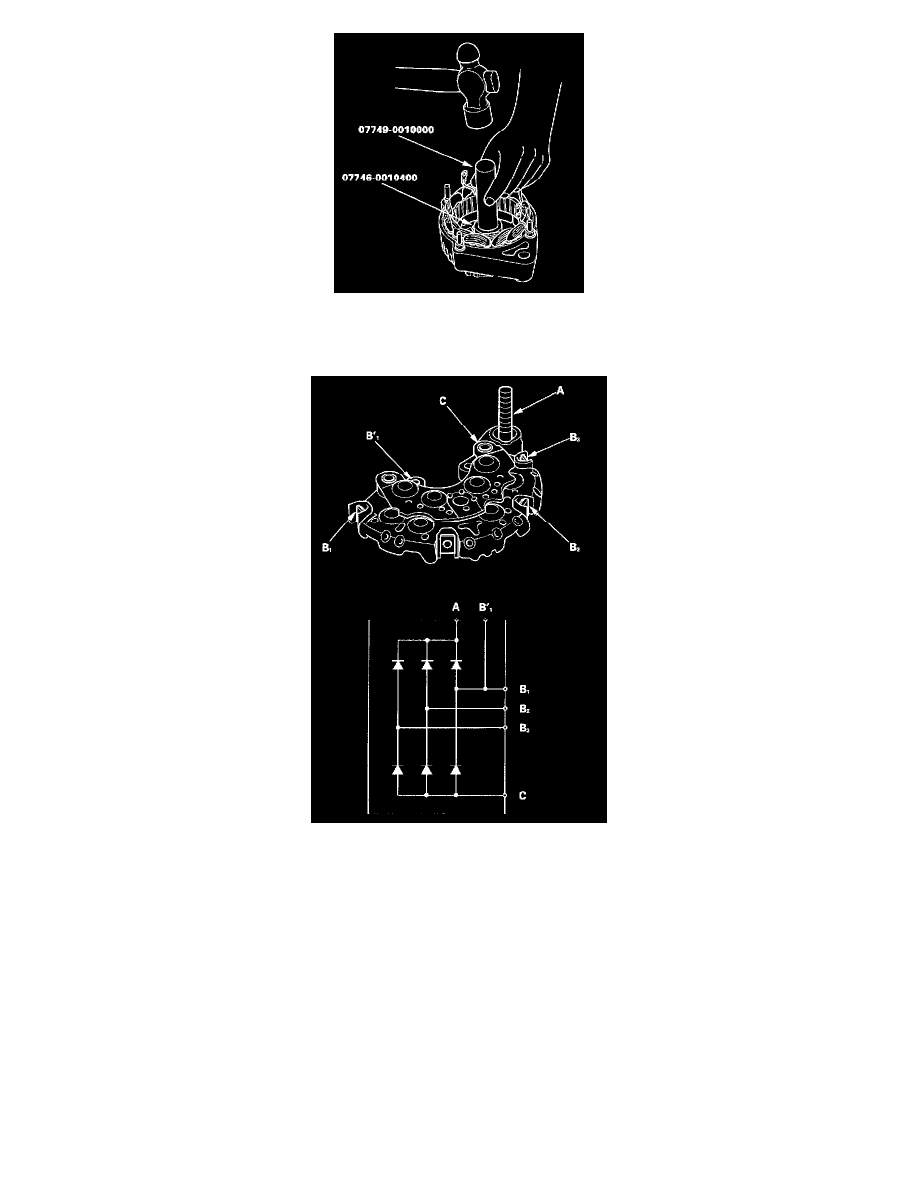
Rectifier Test
18. Check for continuity in each direction, between the B terminal (A) and P terminals (B), and between the E terminal (C) and P terminals of each
diode pair. All diodes should have continuity in only one direction. Because the rectifier diodes are designed to allow current to pass in one
direction, and the rectifier is made up of six diodes (three pairs), you mustiest each diode in both directions for continuity with an ohmmeter that
has diode checking capability: a total of 12 checks.
-
If any diode is faulty, replace the rectifier assembly. (Diodes are not available separately.)
-
If all the diodes are OK, go to step 19.
Alternator Brush Inspection