
CL TYPE S V6-3.2L SOHC (2001)
Windshield: Service and Repair
Windshield Replacement
NOTE:
-
Put on gloves to protect your hands.
-
Use seat covers to avoid damaging any surfaces.
-
Wear eye protection when removing the glass with piano wire.
1. Remove these items:
-
Windshield wiper arms
-
Cowl cover
-
Automatic dimming rearview mirror
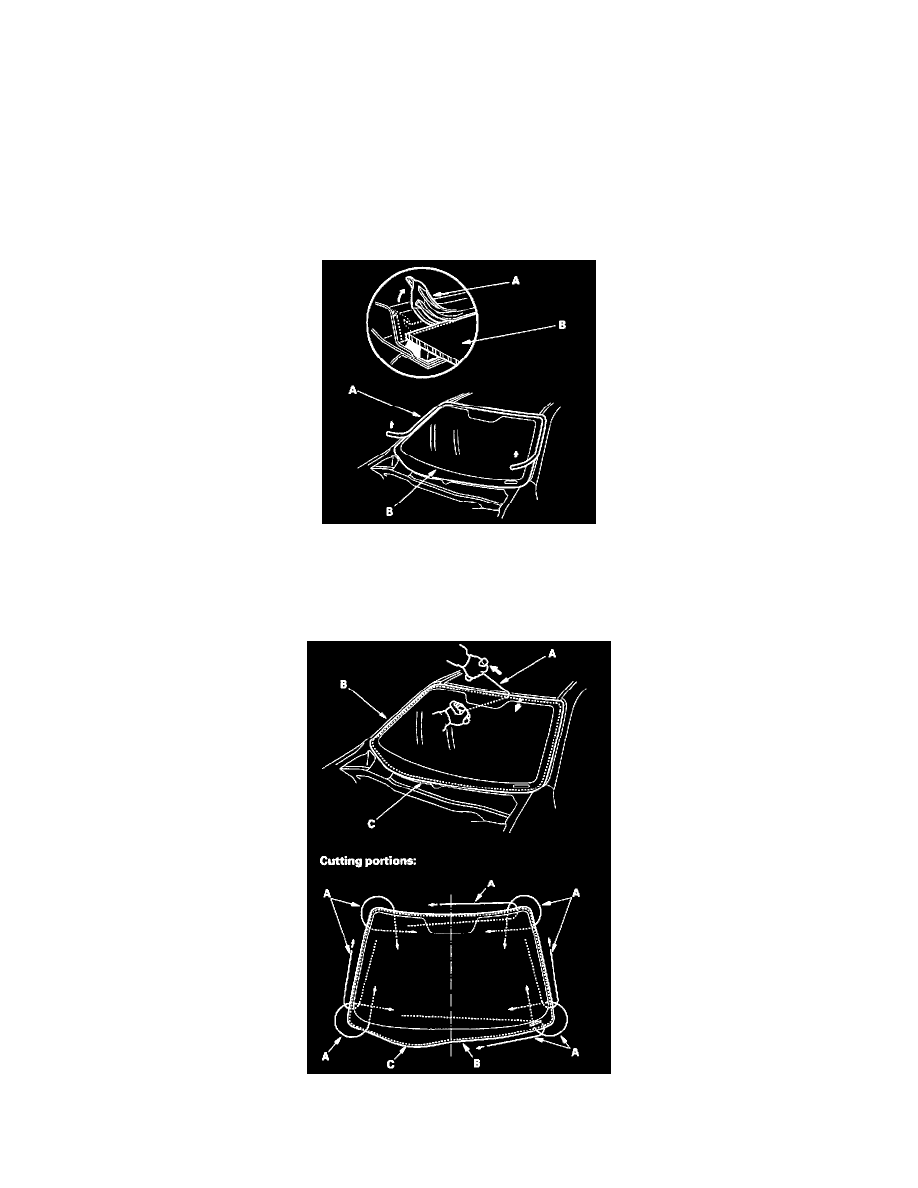
2. Remove the molding (A) from the edge of the windshield (B). If necessary, cut the molding with a utility knife.
3. If the old windshield is to be reinstalled, make alignment marks across the glass and body with a grease pencil.
4. Pull down the front portion of the headliner. Take care not to bend the headliner excessively, as you may crease or break it.
5. Apply protective tape along the edge of the dashboard and body. Using an awl, make a hole through the rubber dam and adhesive from inside the
vehicle at the corner portion of the windshield. Push a piece of piano wire through the hole, and wrap each end around a piece of wood.
6. With a helper on the outside, pull the piano wire (A) back and forth in a sawing motion. Hold the piano wire as close to the windshield as possible
to prevent damage to the body and dashboard. Carefully cut through the rubber dam and adhesive around the entire windshield.
7. Carefully remove the windshield.