
Integra L4-1590cc 1.6L DOHC FI (1987)
Shift Cable: Adjustments
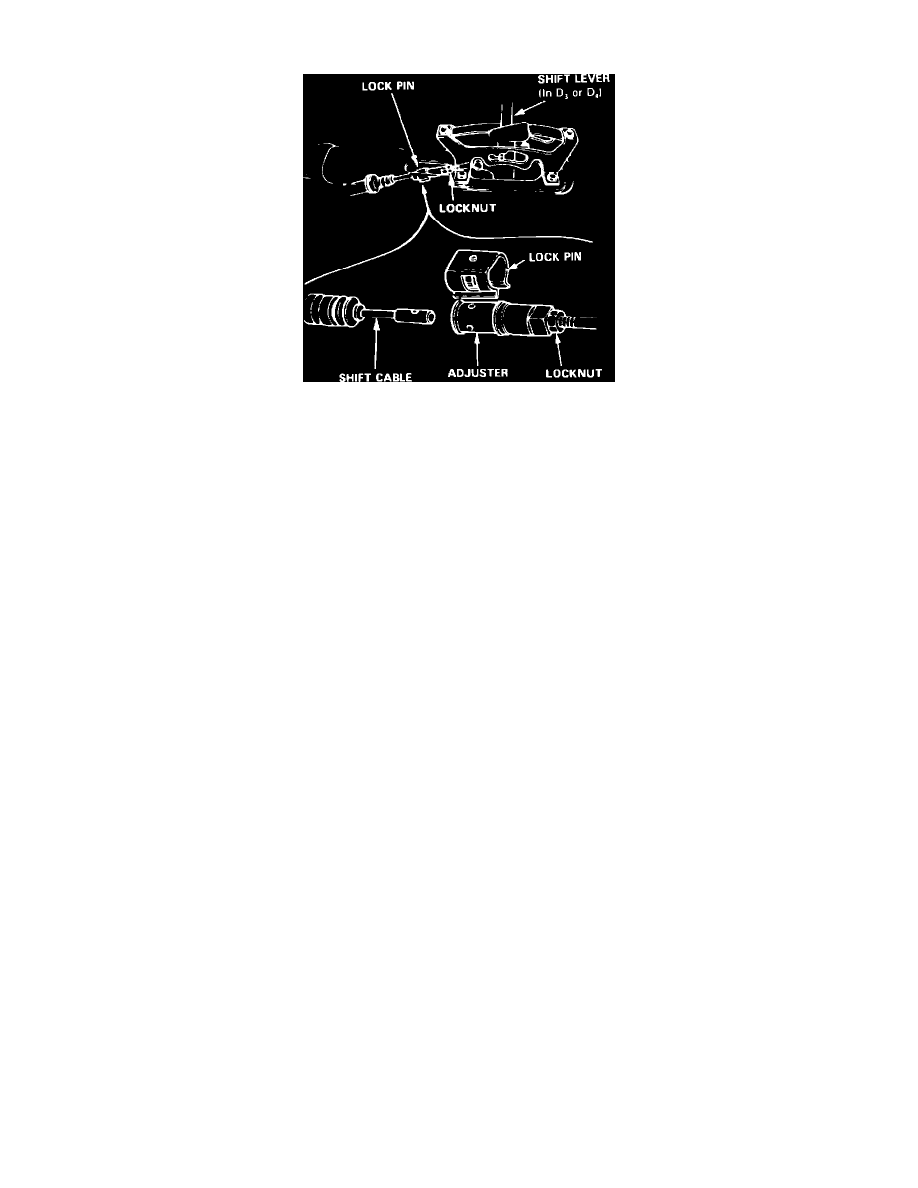
Fig. 3 Shift cable adjustment
1.
With engine off, remove console. On Legend models equipped with air bag restraint system, use extreme care when working around
steering column or center console area to avoid serious personal injury. All electrical harnesses for this system are covered with a yellow
outer insulation, with related components located in the steering column, center console, dash panel and front fenders. It is recommended
that only authorized personnel work on vehicles with this type of restraint system.
2.
Shift to Drive on Integra models, or Reverse on Legend models, then remove lock pin from cable adjuster, Fig. 3.
3.
Ensure hole in adjuster is perfectly aligned with hole in shift cable.
4.
If holes are not aligned, loosen locknut on shift cable and adjust as necessary. There are two holes in the end of the shift cable positioned 90°
apart to allow for small adjustments.
5.
Tighten locknut, then install lock pin on adjuster. If lock pin binds during installation, cable is still out of adjustment.
6.
Start engine and check shift lever in all gears. If any gear does not work, refer to ``Troubleshooting.''