
Integra LS Coupe L4-1834cc 1.8L DOHC MFI (1997)
Valve Spring: Service and Repair
Cylinder Head Installed
NOTE: The procedure shown below applies when using the in-car valve spring compressor (Snap-on YA8845 with YA8845-2A 7/8 inch attachment, or
equivalent).
CAUTION: When using this tool, as with any tool, always use approved eye protection. Using the right tool for each job helps increase productivity
while safeguarding tools, equipment and the user.
1. Turn the crankshaft so that the No. 1 and the No. 4 pistons are at Top Dead Center (TDC).
2. Remove the cylinder head cover.
3. Remove the distributor.
4. Loosen and disconnect the timing belt from the camshaft pulleys.
5. Remove the camshaft holder bolts, then remove the camshaft holders, the camshafts and rocker arms.
(Intake Valve Seals)
6. Using the 6 mm bolts supplied with the tool, mount the two uprights to the cylinder head at the end camshaft holders. The uprights fit as shown.
7. Insert the cross shah through the bottom hole of the two uprights.
8. Select the 7/8 inch diameter long compressor attachment and fasten the attachment to the No. 4 hole of the lever arm with the speed pin supplied.
9. Position the piston at TDC and insert an air adaptor into the spark plug hole. Pump air into the cylinder to keep the valve closed while compressing
springs and removing the valve keepers.
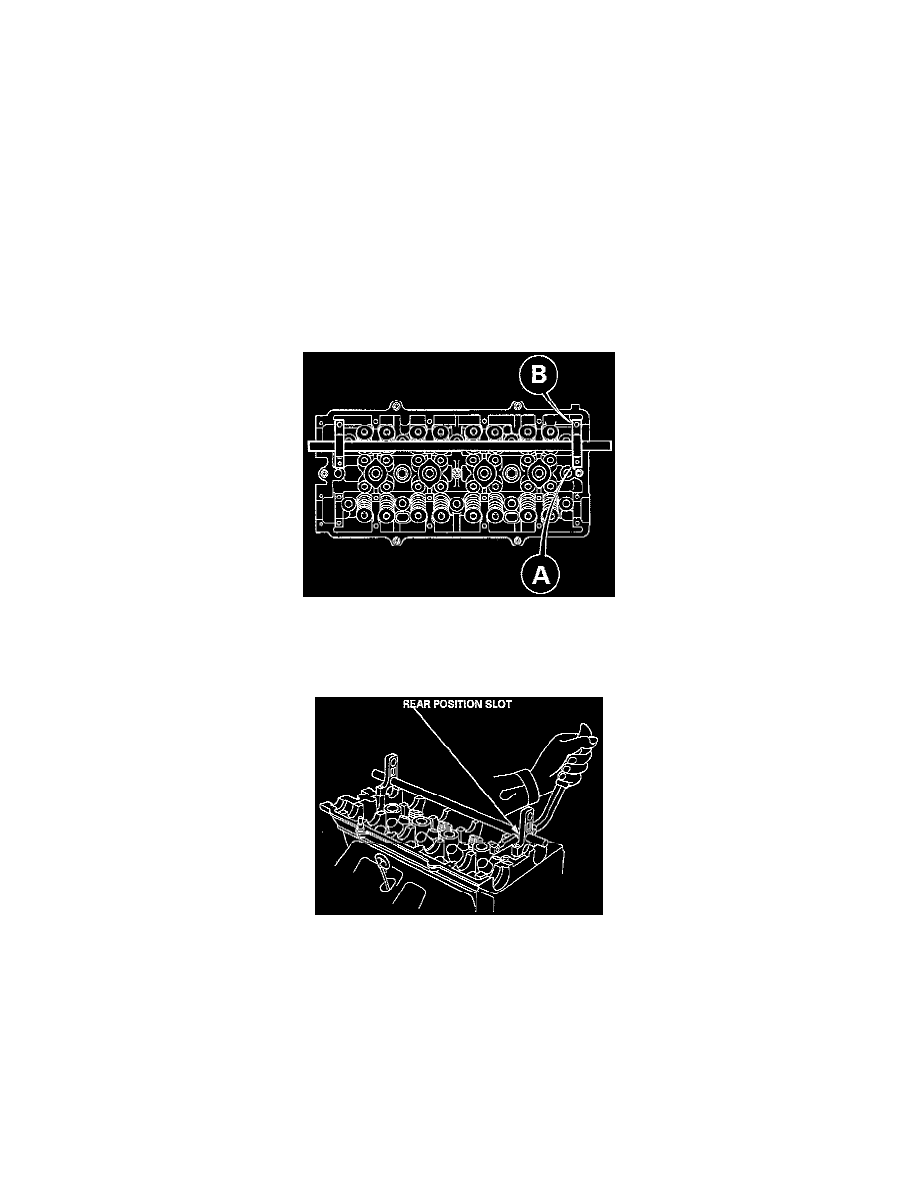
10. Position the lever arm under the cross shah so the lever is perpendicular to the shah and the compressor attachment rests on top of the retainer for
the spring being compressed. Use the rear position slot on the lever as shown.