
Integra LS Coupe L4-1834cc 1.8L DOHC MFI (1997)
Control Arm Bushing: Service and Repair
Front
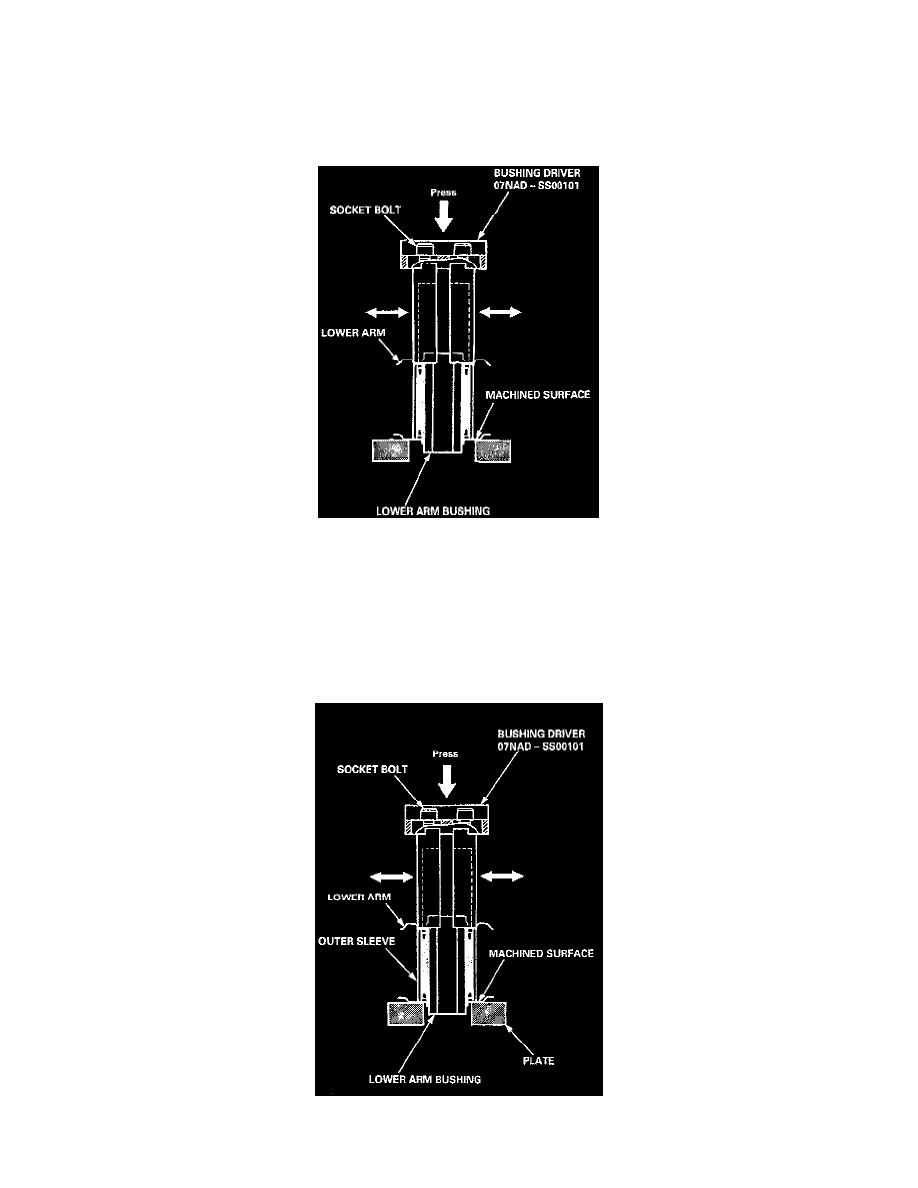
LOWER ARM BUSHING REPLACEMENT
1. Position the lower arm on the press with the machined surface facing down.
2. Adjust the bushing driver so that it matches the inner diameter of the bushing hole, then tighten the socket bolt securely.
3. Position the bushing driver on the bushing.
4. Remove the bushing by pressing on the bushing driver with a press as shown.
CAUTION:
-
Support the lower arm at machined surface as shown.
-
Be careful not to damage the inside of the bushing hole while pressing on the bushing.
5. Position the lower arm on the press with the machined surface facing down.
6. Adjust the bushing driver so that it matches the inner diameter of the bushing hole, then tighten the socket bolt securely.
7. Position the bushing driver on the outer sleeve of the bushing.
8. Press the bushing into the lower arm using the bushing driver and a press until the edge of the bushing reaches on the plate as shown.