
Integra LS Sedan L4-1834cc 1.8L DOHC MFI (1999)
NOTE:
-
Clean the disassembled parts with solvent, and dry them thoroughly with compressed air. Do not wash the rubber parts with solvent.
-
Thoroughly pack the inboard joint and both joint boots with the joints boots with the joint grease included in the new driveshaft set.
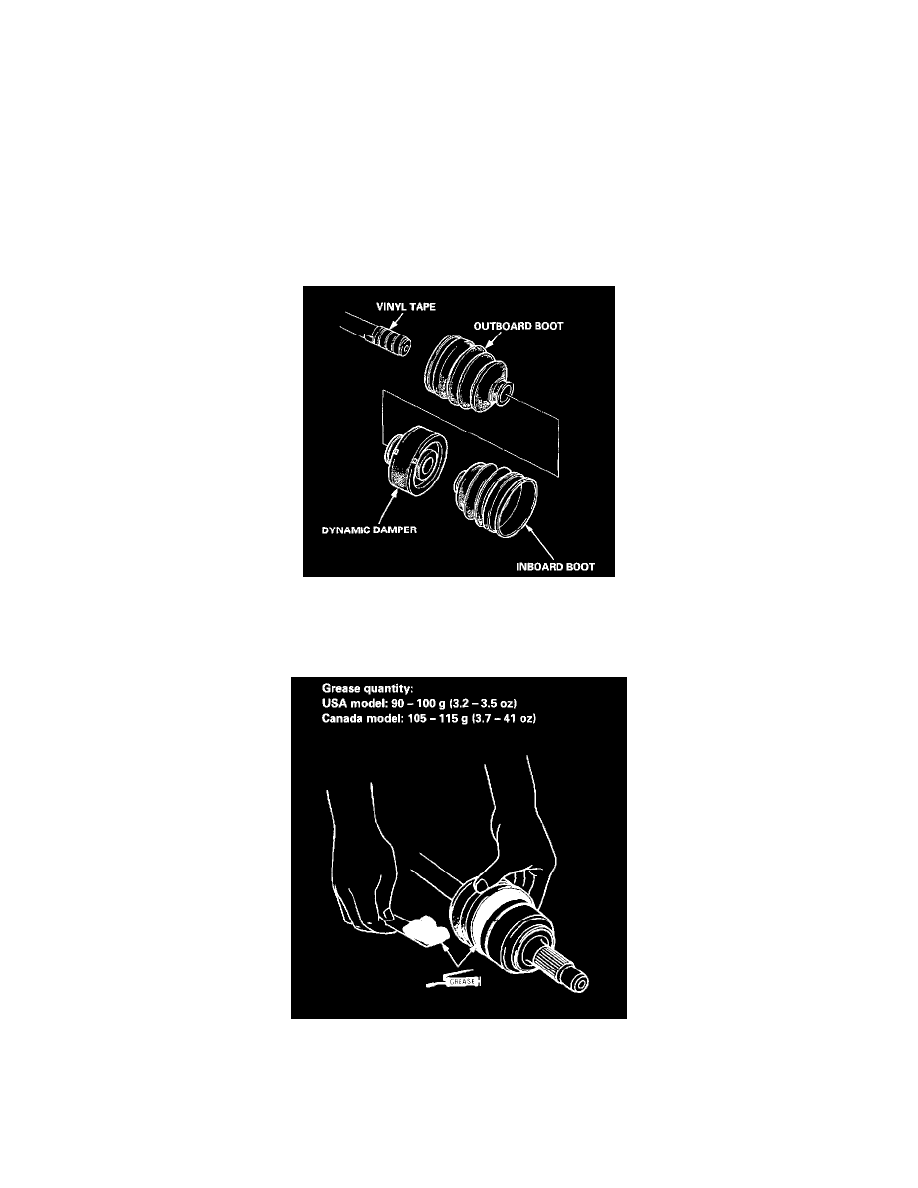
Grease quantity:
Inboard Joint
All models: 120 - 130 g (4.2 - 4.6 ounce)
Outboard Joint
USA model: 90 - 100 g (3.2 - 3.5 ounce)
Canada model: 105 - 115 g (3.7 - 4.1 ounce)
-
The Canada model uses a Thermoplastic Polyester Elastomer (TPE) outboard joint boot. Use the ear clamp type boot band in the outboard joint
boot set.
1. Wrap the splines with vinyl tape to prevent damage to the boots and dynamic damper.
2. Install the outboard boot, dynamic damper and inboard boot to the driveshaft, then remove the vinyl tape.
CAUTION: Take care not to damage the boots and dynamic damper.
3. Pack the outboard joint with the joint grease included in the new driveshaft set.
4. Install the spider on the driveshaft by aligning the marks on the spider and end of the driveshaft.