
Legend Coupe V6-2675cc 2.7L SOHC FI (1988)
8. Check the inside diameter of the compressor for score marks or foreign particles.
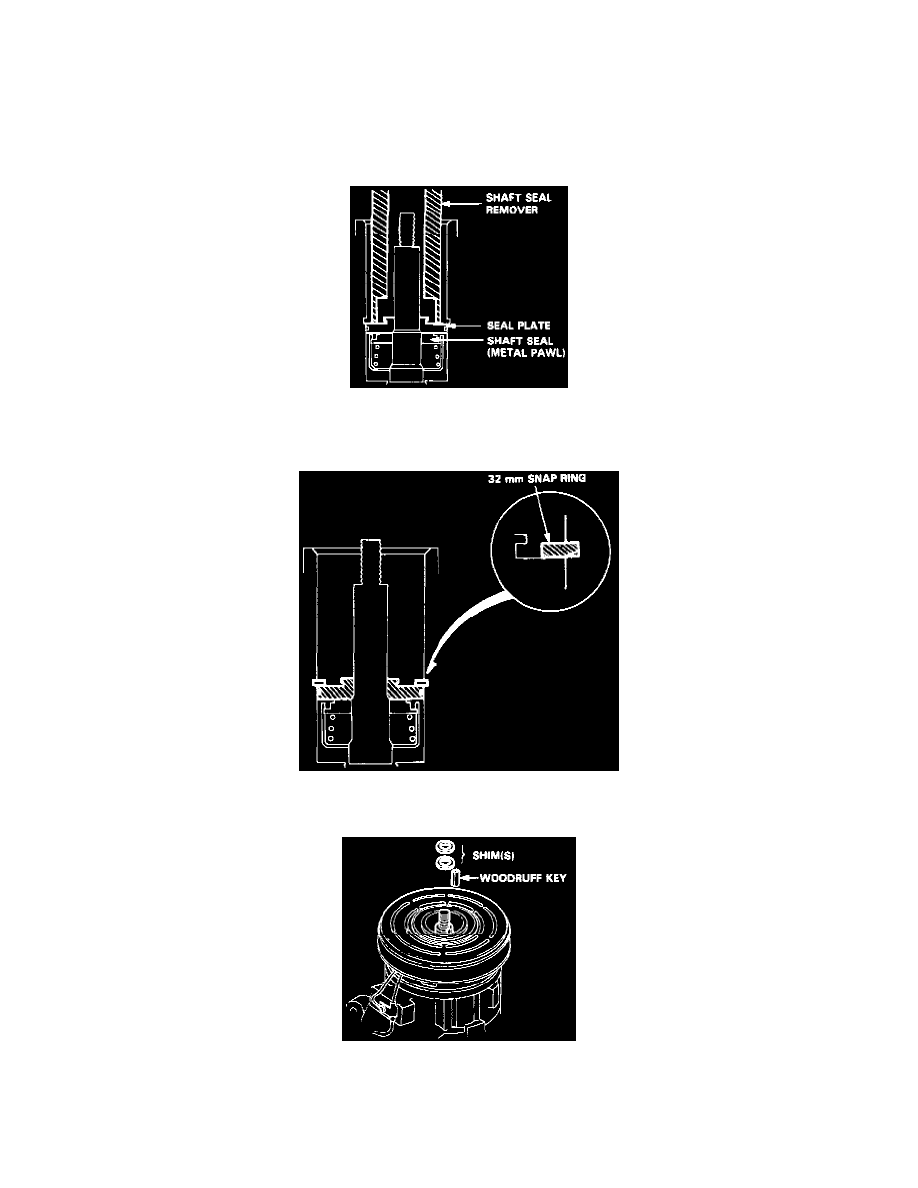
9. Clean the seal seat with cleaning solvent. then lubricate the seal seat with refrigerant oil (SUNISO 5GS or equivalent).
NOTE:
-
Use only clean refrigerant oil.
-
Do not touch the sealing surface of the seal plate after lubricated.
10. First slide the seal plate into the compressor by hand as far as possible.
11. Press the seal plate with the grip side of the remover.
CAUTION: Be careful not to damage the compressor.
12. Install the 32 mm snap ring with its chamfered edge inside.
13. Press the snap ring with the grip side of the remover.
14. Install the shim(s) and woodruff key.
15. Evacuate and charge the compressor and then perform a leak test.
16. Install the pressure plate. Measure the clearance between the pulley and pressure plate all the way around. If the clearance is not within the
specified limits, [0.4 - 0.7 mm (0.016 - 0.028 in)] shims must be added or removed as required.