
Legend Coupe V6-2675cc 2.7L SOHC FI (1988)
Housing Assembly HVAC: Service and Repair
Fresh Air/Recirculation Control Box
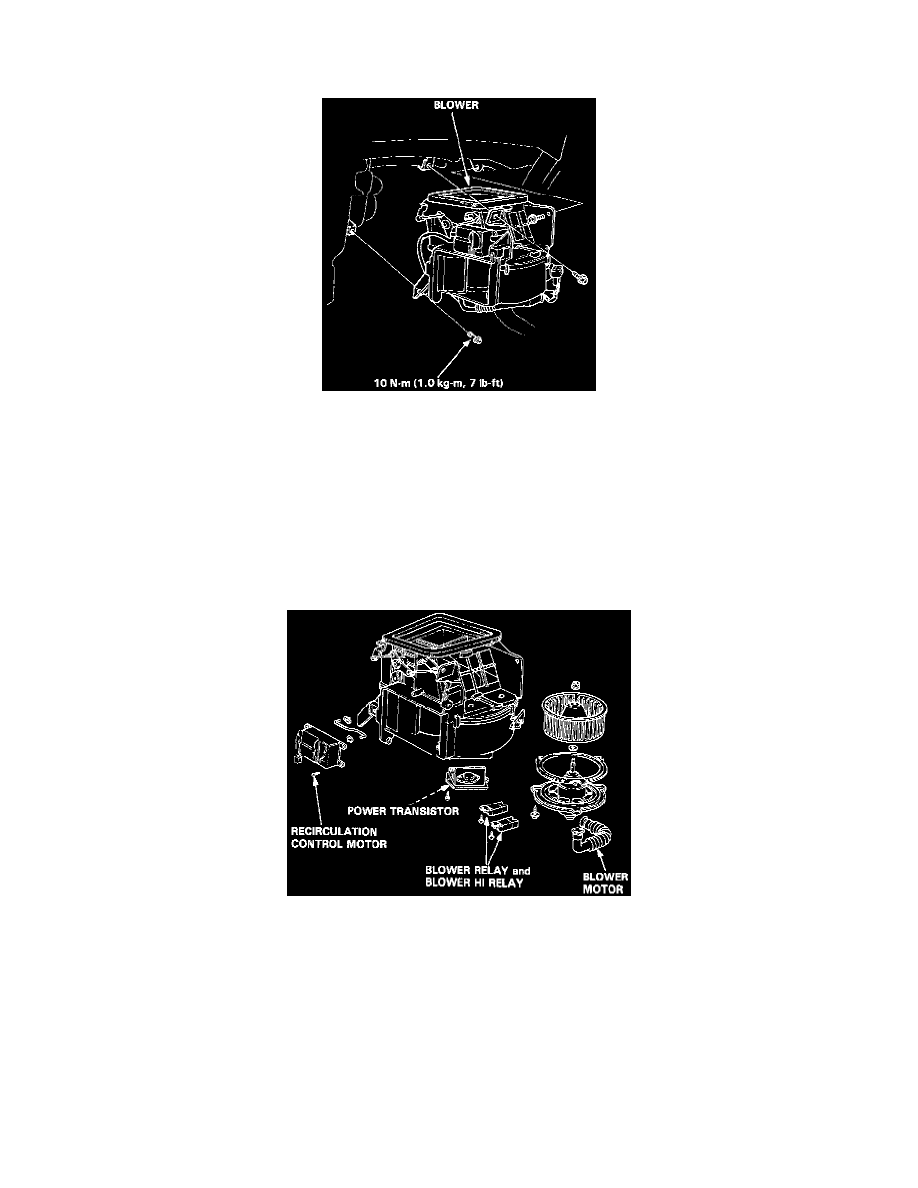
BLOWER REPLACEMENT
1. Disconnect the battery negative terminal.
2. Remove the screws (3), then remove the glove box lower cover.
3. Remove the screws (2), then remove the glove box.
4. Remove the screws (4) and tapping screws (5), then remove the glove box frame, clips (2), and side heater duct.
5. Recover the refrigerant from the air conditioner system.
6. Remove the evaporator. See: Evaporator Case/Service and Repair
7. Disconnect the wire connectors from the blower.
8. Remove the mounting bolts (3) from the blower.
9. Remove the blower.
10. Install the blower in the reverse order of removal making sure there is no air leakage.
BLOWER DISASSEMBLY
1. Refer to image for details of blower disassembly.
NOTE:
-
Before reassembly, make sure that the air door and linkage moves smoothly without binding.
-
When re-attaching the actuator, make sure its positioning will not allow the air door to be pulled too far. Attach the actuator and all linkage,
then apply battery voltage and watch the door movement. If necessary, loosen the holding screw and move the actuator up or down.