
Legend Coupe V6-3206cc 3.2L SOHC FI (1991)
5.
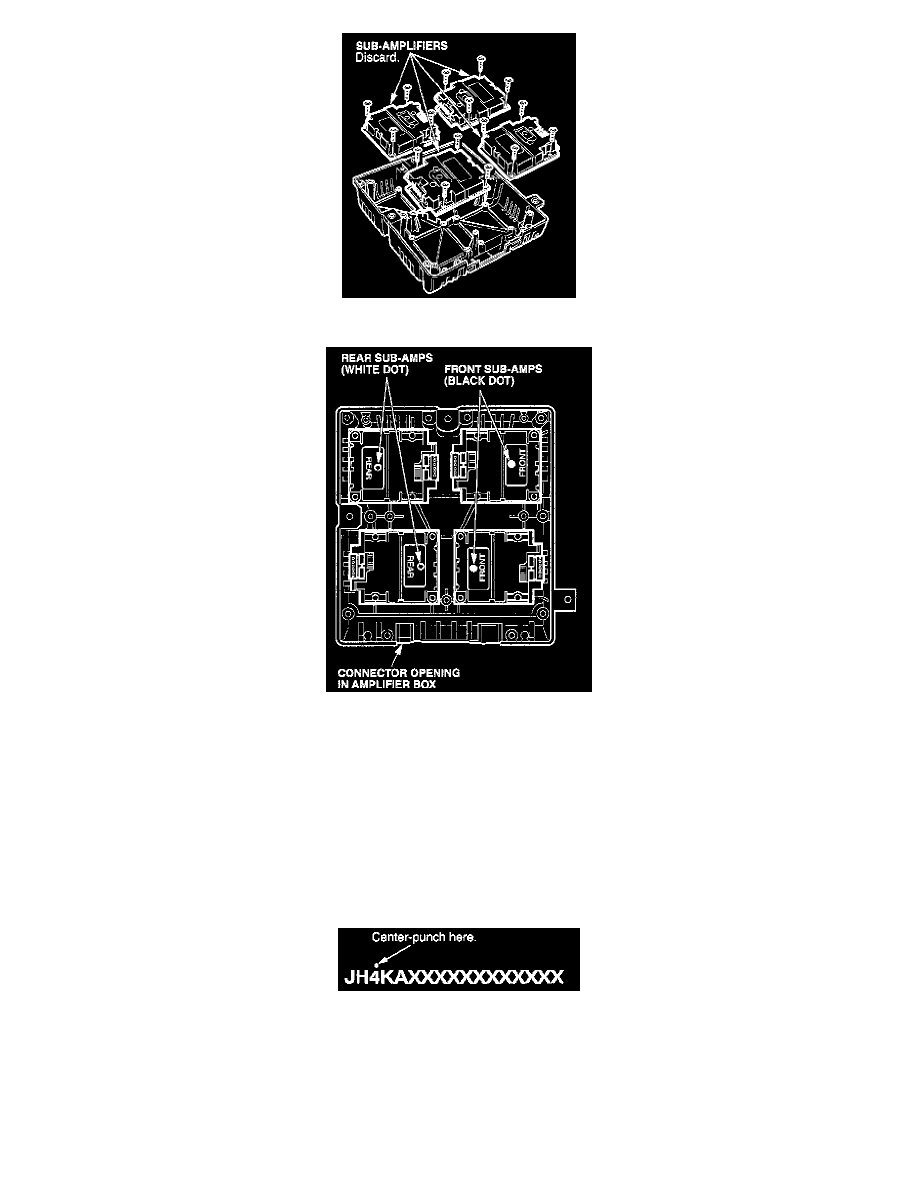
Disconnect the electrical connectors from the four sub-amplifiers. Remove the mounting screws, and remove the sub-amplifiers.
6.
Make sure the amplifier box is facing as shown. Each replacement sub-amplifier has a white dot or a black dot to show if it is for the front or the
rear speakers. Install the sub-amplifiers with a white dot on the left side of the box. Install the sub-amplifiers with a black dot on the right side.
7.
Mount the sub-amplifiers with the original screws. Reconnect the electrical connectors.
8.
Reinstall the I/O printed circuit board. If it is a type A board, make sure you have the isolation washers in the proper locations.
9.
Install the cover on the amplifier box.
10.
Reinstall the amplifier box in the vehicle. Connect the three harness connectors.
11.
Install the rear seat-back and seat bottom.
12.
Center-punch a completion mark above the third character (4) of the engine compartment VIN.