
Legend Coupe V6-3206cc 3.2L SOHC FI (1991)
8.
Disconnect the four motor power and pulser connectors. Remove the front elevation motor power connector from the bracket on the rear elevation
motor. Remove the rear elevation motor pulser connector from the bracket on the front elevation motor.
9.
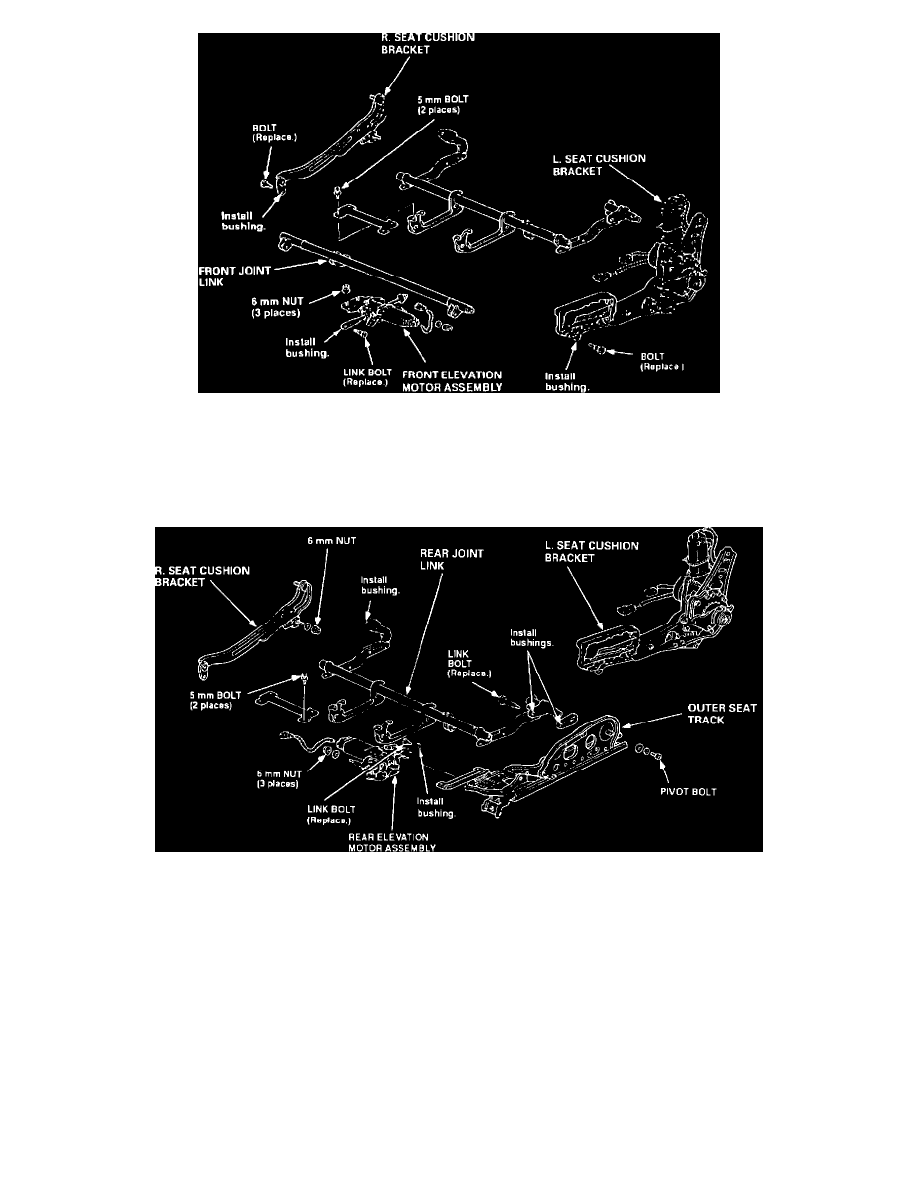
Remove the bolt linking the front elevation motor assembly to the front joint link. Discard the bolt. Remove the two 5 mm crossbrace bolts.
10.
Remove the three 6 mm front elevation motor assembly mounting nuts. Remove the motor assembly.
NEW
11.
Install a bushing from the kit in the linkage arm of the new front elevation motor. Install the bushing so the split is facing the floor of the car. Flare
the bushing end with a smooth, rounded object.
12.
Install the new motor assembly. Tighten the three mounting nuts to 10 N-m (1.0 kg-m, 7 lb.ft.).
13.
Install a new link bolt from the bushing kit. Tighten to 10 N-m (1.0 kg-m, 7 lb.ft.).
14.
Reinstall the 5 mm crossbrace bolts. Tighten to 5 N-m (0.5 kg-m, 3.6 lb.ft.).
15.
Remove and discard the two bolts attaching the front joint link outer arms to the seat cushion brackets.
16.
Install new bushings in these links. Insert the bushings so the split is facing the floor of the car, flare the bushing end with a smooth, rounded
object.
17.
Reattach the front joint link to the seat brackets with new bolts from the bushing kit. Tighten to 10 N-m (1.0 kg-m, 7 lb.ft.).