
Legend Coupe V6-3206cc 3.2L SOHC FI (1991)
Vacuum Brake Booster: Service and Repair
Disassembly and Assembly
On Legend, Vigor & 1990-91 Integra models, do not disassemble brake booster, if found faulty replace as an assembly.
DISASSEMBLE
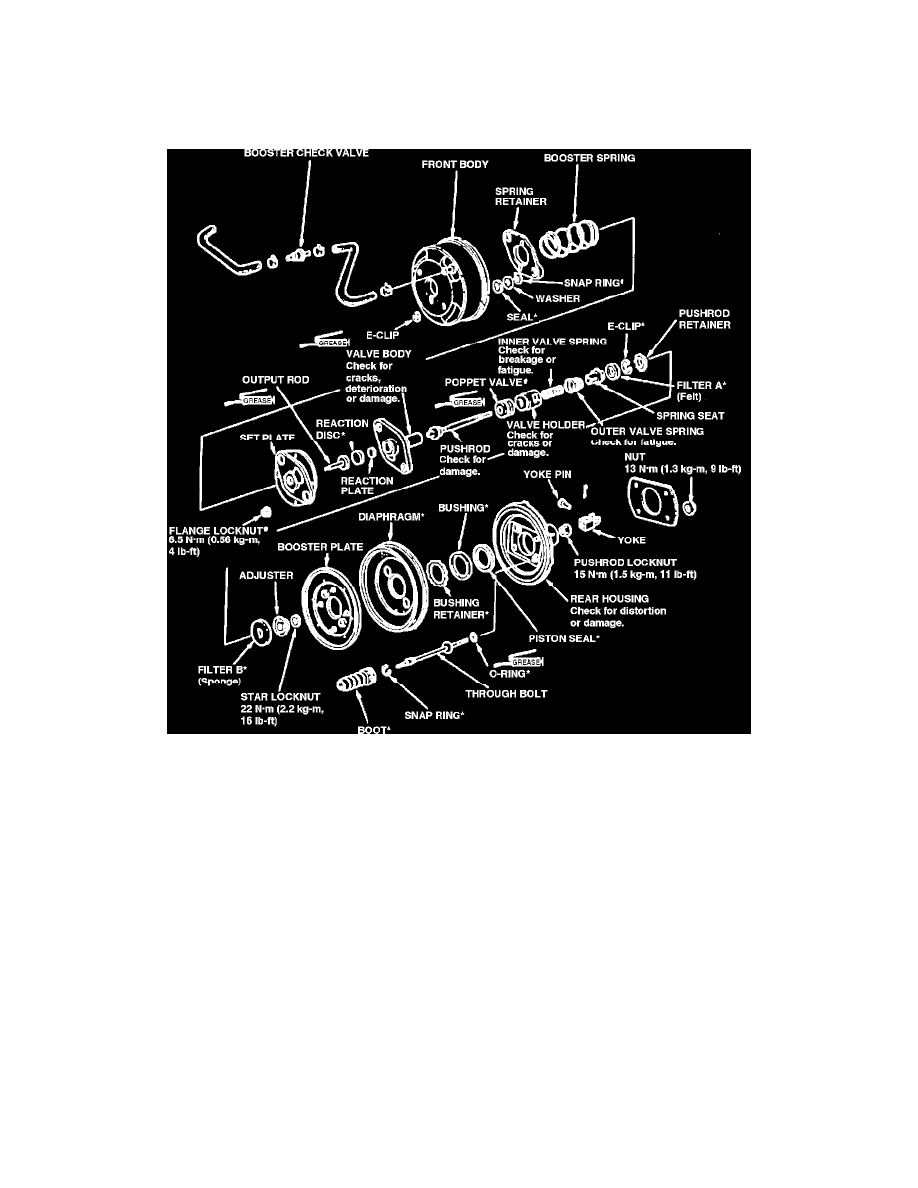
Fig. 6 Brake Booster Exploded View
1.
Scribe installation alignment mark across front and rear booster housing.
2.
Remove E-clips, then separate front and rear housing.
3.
Remove booster spring seal and washers, then remove snap rings, Fig. 6.
4.
Remove spring plate and booster spring.
5.
Remove set plate attaching locknuts, then set plate.
6.
Remove valve body assembly from rear housing.
7.
Remove through bolt boots.
8.
Remove booster plate and diaphragm from rear housing.
9.
Remove snap rings, through bolts and O-rings from rear housing.
10.
Remove bushing retainer, bushing and piston seal from rear housing.
11.
Remove output rod, reaction disc and reaction plate from valve body assembly.
12.
Remove pushrod yoke, star locknut, adjuster and filter B from valve body.
13.
Remove pushrod retainer, then pushrod from valve body.
14.
Remove pushrod E-clip.
15.
Remove pushrod filter A, spring seat, valve springs, valve holder and poppet valve.
ASSEMBLE
1.
Install poppet valve on valve holder.
2.
Install valve holder, inner and outer valve springs and spring seat to pushrod.
3.
Install filter A and E-clip to pushrod.